SPOILER WARNING!
This article contains information that may ruin your enjoyment of discovering the game's secrets for yourself. Read at your own risk! |
Read at your own risk!
| Walkthroughs/The Shroudbreaker | |
|---|---|
| |
| Details | |
| Type | Walkthrough |
| Related | The Shroudbreaker (Quest) |
This Article is a Walkthrough with expandable Hints and image Galleries of The Shroudbreaker Tall Tale. For general information on the Tall Tale, visit The Shroudbreaker (Quest) page.
Guide[]
For those that do not want to be completely spoiled of the Tall Tale can find expandable Hints in each section that allow Players to find solutions to a specific problem only. The full written Walkthrough with a Gallery of each step can be found below the Hints sections.
For those that also want to complete all of the Commendations tied to the Tall Tale should also keep their eyes out for the five Mercia's Journals that need to be found and read for the Mercia's Lost Memories Commendation. The best time to find and look for each of these Journals is noted in the Walkthrough, but the journal contents and exact locations with images can be found in the Journals section below.
There are also three unlockable Checkpoints in this Tall Tale that are marked in the Walkthrough below. After receiving a Checkpoint, Players can leave or vote to cancel the Tall Tale and continue it from that Checkpoint at a later time by putting it up for a vote on the Voyage Table. All necessary Quest Items for Tale completion will be placed on the Voyage Table after a Checkpoint is voted for.
Opening[]
To start the Tall Tale, each member of the crew must vote for its Tale Book on the table next to the Mysterious Stranger in the Tavern of any Outpost. When active, the Stranger will share the Tale Book with you and clue you in on further details.
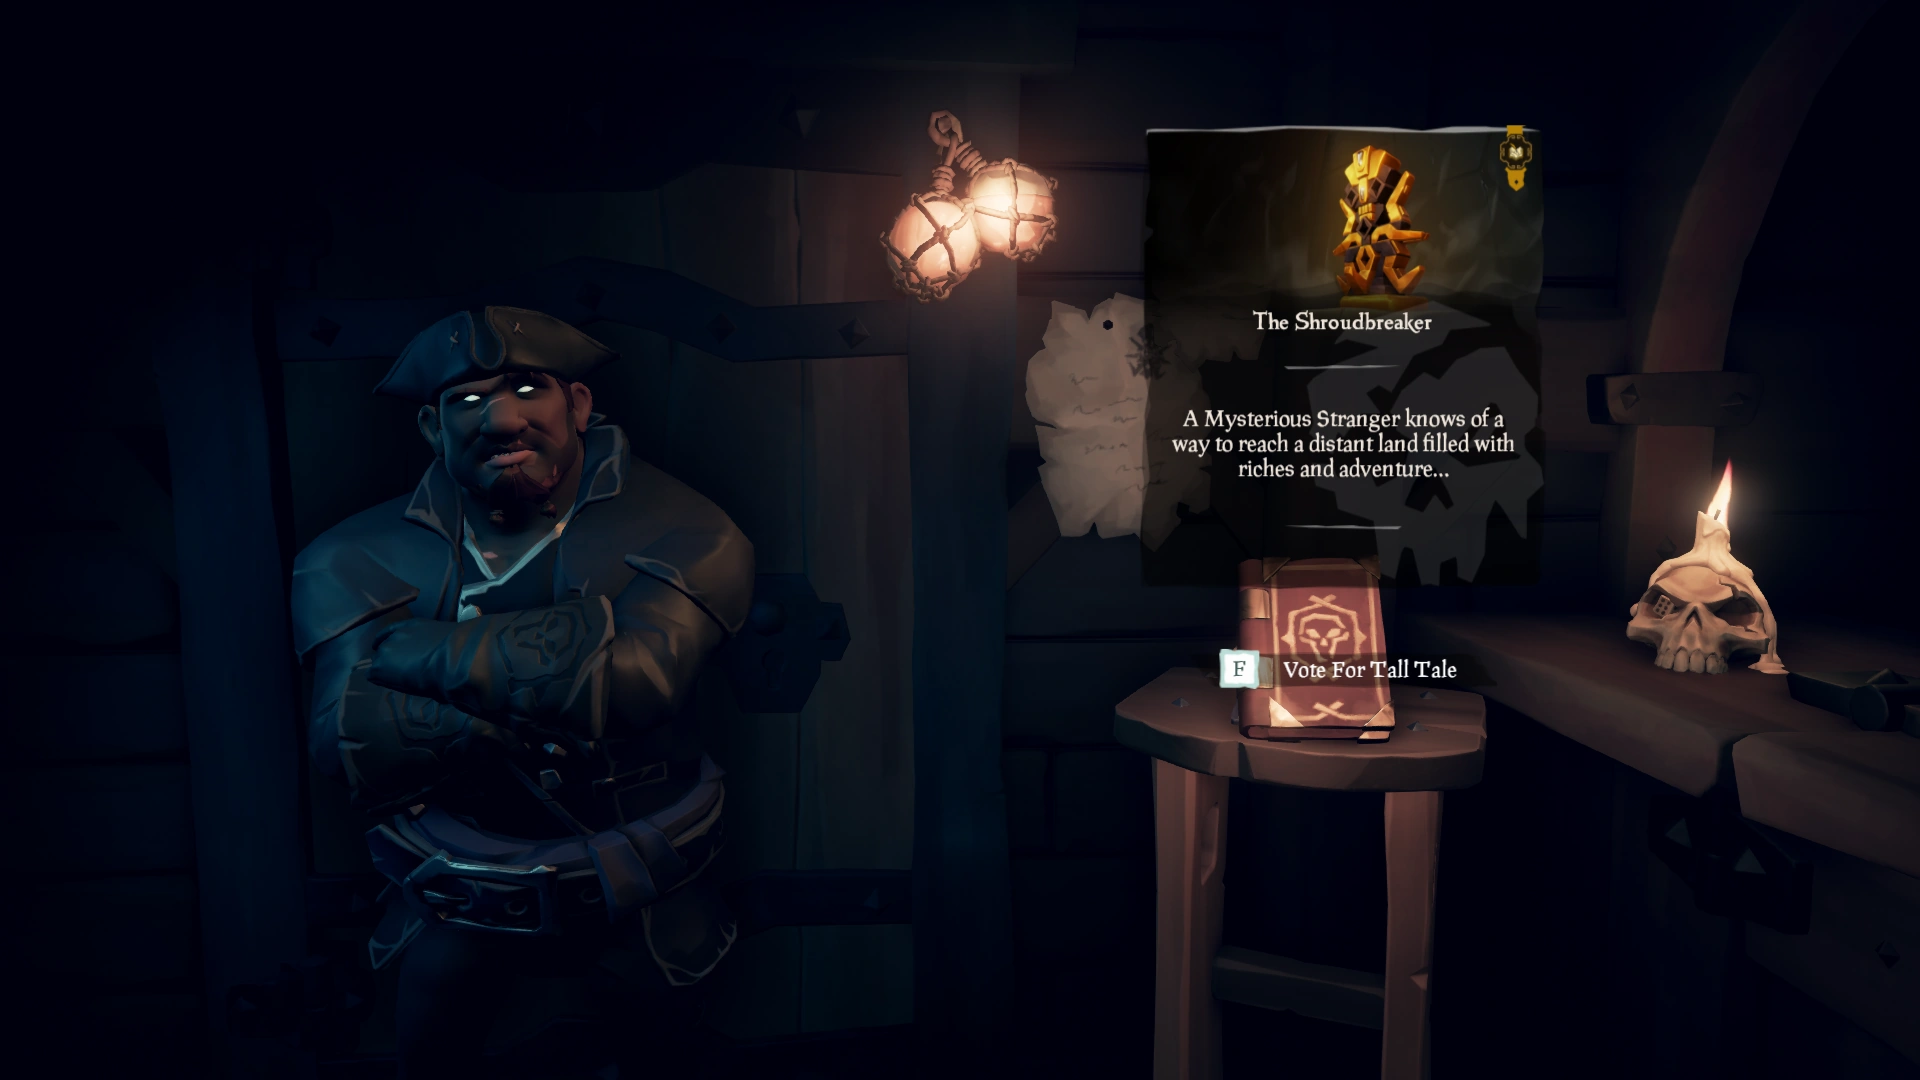

The Tale Book can be found and voted on in any Tavern.
MYSTERIOUS STRANGER
One moment. You'd do well to heed my warning, for this is no ordinary voyage you're contemplating!
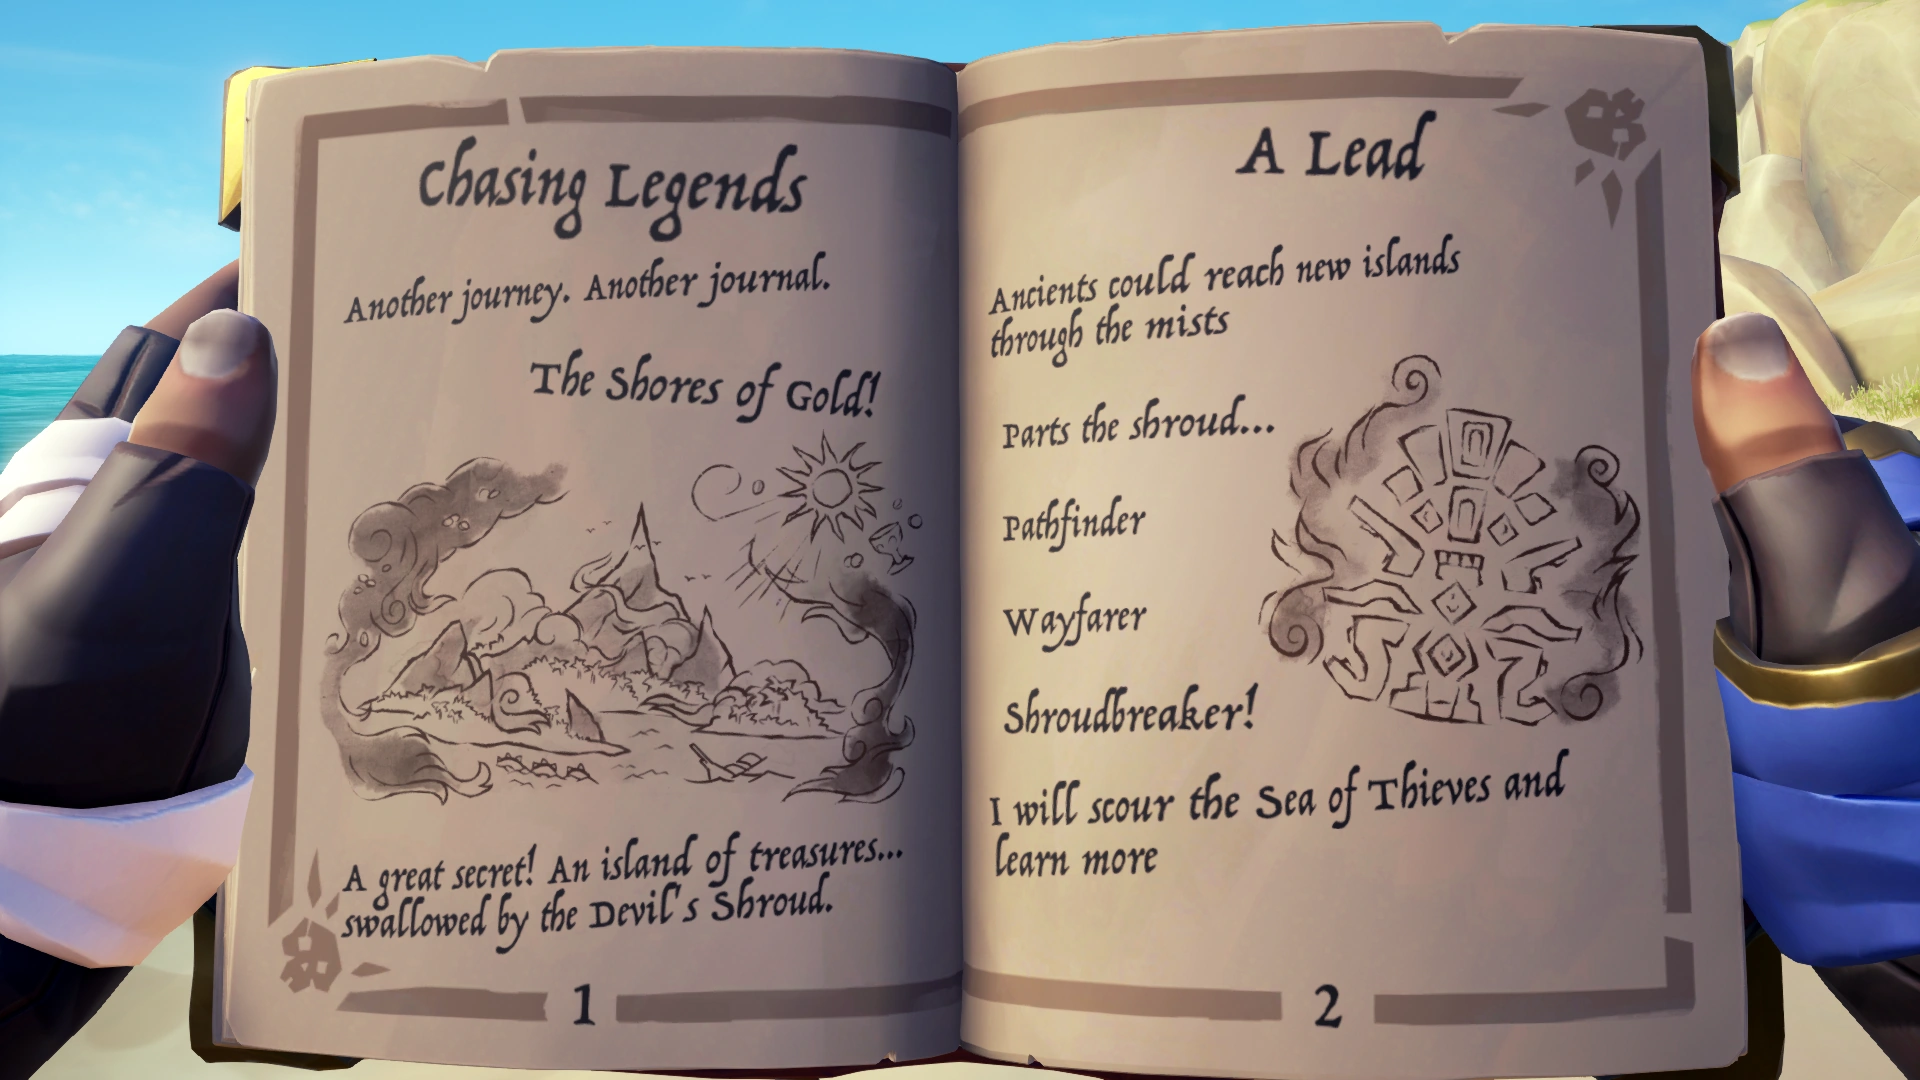
Few pirates have even heard of the Shores of Gold, let alone seen them with their own eyes.
They say it's an island riddled with untold riches, ancient secrets, hidden tombs, and deadly traps.
But you won't find it on any map, for it was swallowed up by the mists of the Devil's Shroud.
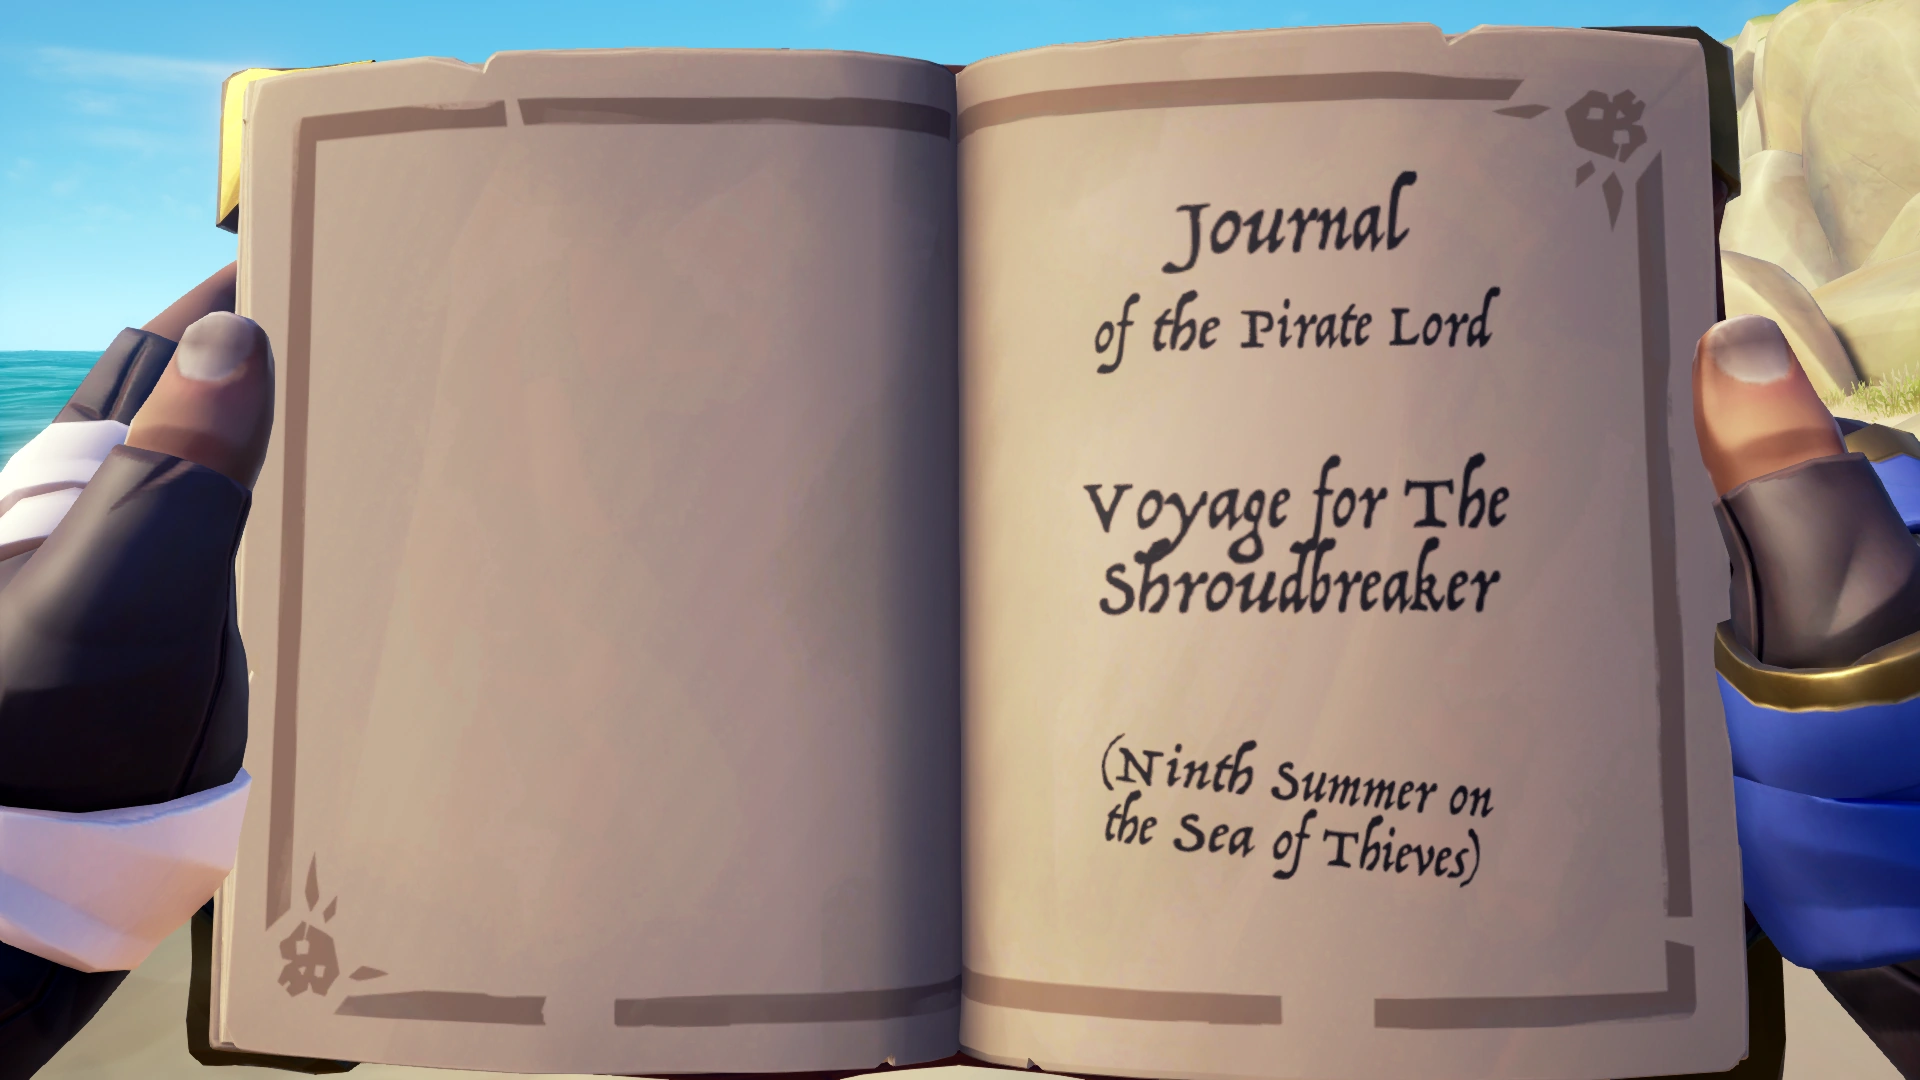
This book is the journal of the Pirate Lord himself.
It tells of his first ship, the Magpie's Wing and the journey he took to find the mythical Shroudbreaker-
The only way to part the fog and reach the Shores of Gold!
If you dare to follow in the footsteps of the greatest pirate who ever lived, then take the journal and use it to find the wreck of the Magpie's Wing.
It holds clues to the Shroudbreaker's whereabouts.
Bring it to me, and I'll set you on your way to the Shores of Gold.
But don't be fooled. Only the bravest, strongest pirates will be able to make it back alive…
I wish you luck. You're going to need it.
Heh heh heh...-
-
-
-
Note: Although this can be started at any Outpost, Ancient Spire Outpost is closest to your first destination and you can pick up Mercia's Journal #2 while you are there.
The Tale Book[]
When the Crew has voted on the Tall Tale and listened to the Mysterious Stranger, they are given The Journal of the Pirate Lord Tale Book. Once acquired, any Tale Book can be equipped and read from the Map Radial Menu, viewed with the Primary Use button (![]() /
/![]() ) and showed with Secondary Use (
) and showed with Secondary Use (![]() /
/![]() ). When looking closely at the Tale Book with Primary Use, it's pages can be turned to read on (Previous Page:Q/
). When looking closely at the Tale Book with Primary Use, it's pages can be turned to read on (Previous Page:Q/![]() ; Next Page:E/
; Next Page:E/![]() ).
).
The first pages of the Journal of the Pirate Lord are always the same:

The Lost Voyage[]
The first task of the crew is to find the shipwreck of Magpie's Wing and retrieve the Ship's Log. Finding the Ship's Log will unlock The Lost Voyage Commendation and the first Checkpoint of the Tall Tale.
Note: Now would be a good time to pick up Mercia's Journal #1 on the Uncharted Island.
Hints[]
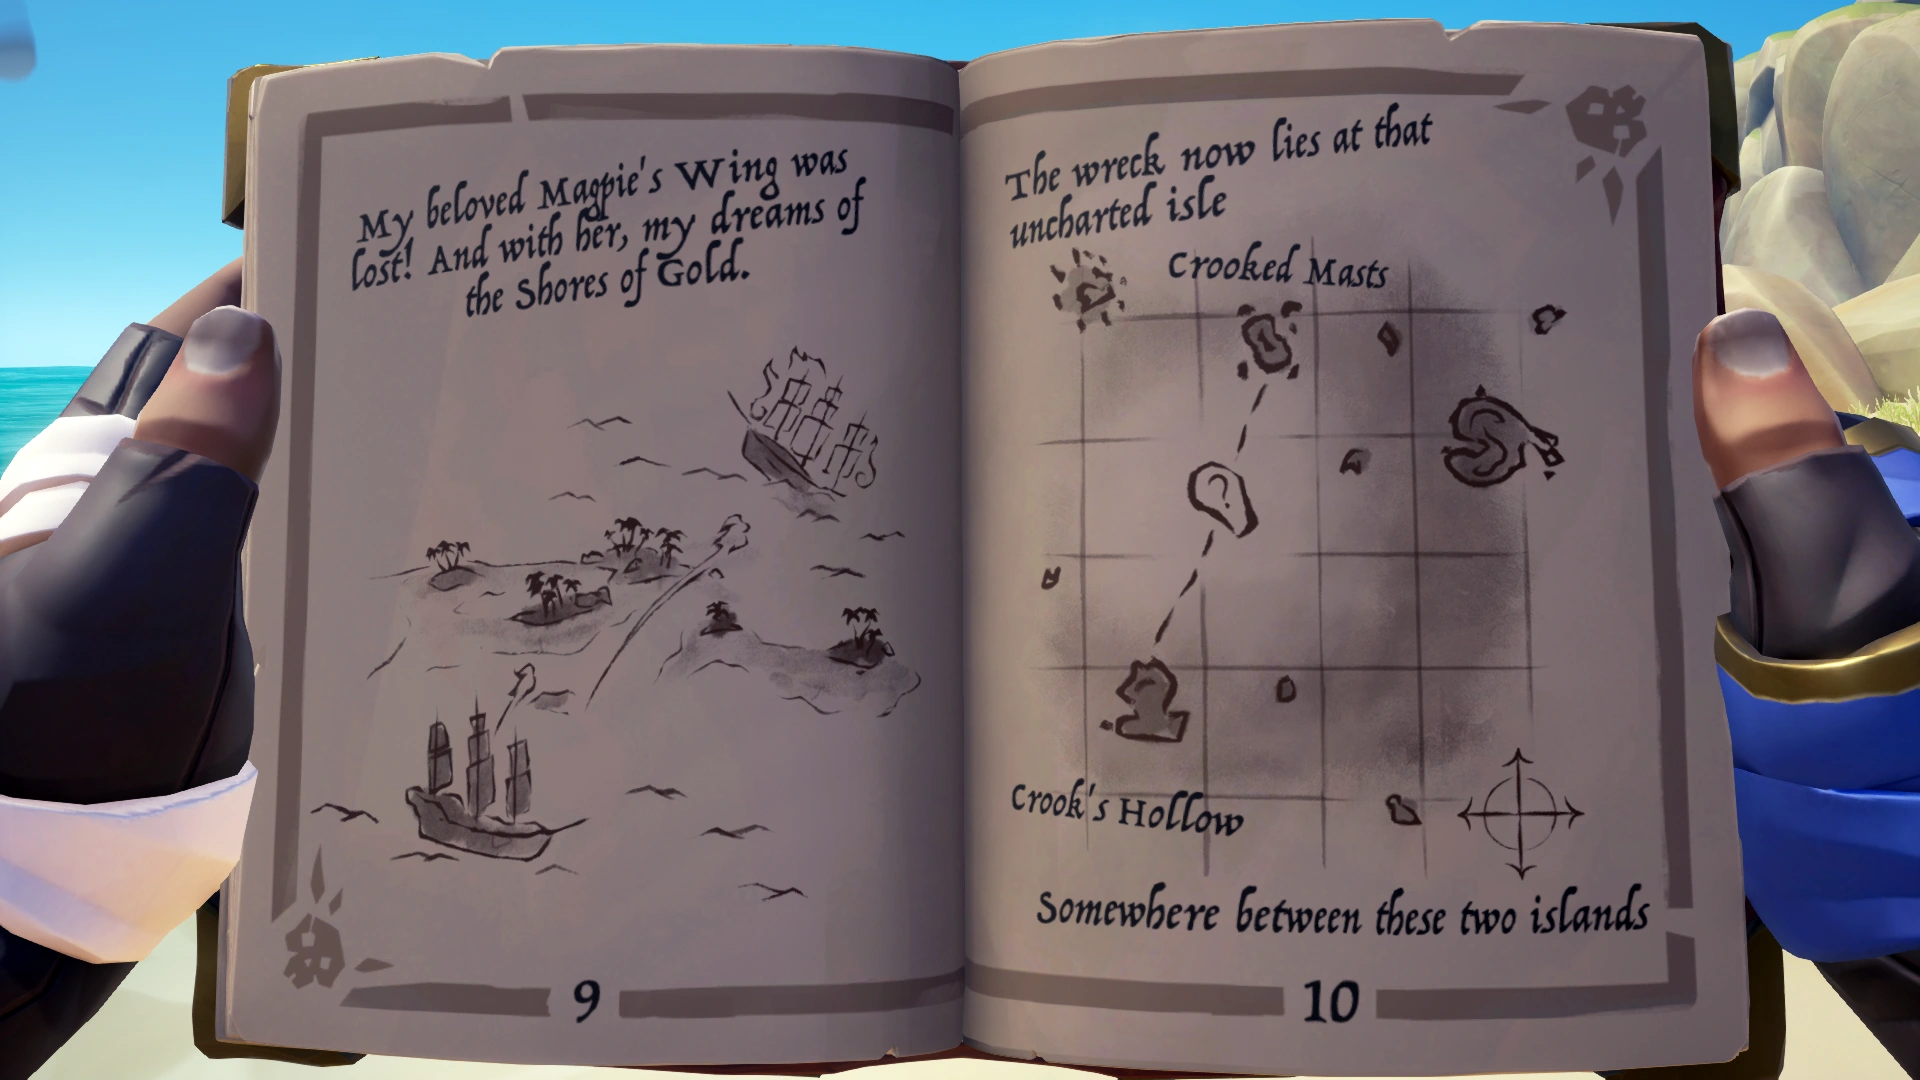
You will find your answer on pages 7 and 8, visualised on map at page 10.
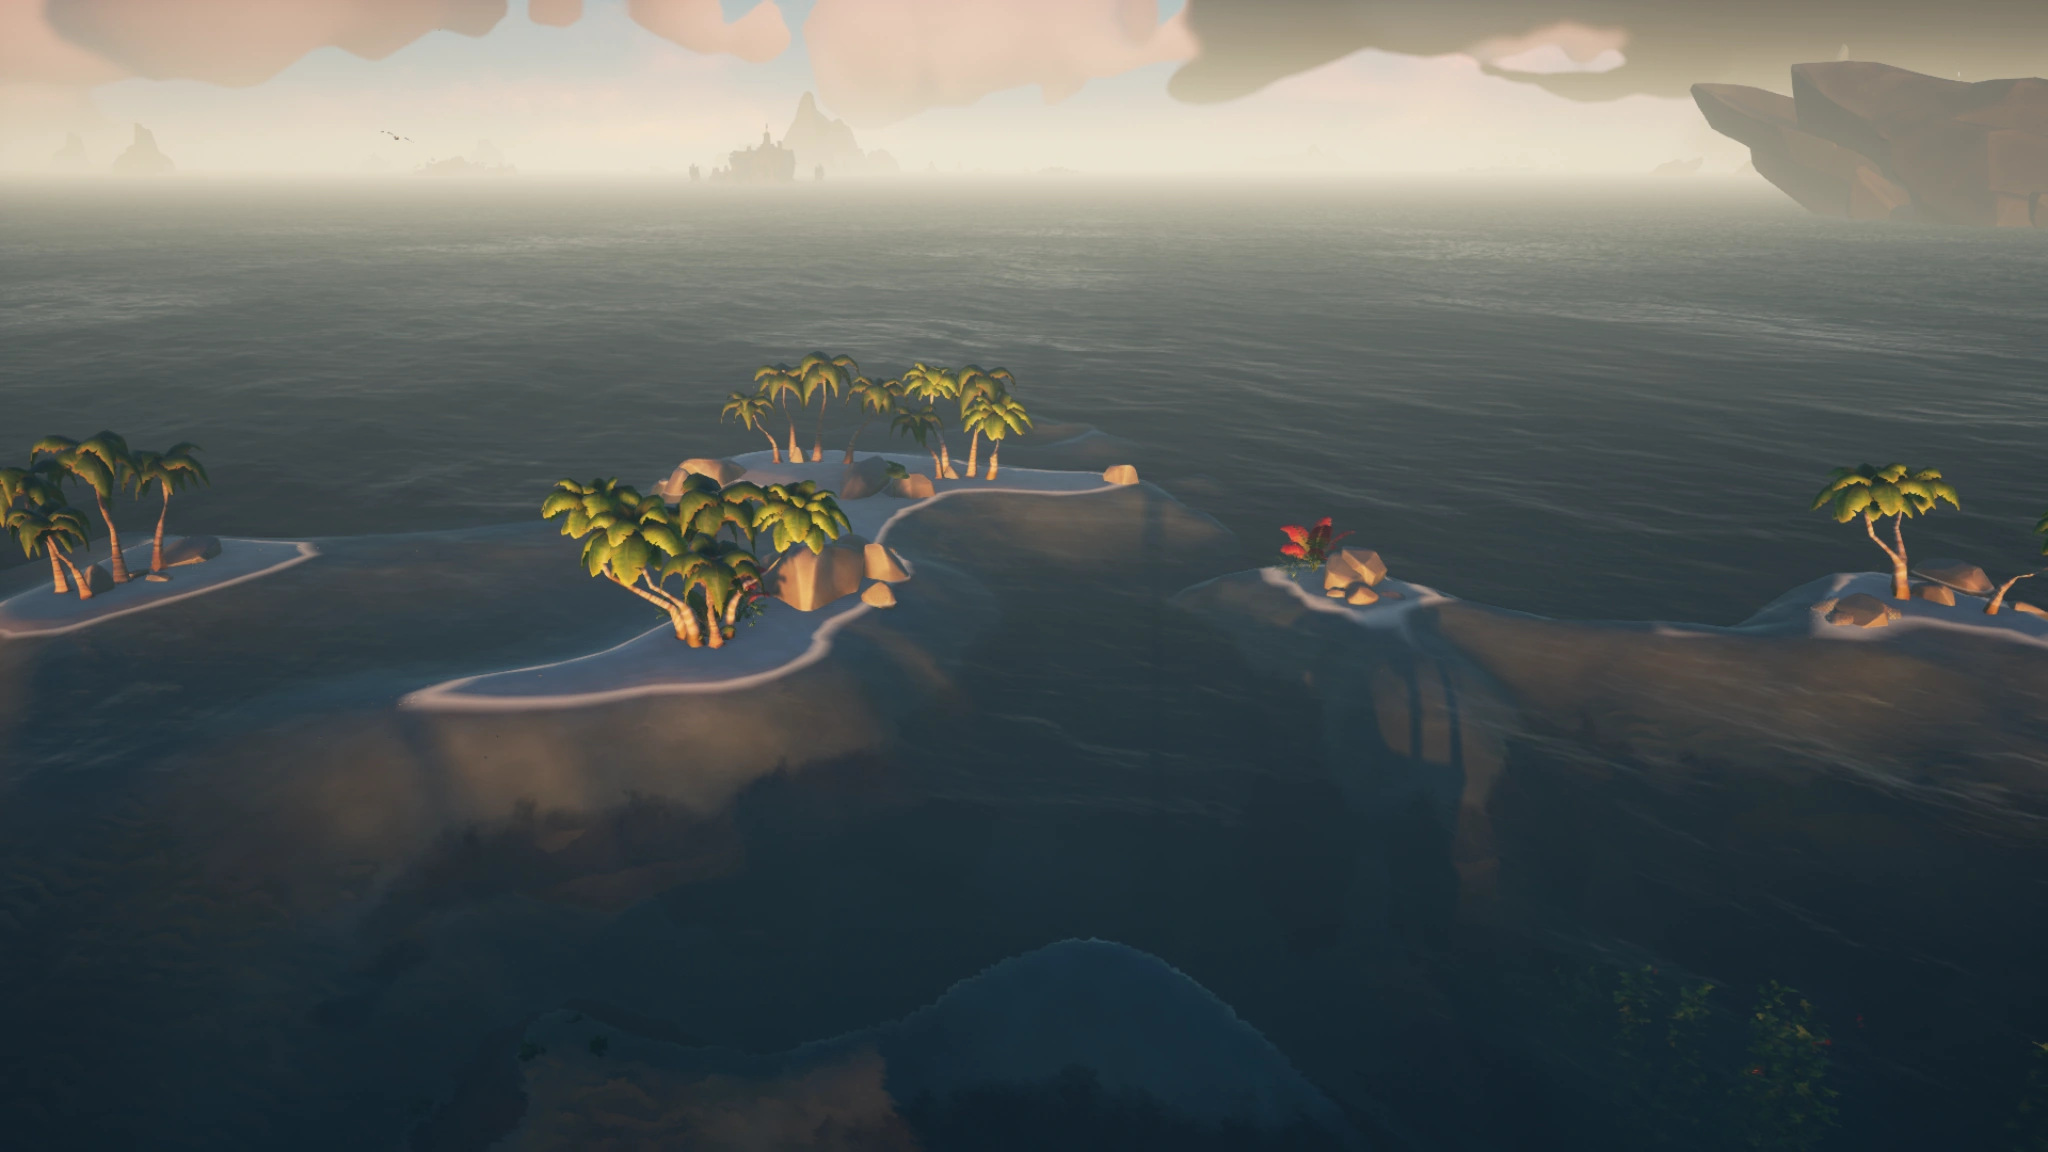
The location is an Uncharted Island between The Crooked Masts and Crook's Hollow
Sail to Uncharted Island (N-13) and swim in between the islets to find the Wreck.
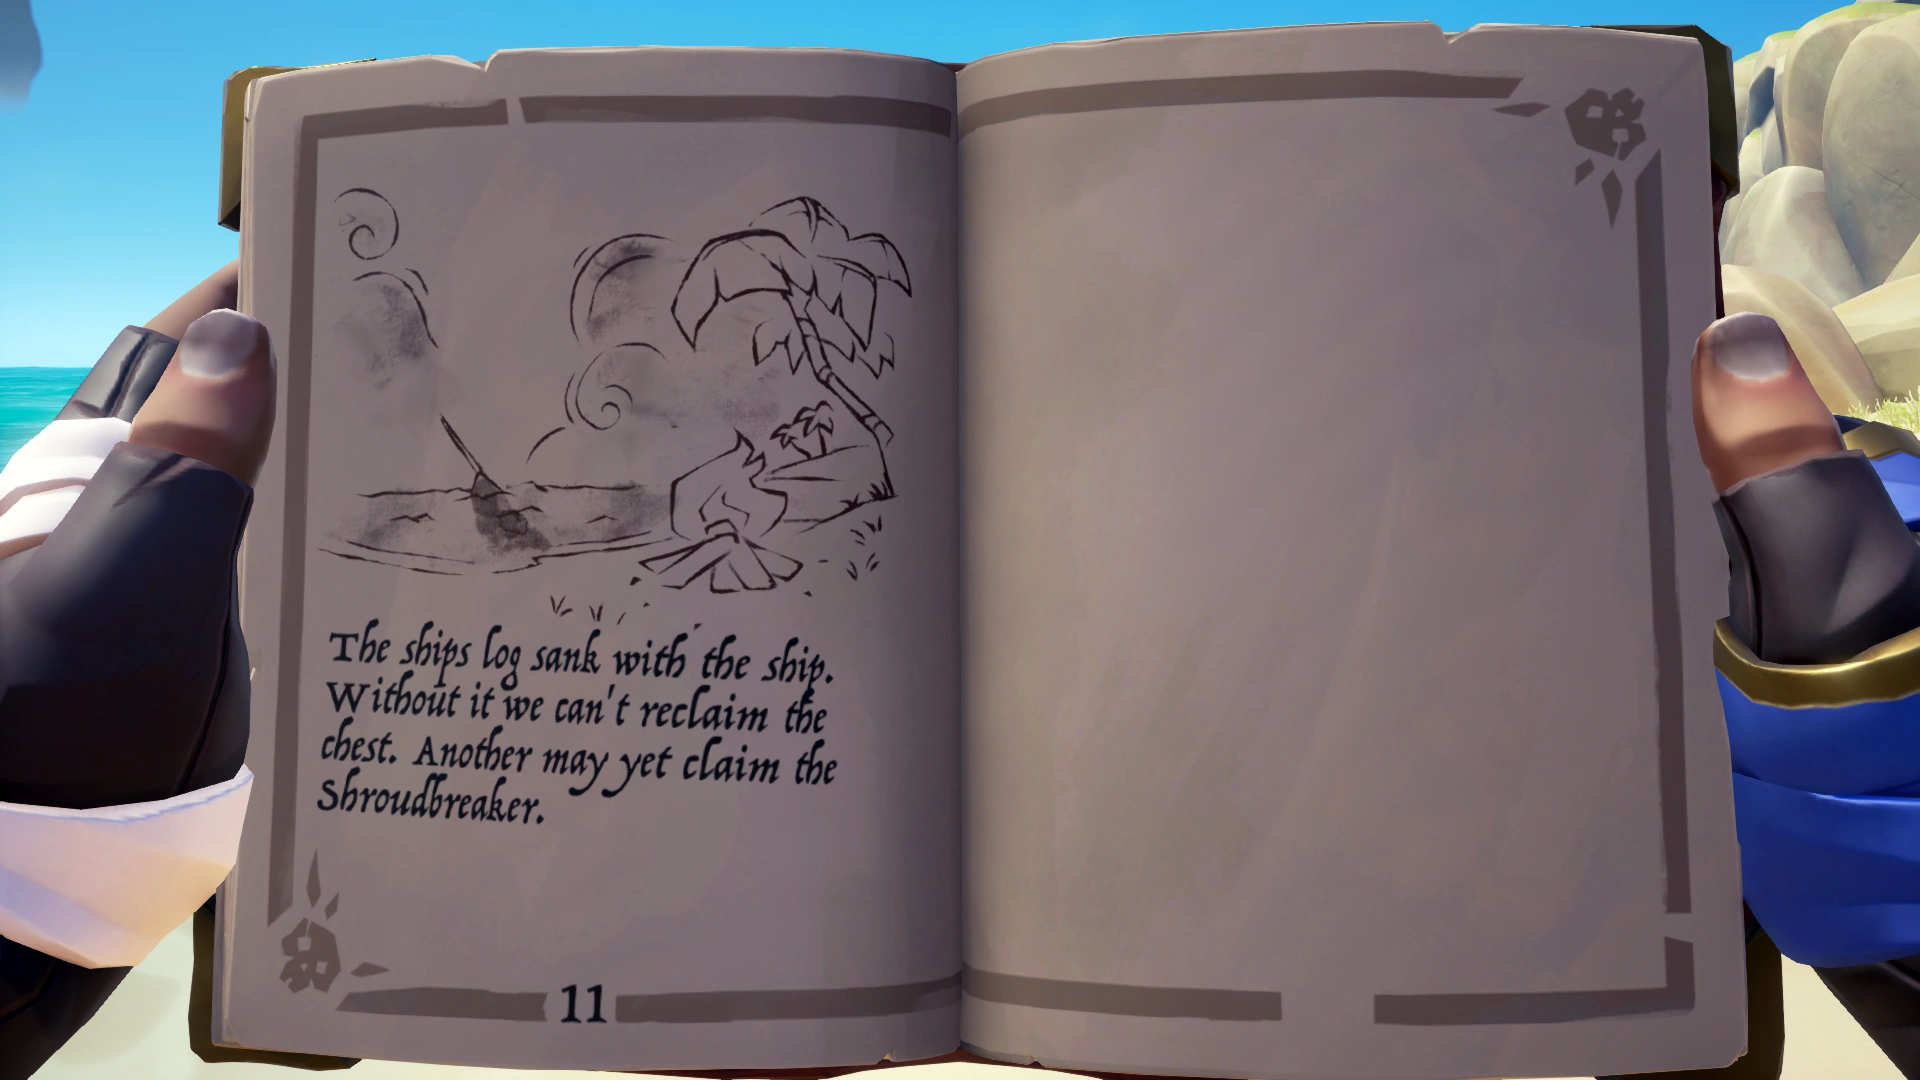
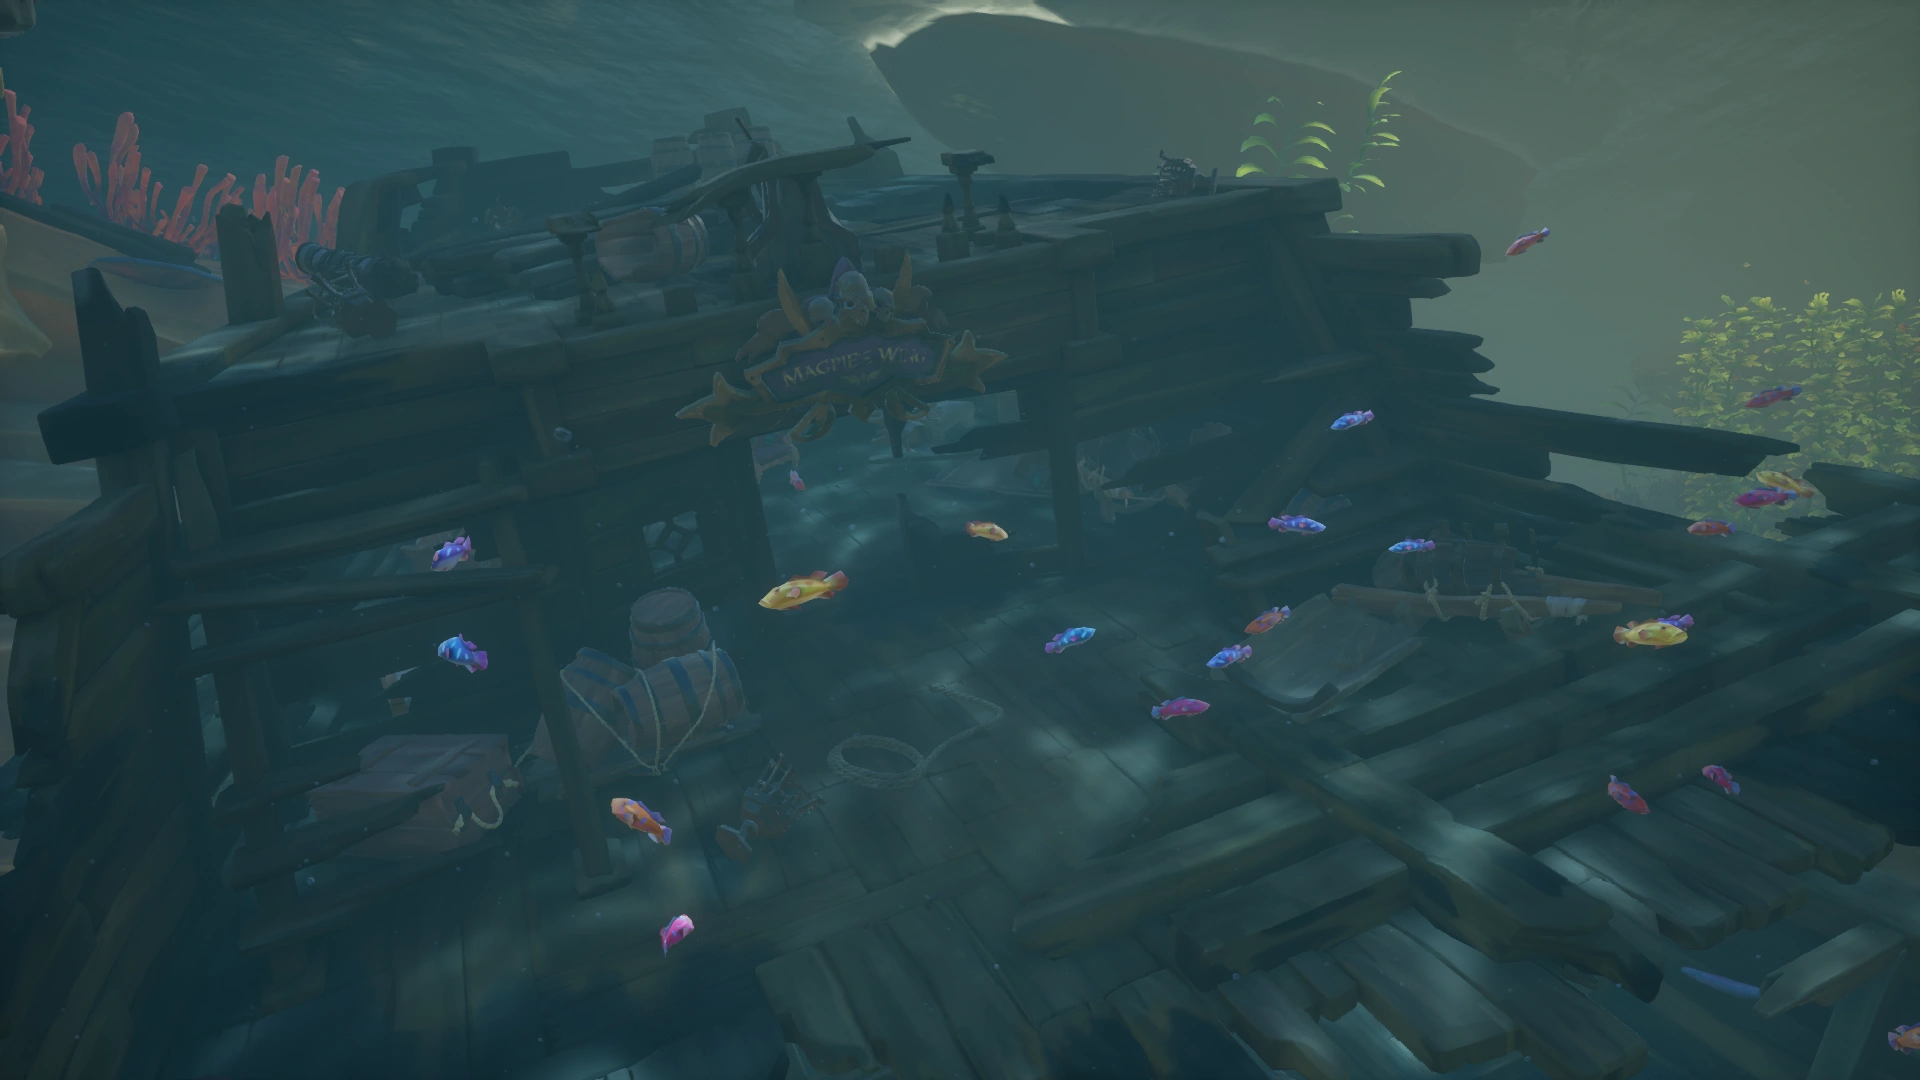
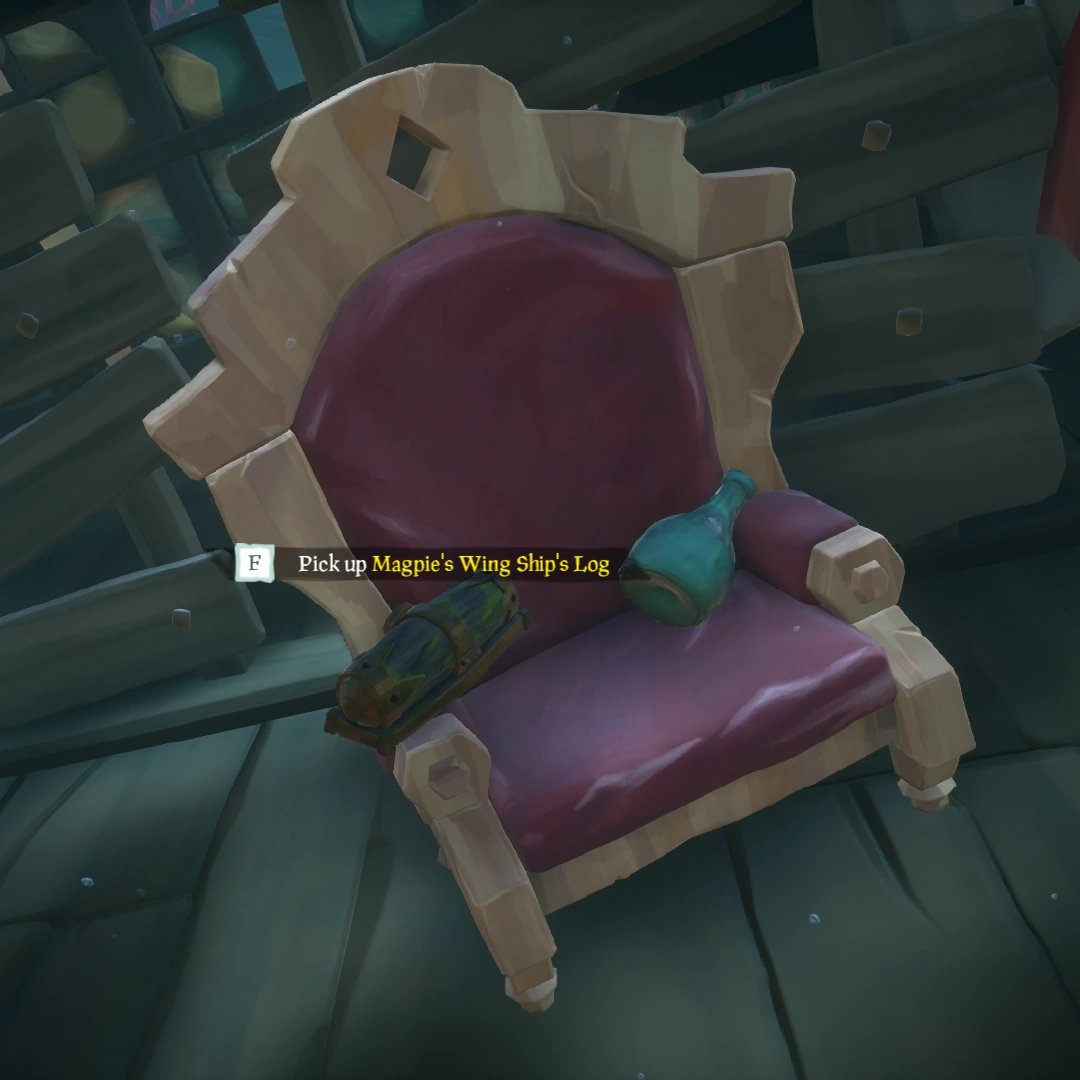
The Ship's Log is always inside the wrecked Ship's Captain's Quarters located in the back half of the ship. It is an intractable item that looks like a Voyage, and it can be found sitting on the Captain's Chair or in the Bookshelf.
CLICK FOR WALKTHROUGH AND GALLERY
|
|---|
Walkthrough[]
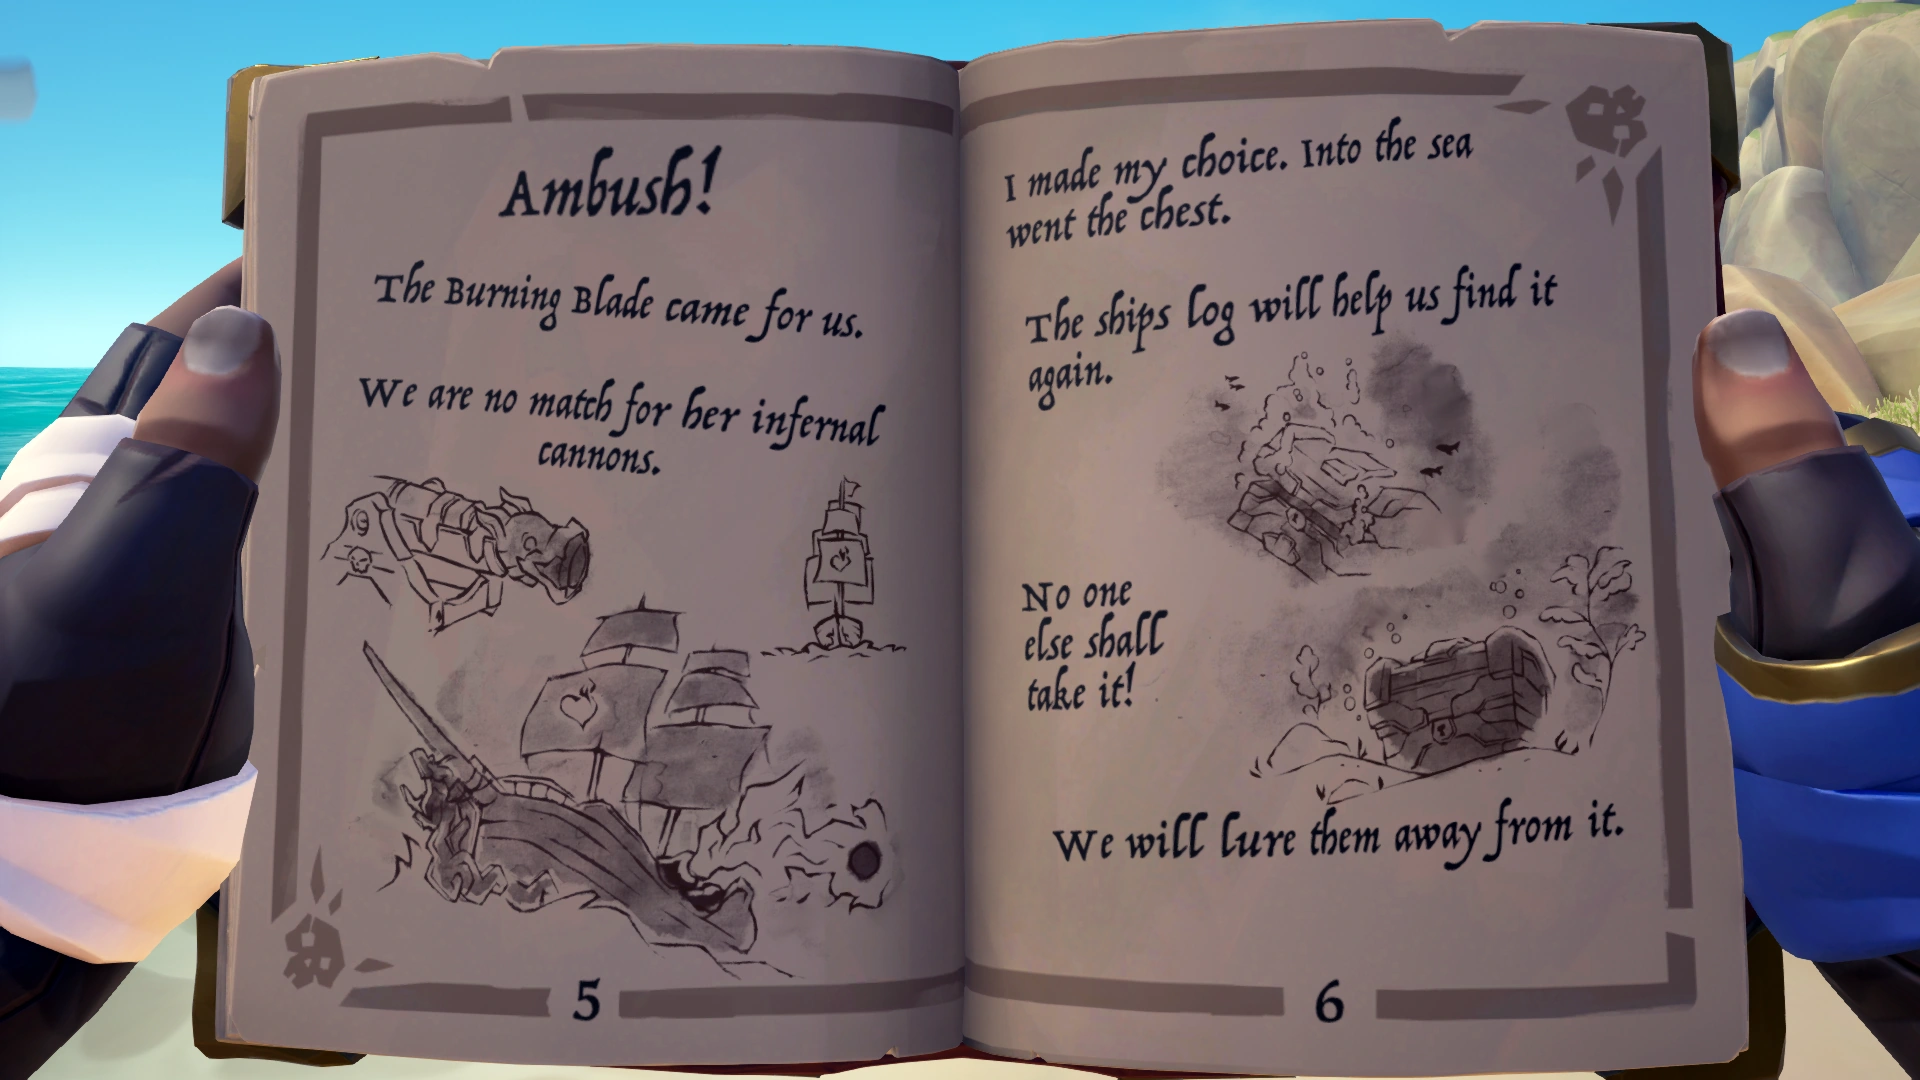
The Pirate Lord's Ship Magpie's Wing was defeated by Flameheart's Ship, The Burning Blade at an Uncharted Islet at the co-ordinates N-13, between The Crooked Masts and Crook's Hollow. Sail to the Island and swim below to find the broken Shipwreck on the west side of the islets. Magpie's Wing Ship's Log can be found in the Captain's Quarters ready to be picked up. It has been reported to appear on the Captain's Chair and on the broken Bookshelf.
Image Guide[]

The 10th page of the Tale Book clearly indicates the location of the Shipwreck
The Ship sunk between the islets of Uncharted Island (N-13)
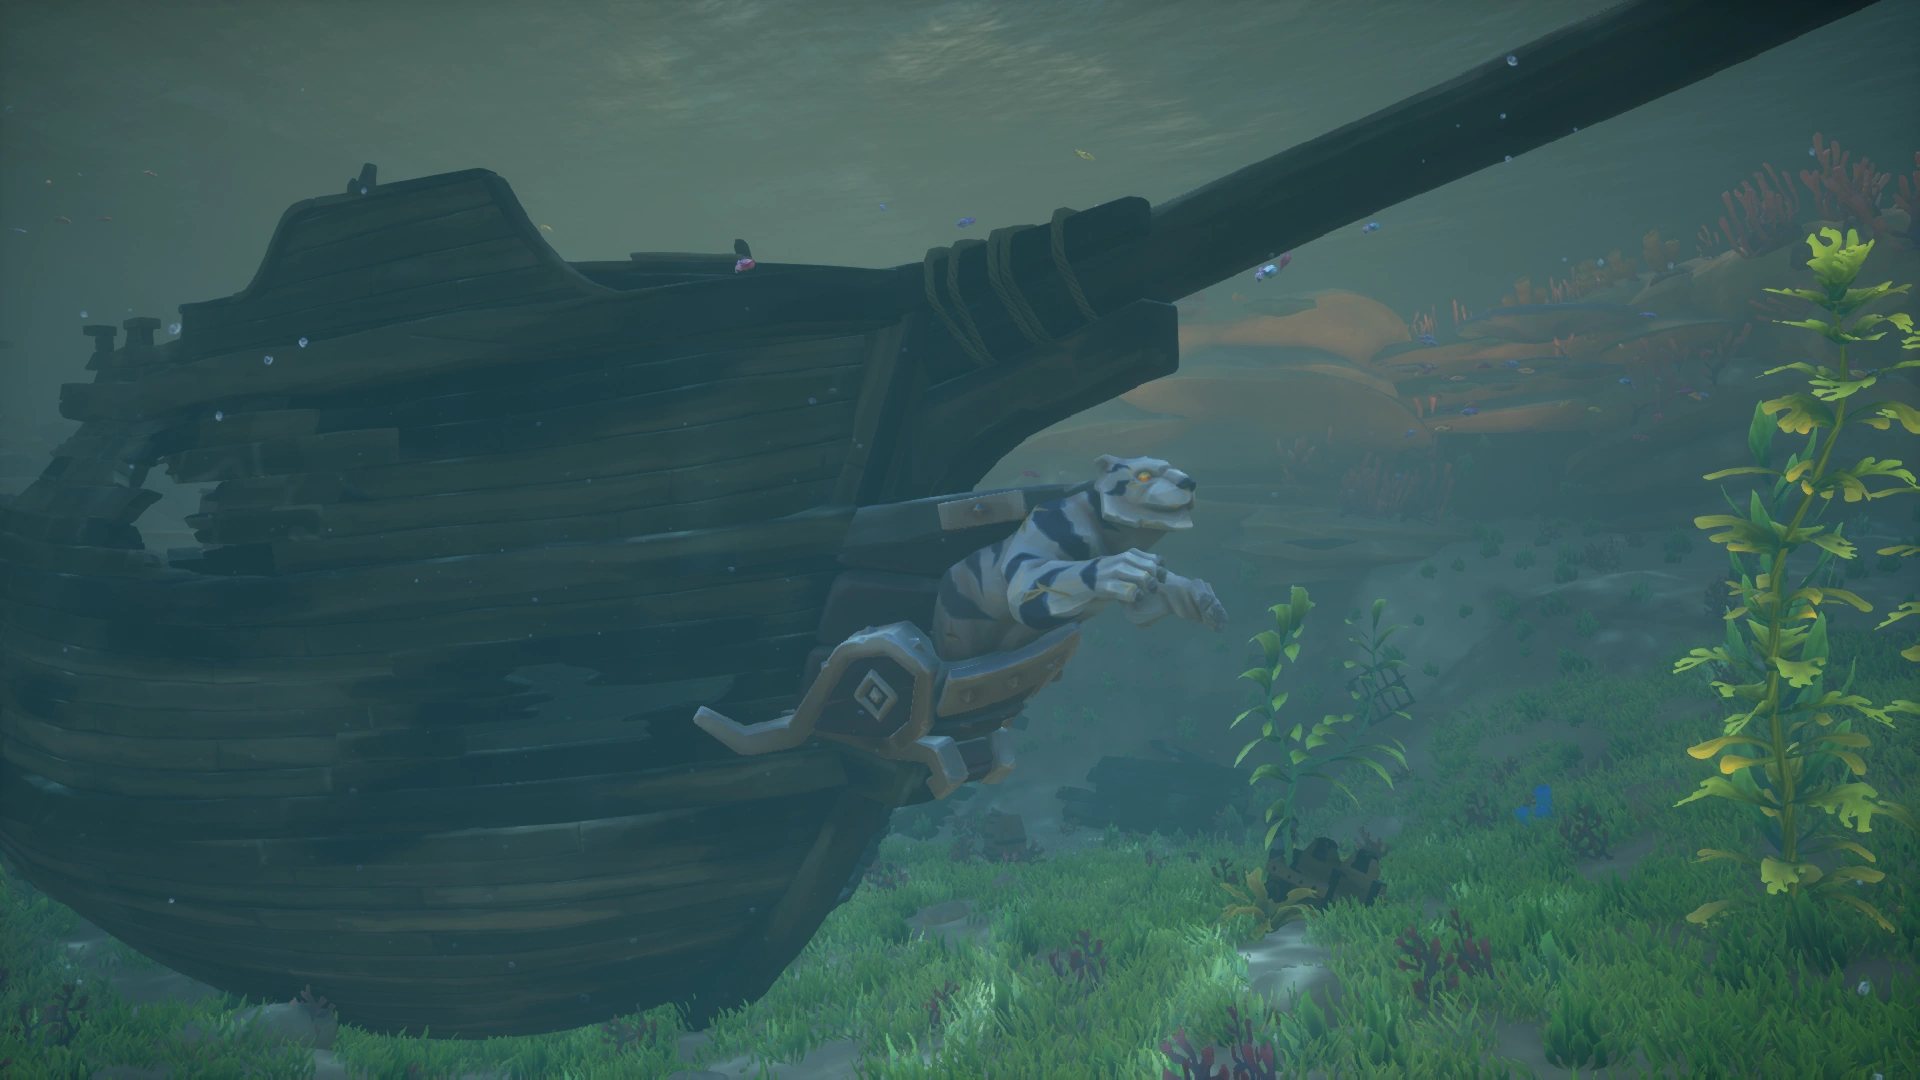
The feline Figurehead of the Magpie's Wing
The Captain's Quarters of the Magpie's Wing
One of the possible locations of the Ship's Log
On Path of a Legend[]
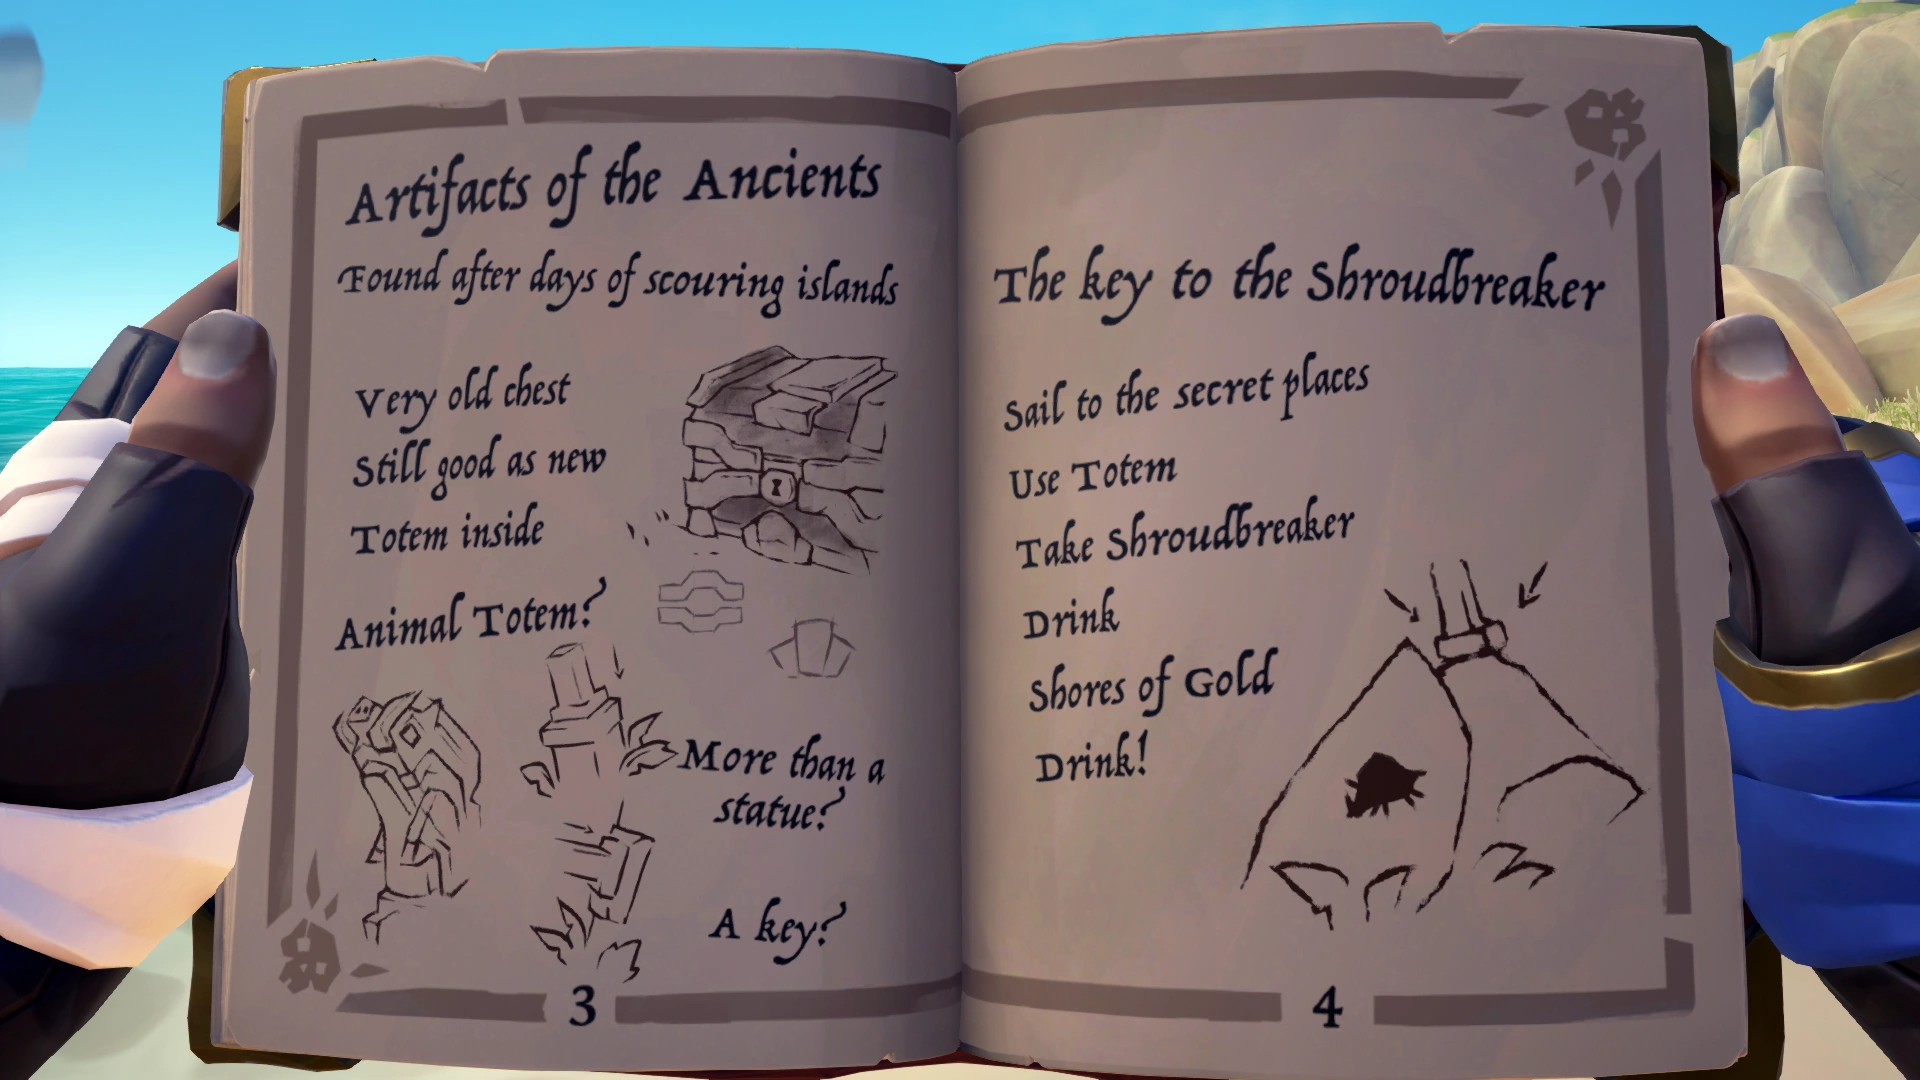
After you've found the Ship's Log, it will be added as extra pages to your Tale Book. At this point of the Voyage, the content of the pages and the destinations of the puzzles may vary, giving some variety for replays. Your goal here is to determine the location of the Ancient Chest and its contents, a Totem Key that are both referenced on page 3 and 4 of the Tale Book.
The Ship's Log tracks the chase of Magpie's Wing through The Ancient Isles and describes their heading by using Islands and Compass directions as pointers. As such, this part of the Tall Tale may require knowledge of the following elements to solve the Ship's Log puzzle:
- The names, shapes and types of Islands in The Ancient Isles
- Compass directions
- Nautical orientation terms like Port and Starboard
Note: Now would be a good time to pick up Mercia's Journal #3 at Devil's Ridge.
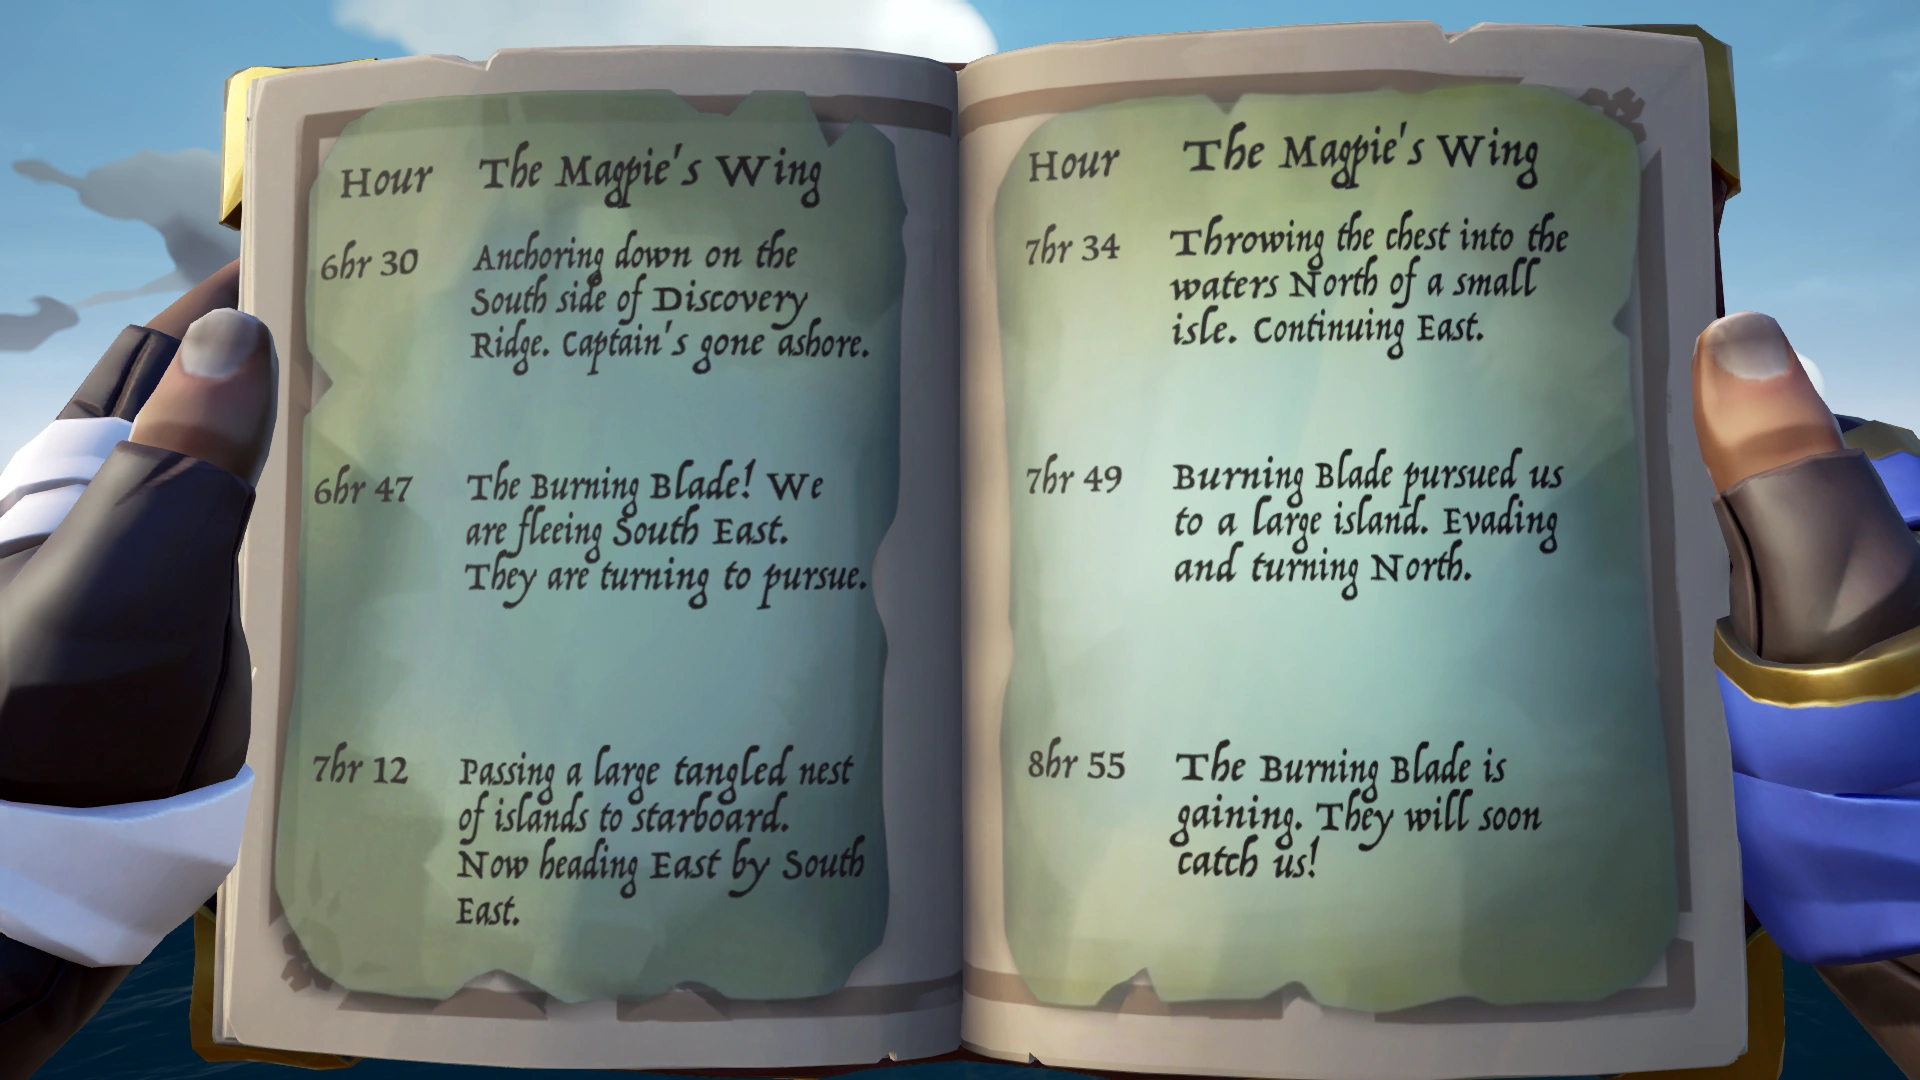
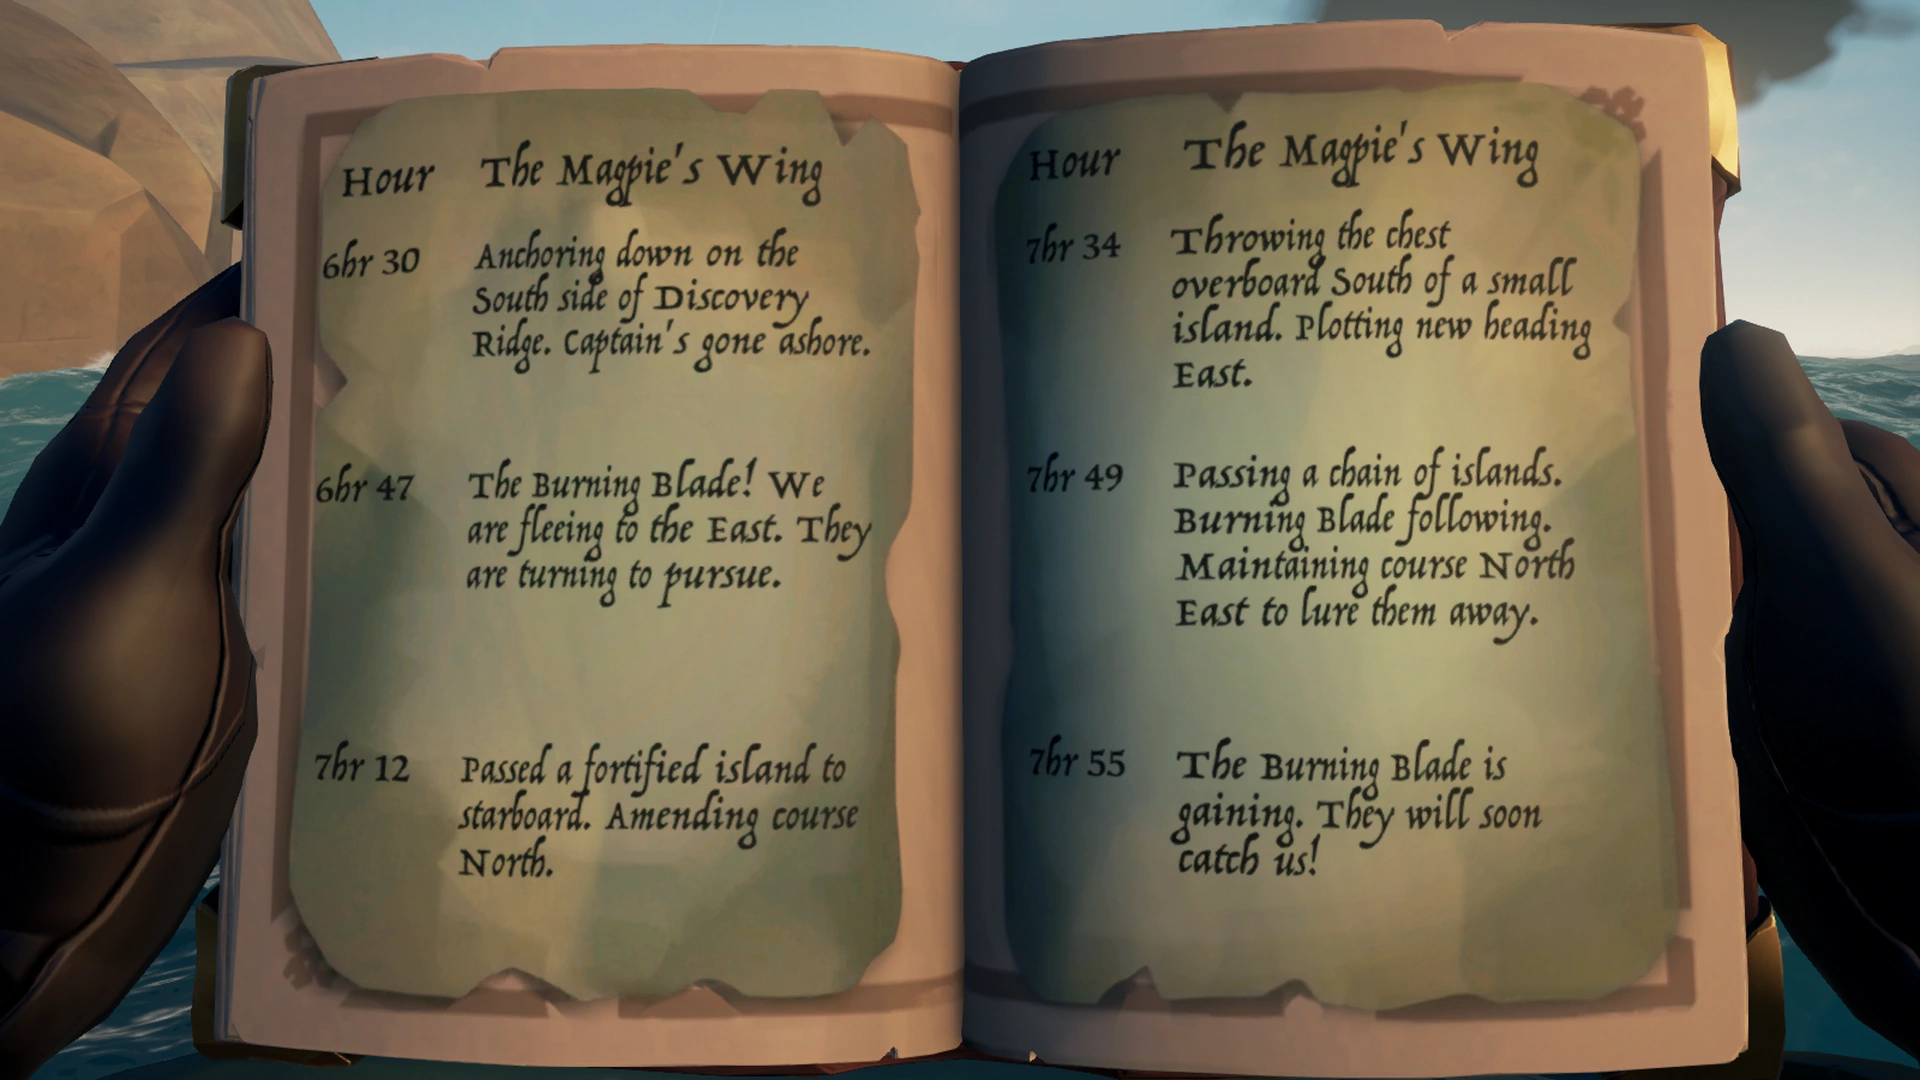
The following pages show one possible version of the Magpie's Wing Ship's Log Puzzle.
Hints[]
You have to follow the Islands and Compass directions mentioned in the Log to track the Ship's route on your Map Table. Look for similarities between the Islands and the descriptions given for them. Also, you don't have to go to all of these places ;)
P.S. Port = Left of Ship, Starboard = Right of Ship.
The most important entry is the location where the "Chest" was dropped overboard.
Take note of page 4 of the Tale Book, it illustrates exactly where the Chest should be! Keep an eye out for a white Glint.
All right, all right. If you are sure you have the right Island, the Ancient Chest is submerged in the shores of the Islands at the Compass direction mentioned in the Log. Sometimes it can be quite far away from the shoreline or obscured by sea plants. Try to look at the place from different distances and angles to find it by the tell-tale white glint of Treasure!
CLICK FOR WALKTHROUGH AND GALLERY
|
|---|
Walkthrough[]
As stated before, the added Tale Book pages with the Ship's Log always record the Magpie’s Wing's voyage across The Ancient Isles, making entries upon reaching ambiguously named islands along the path and stating which Island's waters the Ancient Chest was dropped in.
The most important entry to pay attention to is the entry that documents the location where the "Chest" was dropped overboard. This marks the Island where you will find the next Quest Item, the Ancient Chest. As such, you don't necessarily need to go to each location that the Ship's Log mentions yourself, but you can determine the final Island by going to a Map Table and tracking the journey there instead. Despite this, if you feel safer by tracking the whole journey and have the time, then go ahead and sail through the whole experience yourself.
The Ship's Log has so far been reported to lead to 7 different Islands with the Ancient Chest: Fools Lagoon, Chicken Isle, Snake Island, Paradise Spring, Cutlass Cay, Lookout Point and Devil's Ridge.
Here are a few documented pointers to the different wordings used to describe locations in The Ancient Isles:
- Fortified Island - Refers to any of the Fortress Islands.
- Large Tangled Nest of Islands - This refers to Shark Bait Cove. Not to be confused with the near-by Old Salts Atoll, which is a Small Island.
- Small Shallow Isles - This can refer to Old Salts Atoll or Mutineer Rock instead.
- Chain/Clump of Islands - This refers to the three Island Snake Island on the Northern side of the Region.
- Large Island with Tall Arches - This refers to Thieves' Haven, although it may also just be referred to as a Large Island.
- Large Island - Any of the Large Islands in the Region.
- Small Isle(t)/(Island) - Any of the Small Islands in the Region.
- Port - A nautical orientation term signifying the Left side of the Ship.
- Starboard - A nautical orientation term signifying the Right side of the Ship.
Click Expand to see the puzzles and solutions for each riddle below:
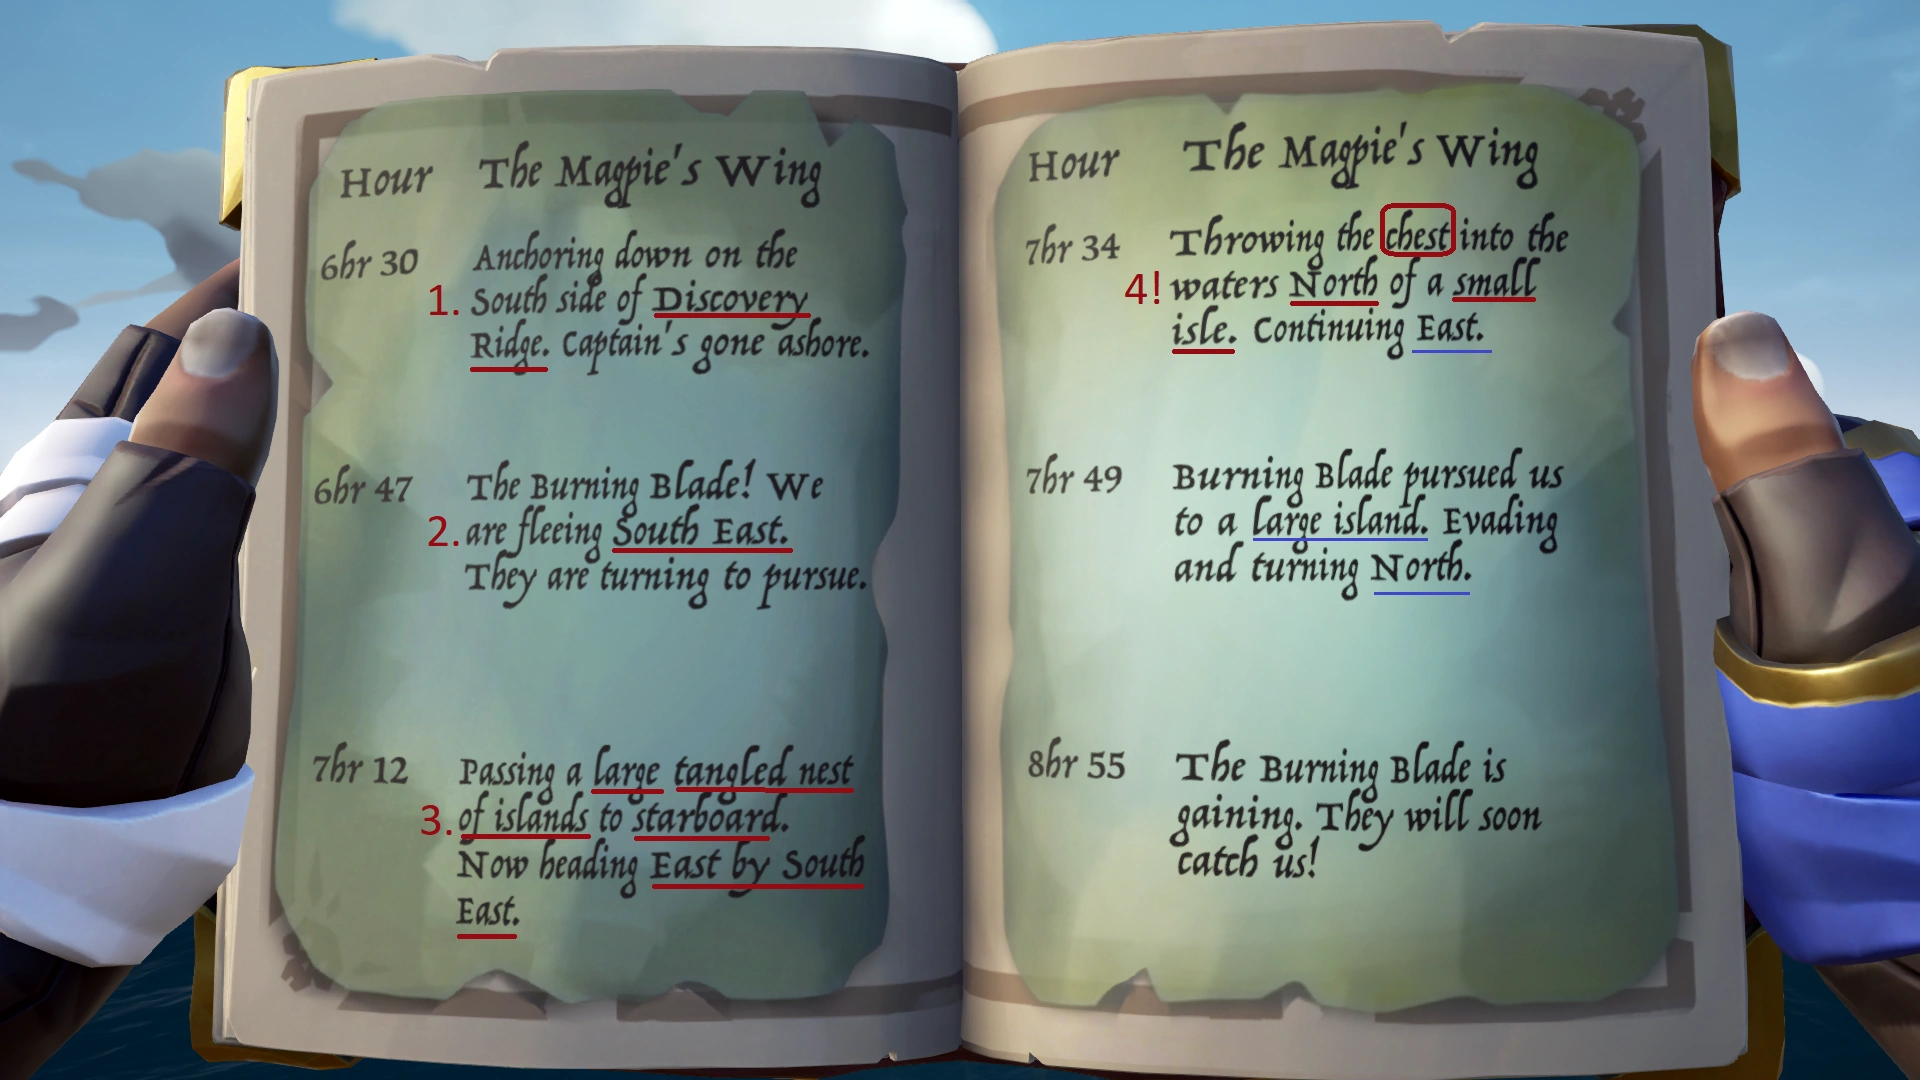
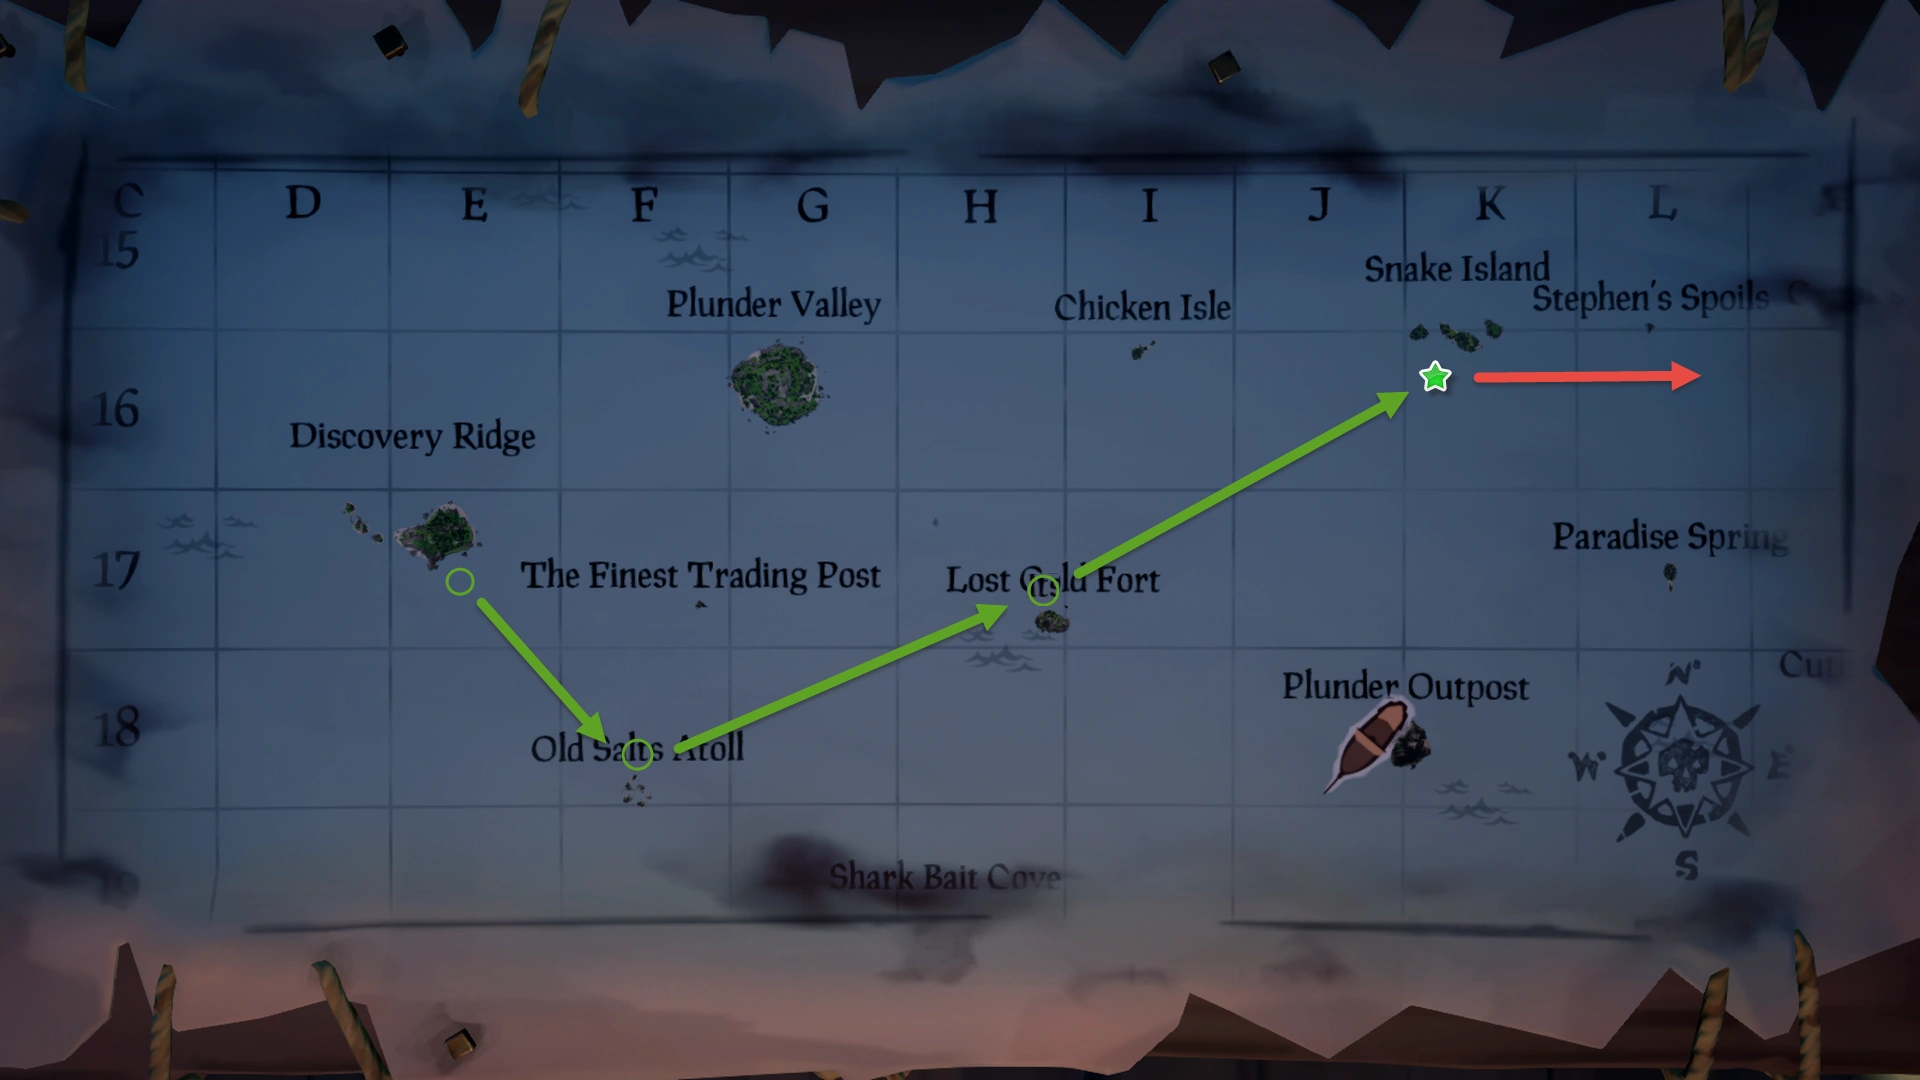
The above example Ship Log with important parts underlined and numbered.
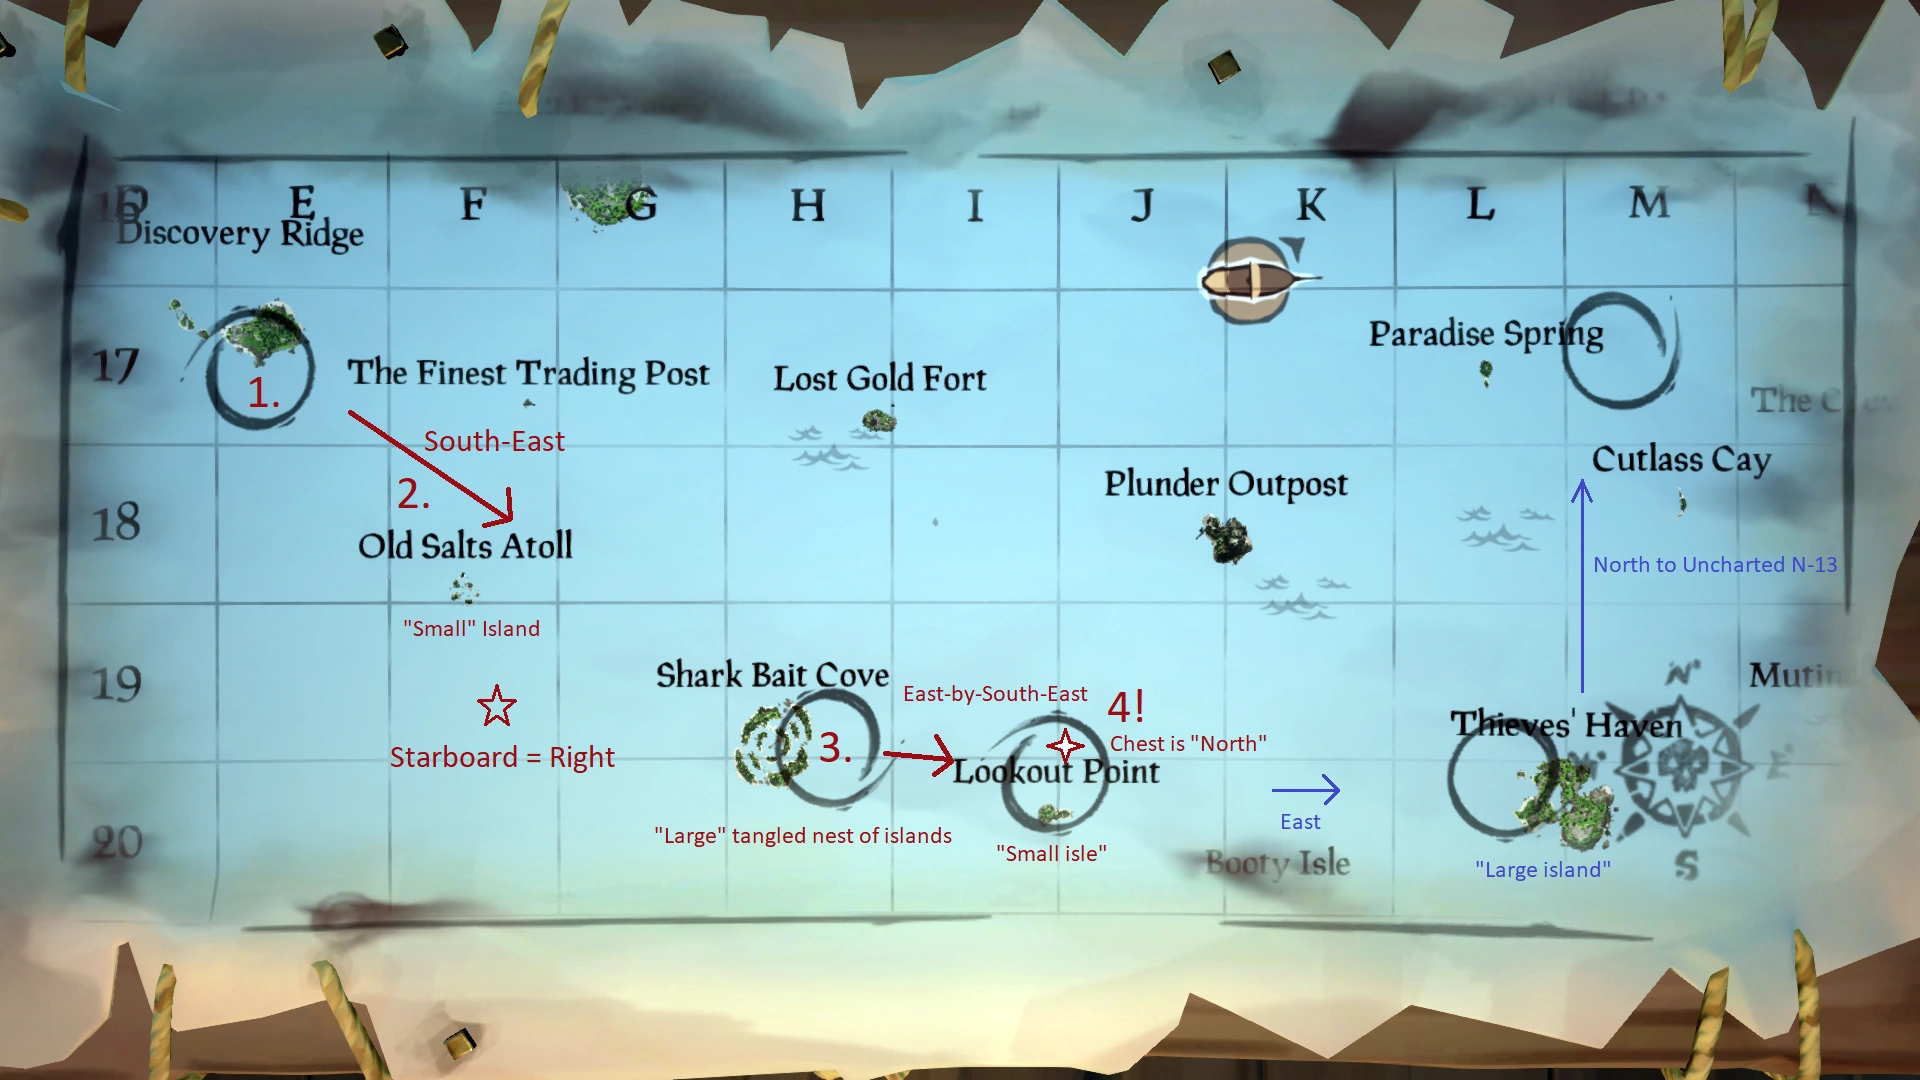
The solution to the Ship Log with corresponding numbers, directions and hints.
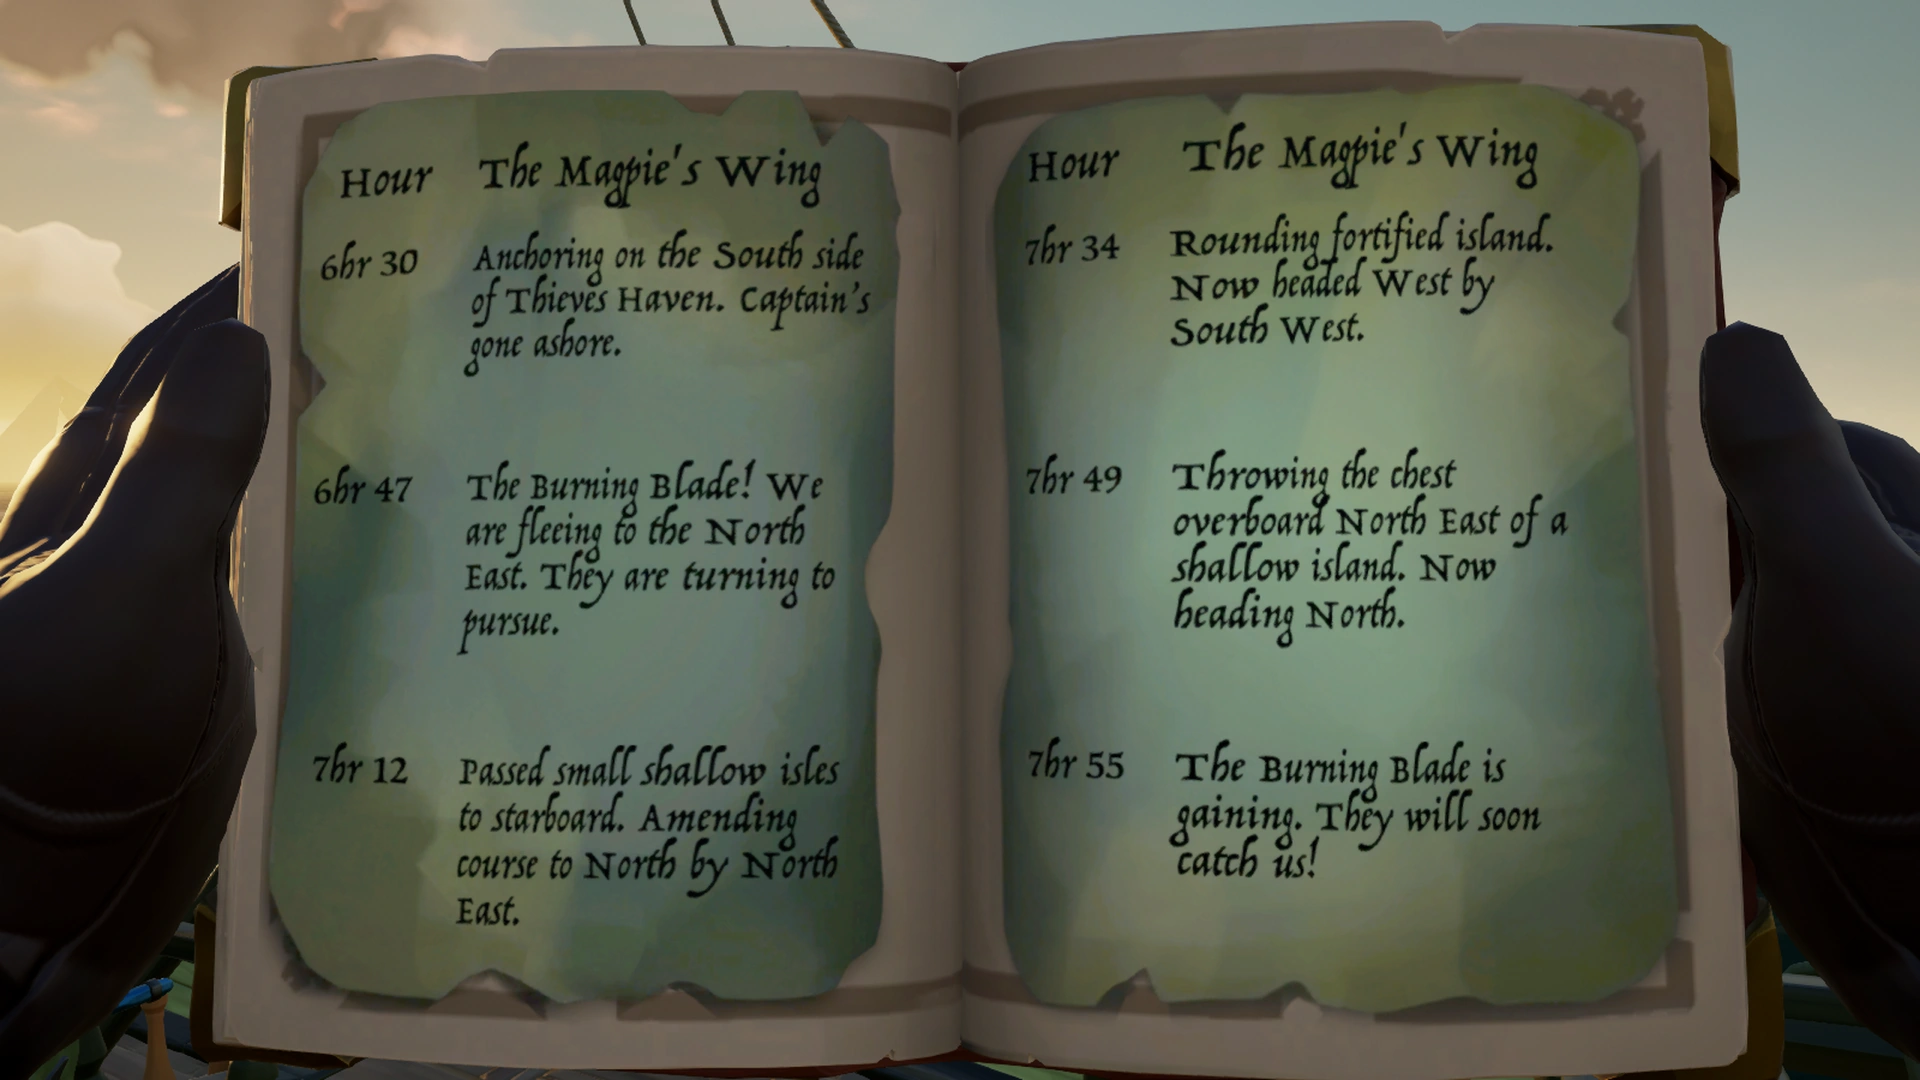
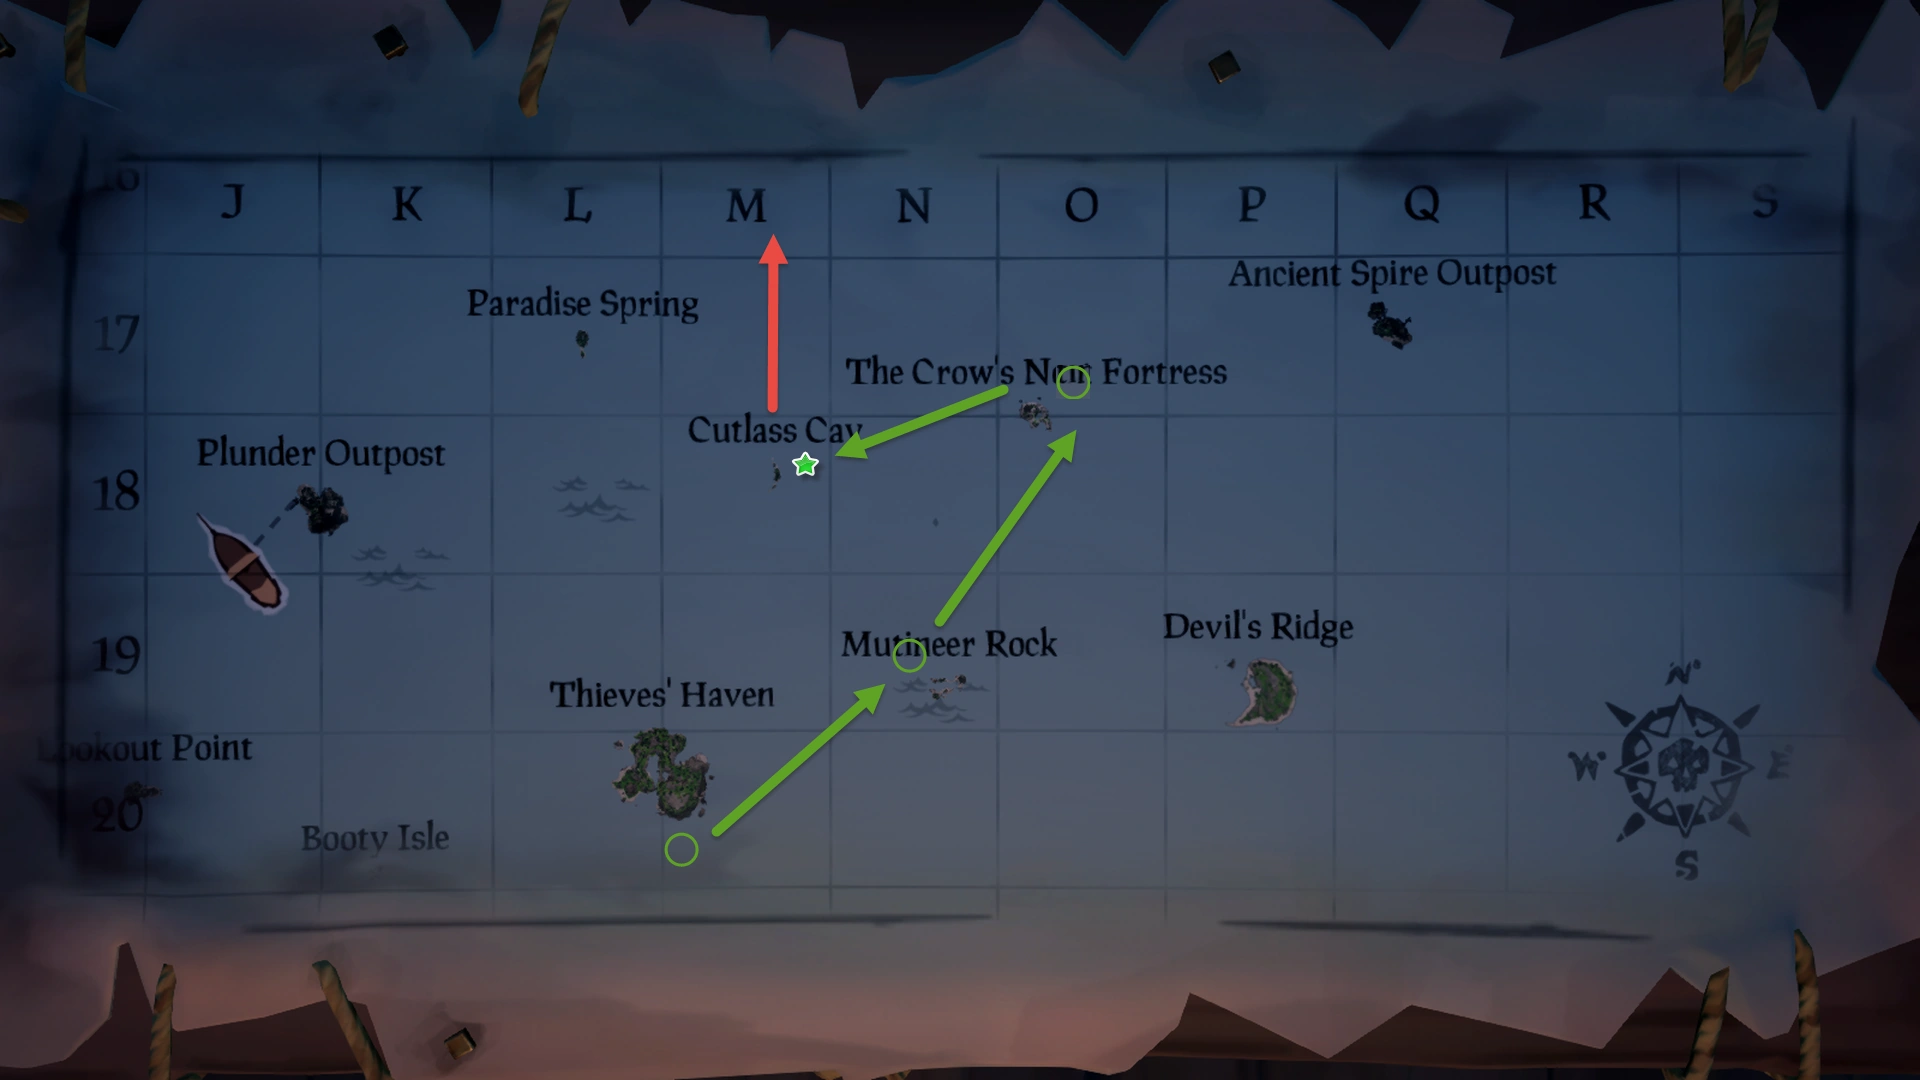
Ship's Log Clue for Cutlass Cay.
Path to Cutlass Cay.
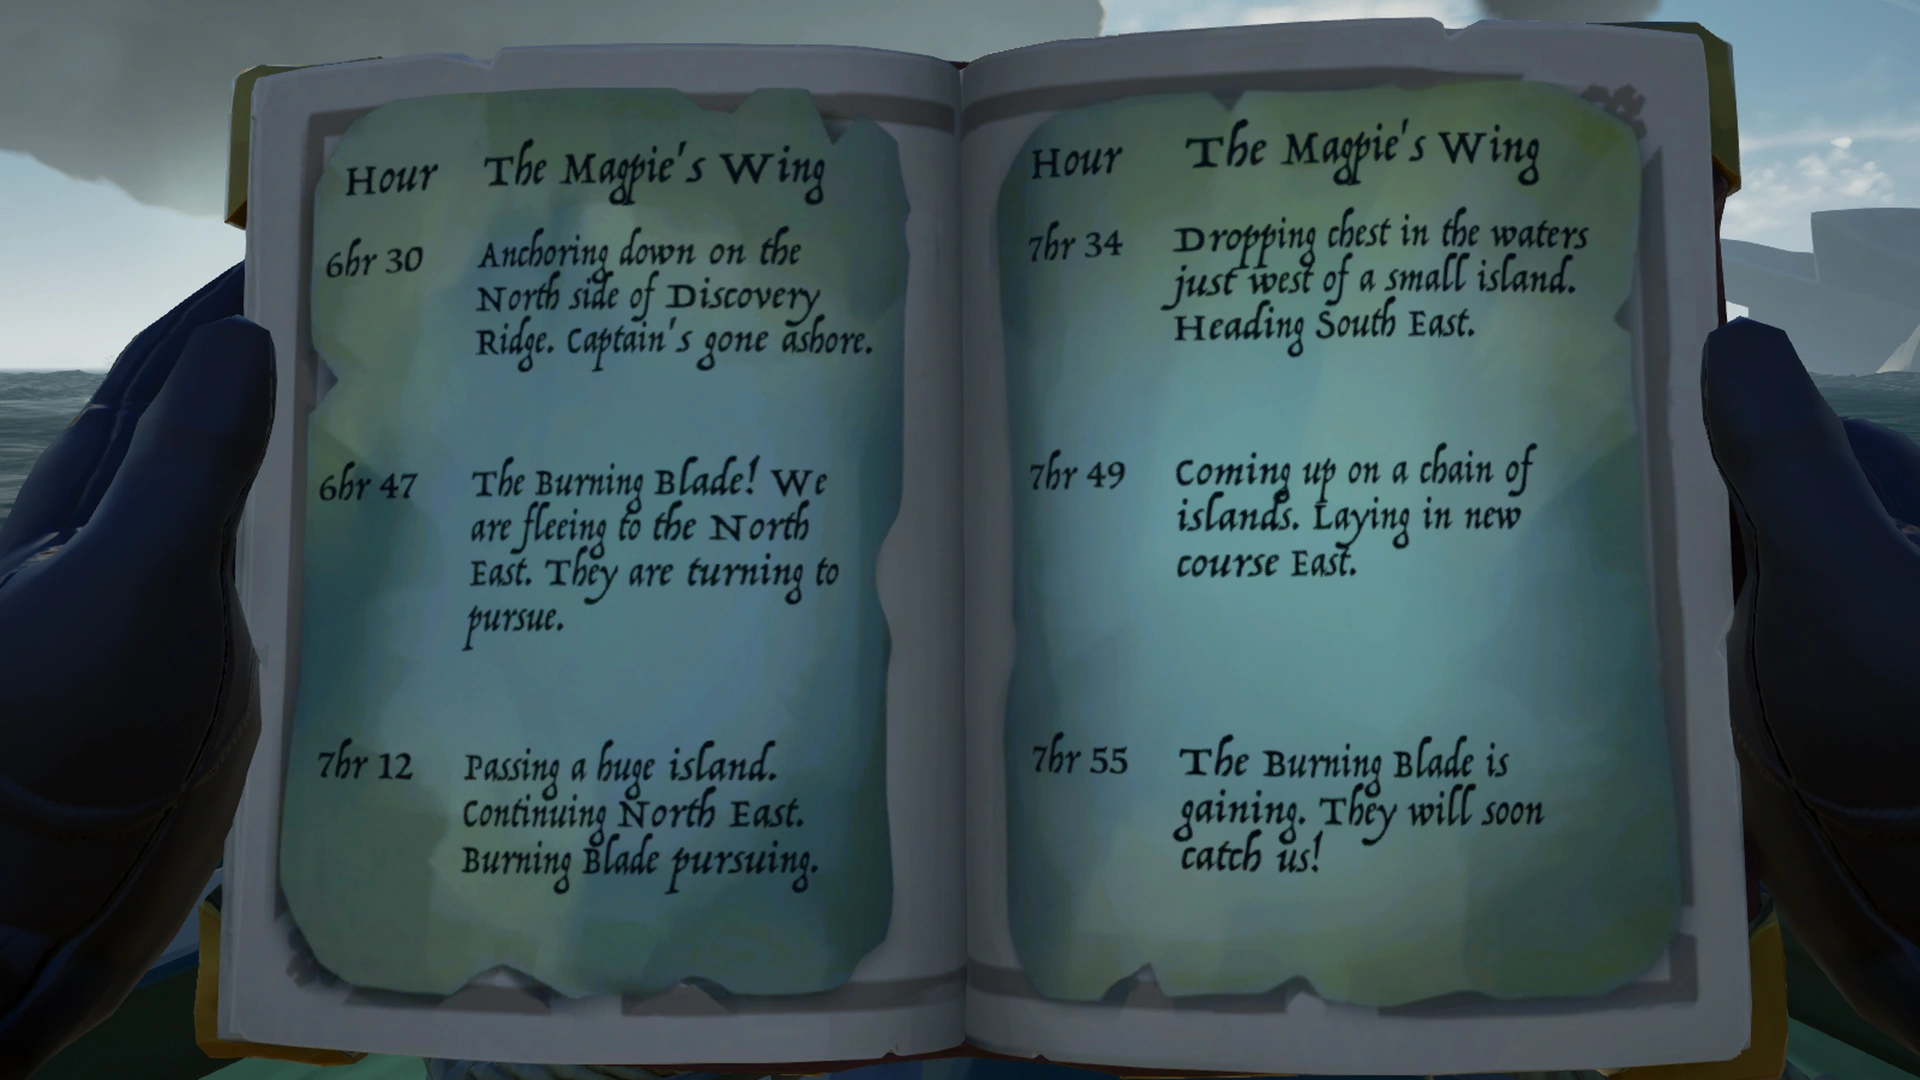
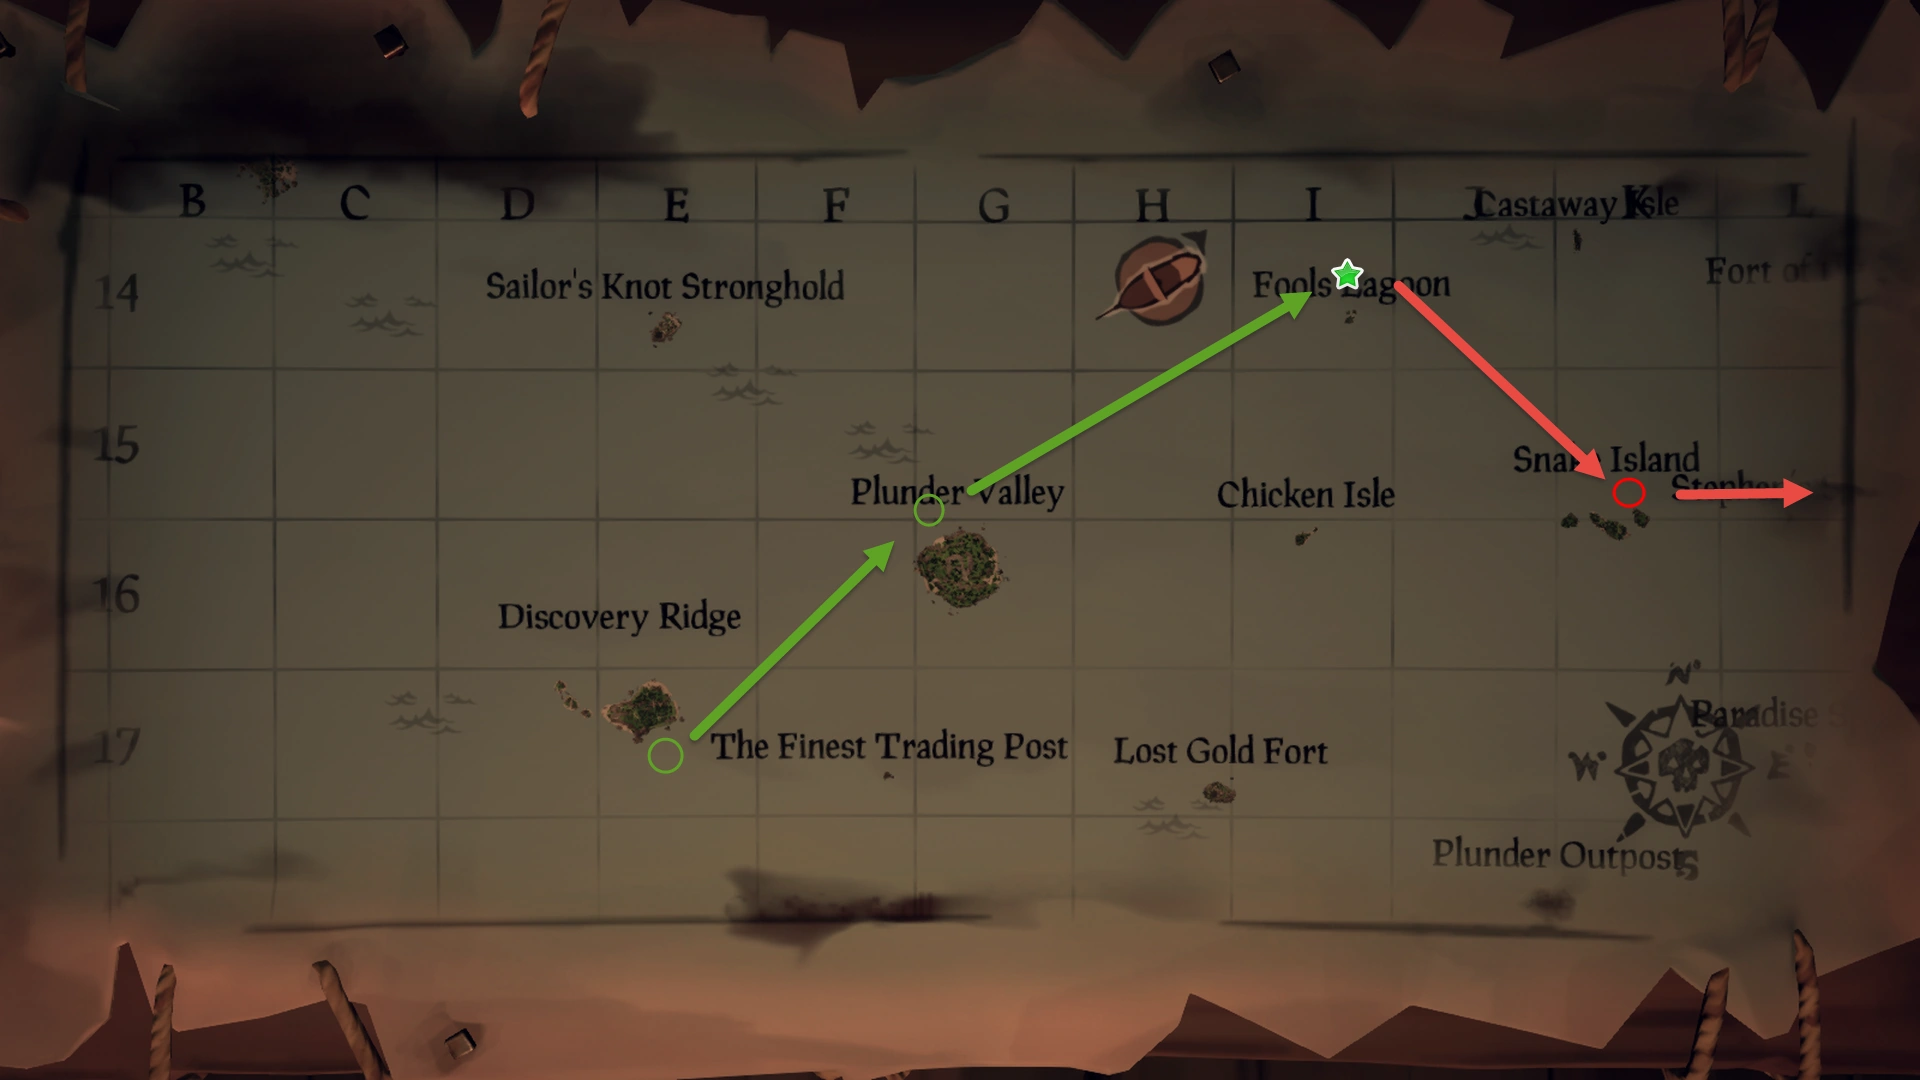
Ship's Log Clue for Fool's Lagoon.
Path to Fool's Lagoon.
Ship's Log Clue for Snake Island.
Path to Snake Island.

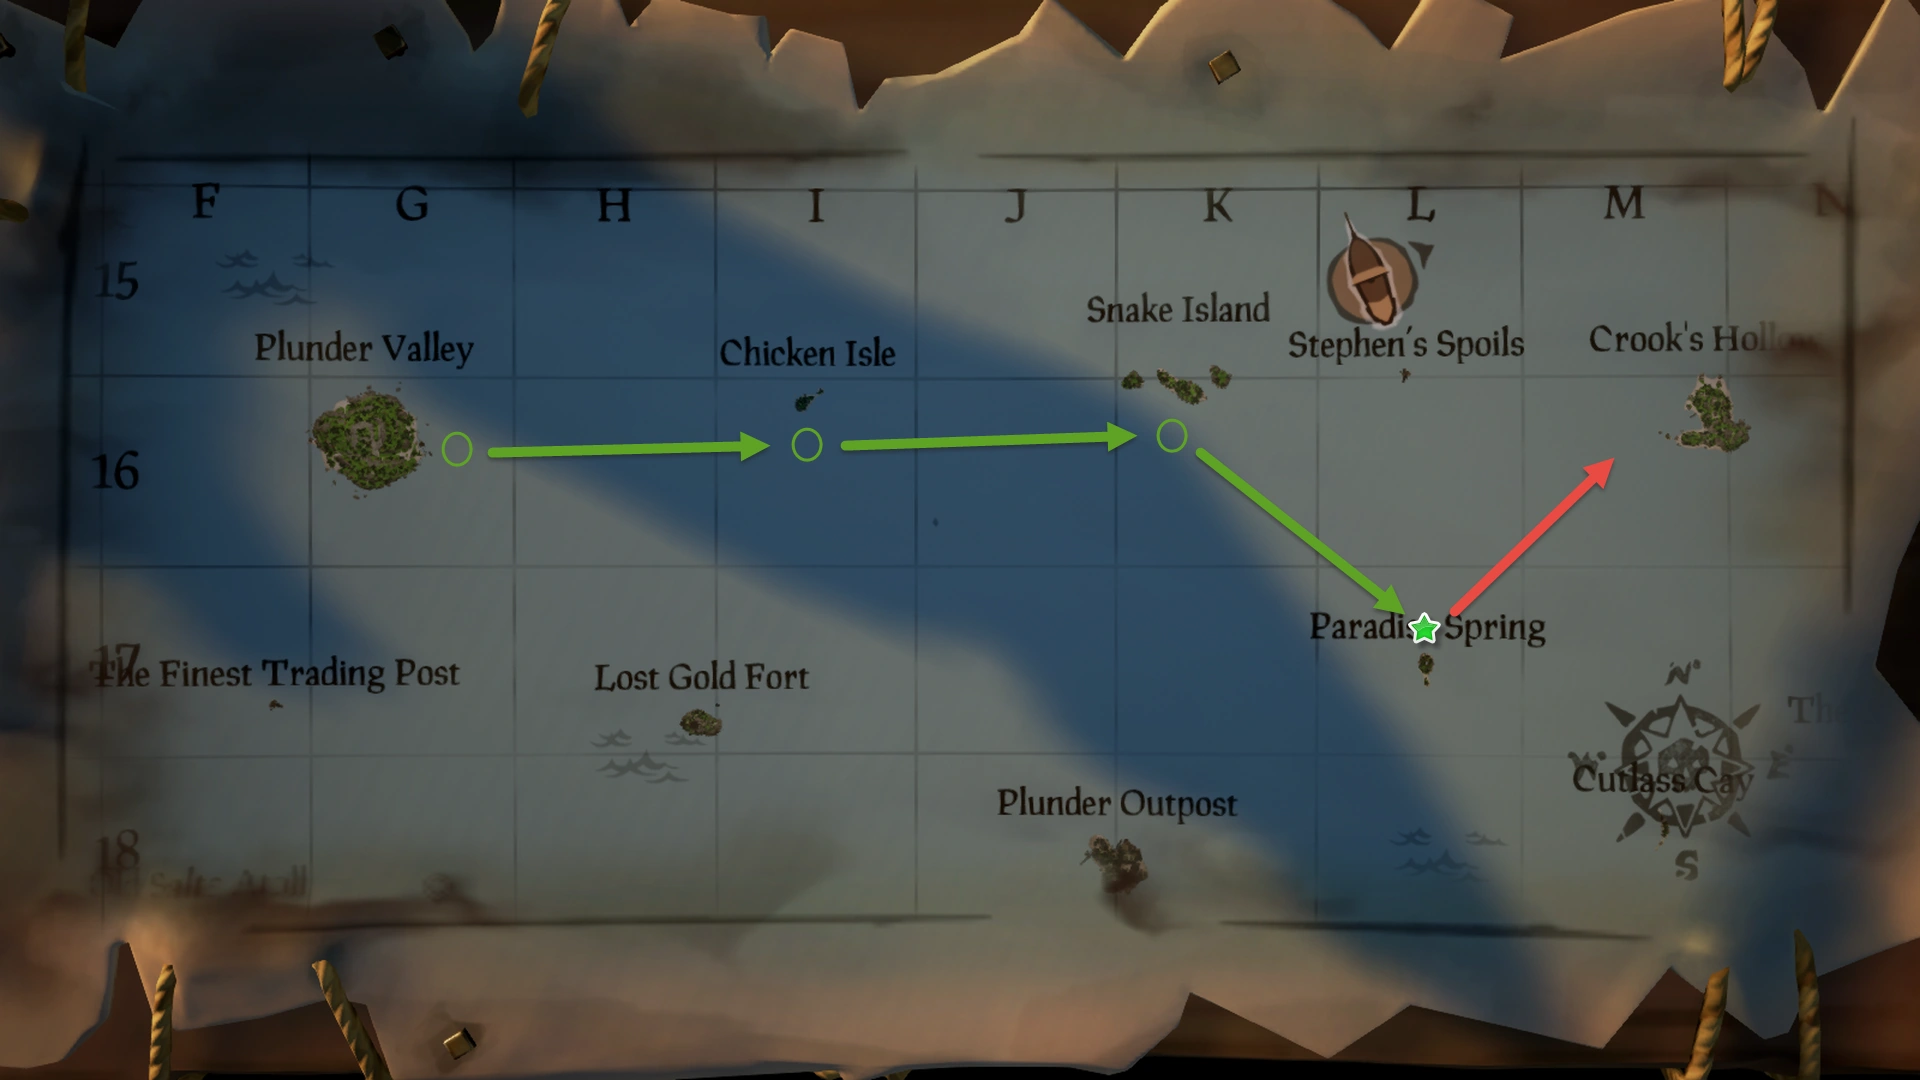
Ship's Log Clue for Paradise Spring.
Path to Paradise Spring.

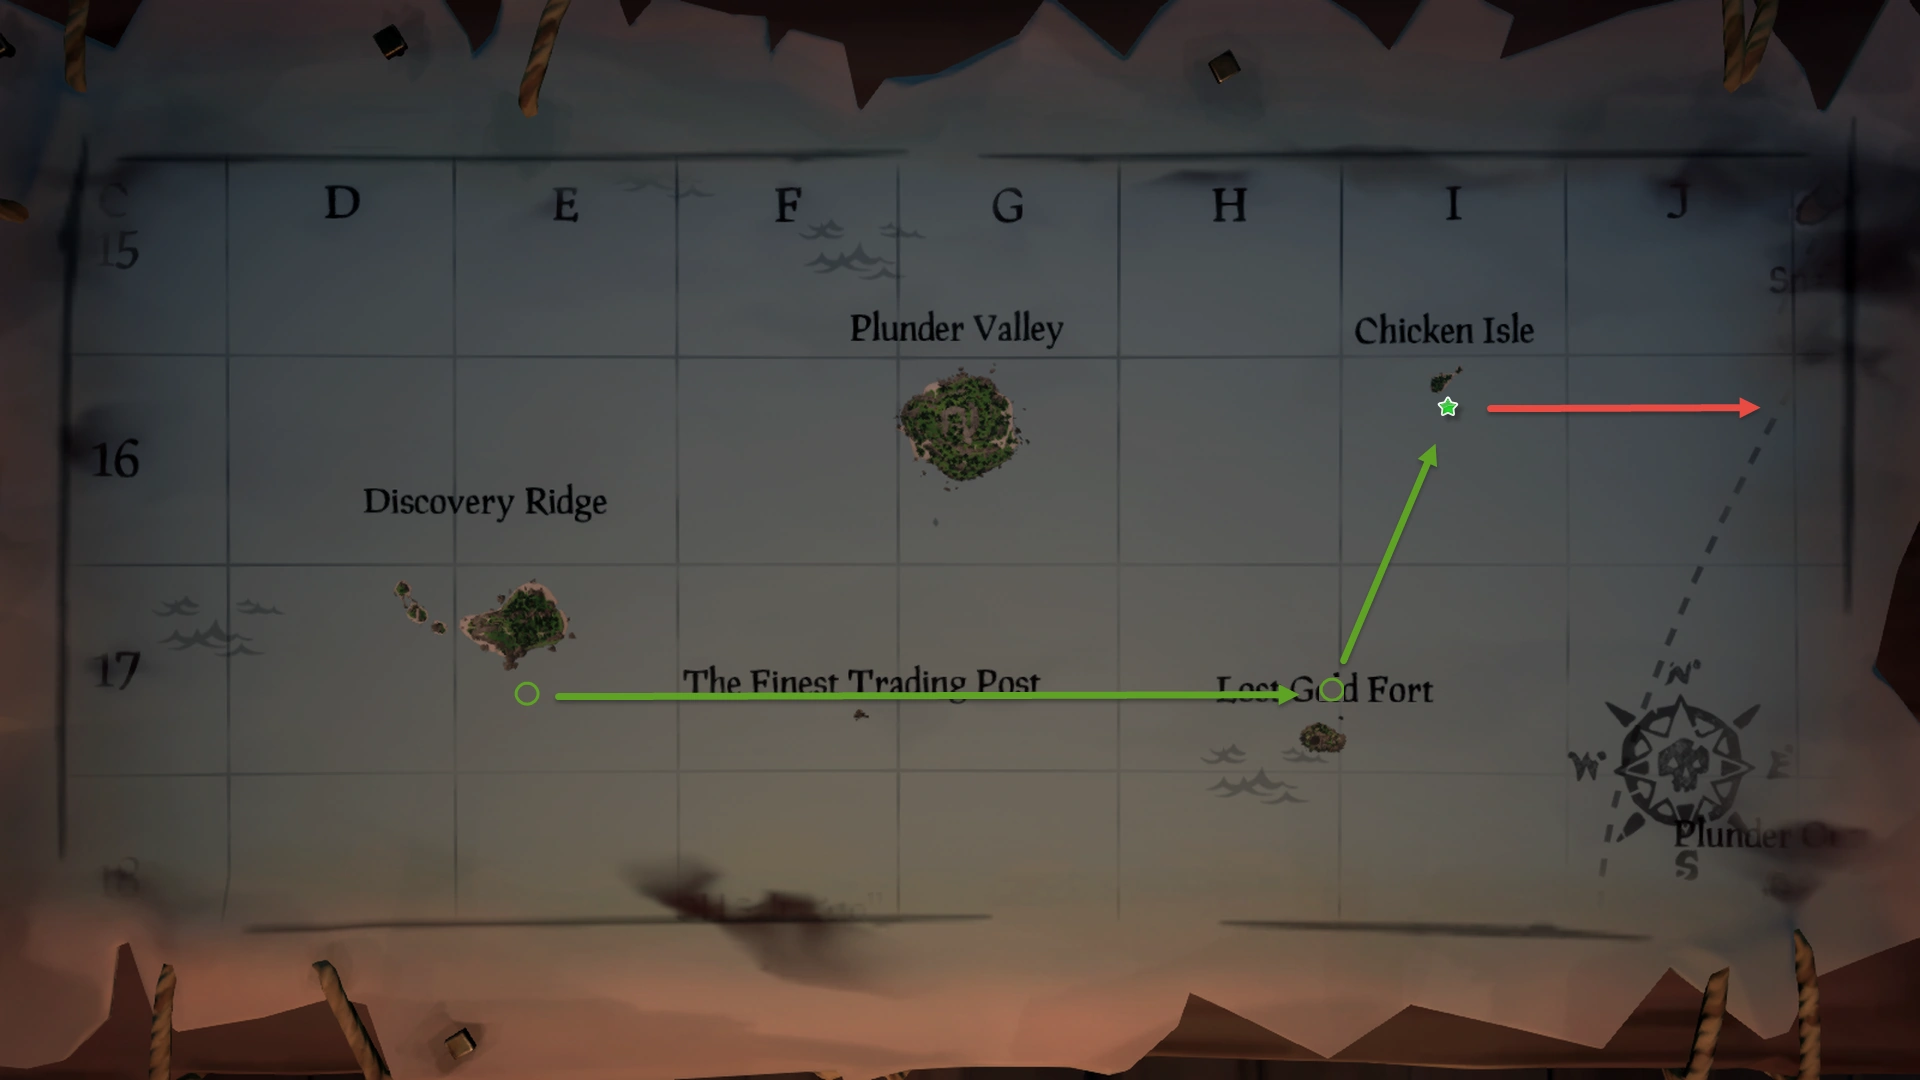
Ship's Log Clue for Chicken Isle.
Path to Chicken Isle.
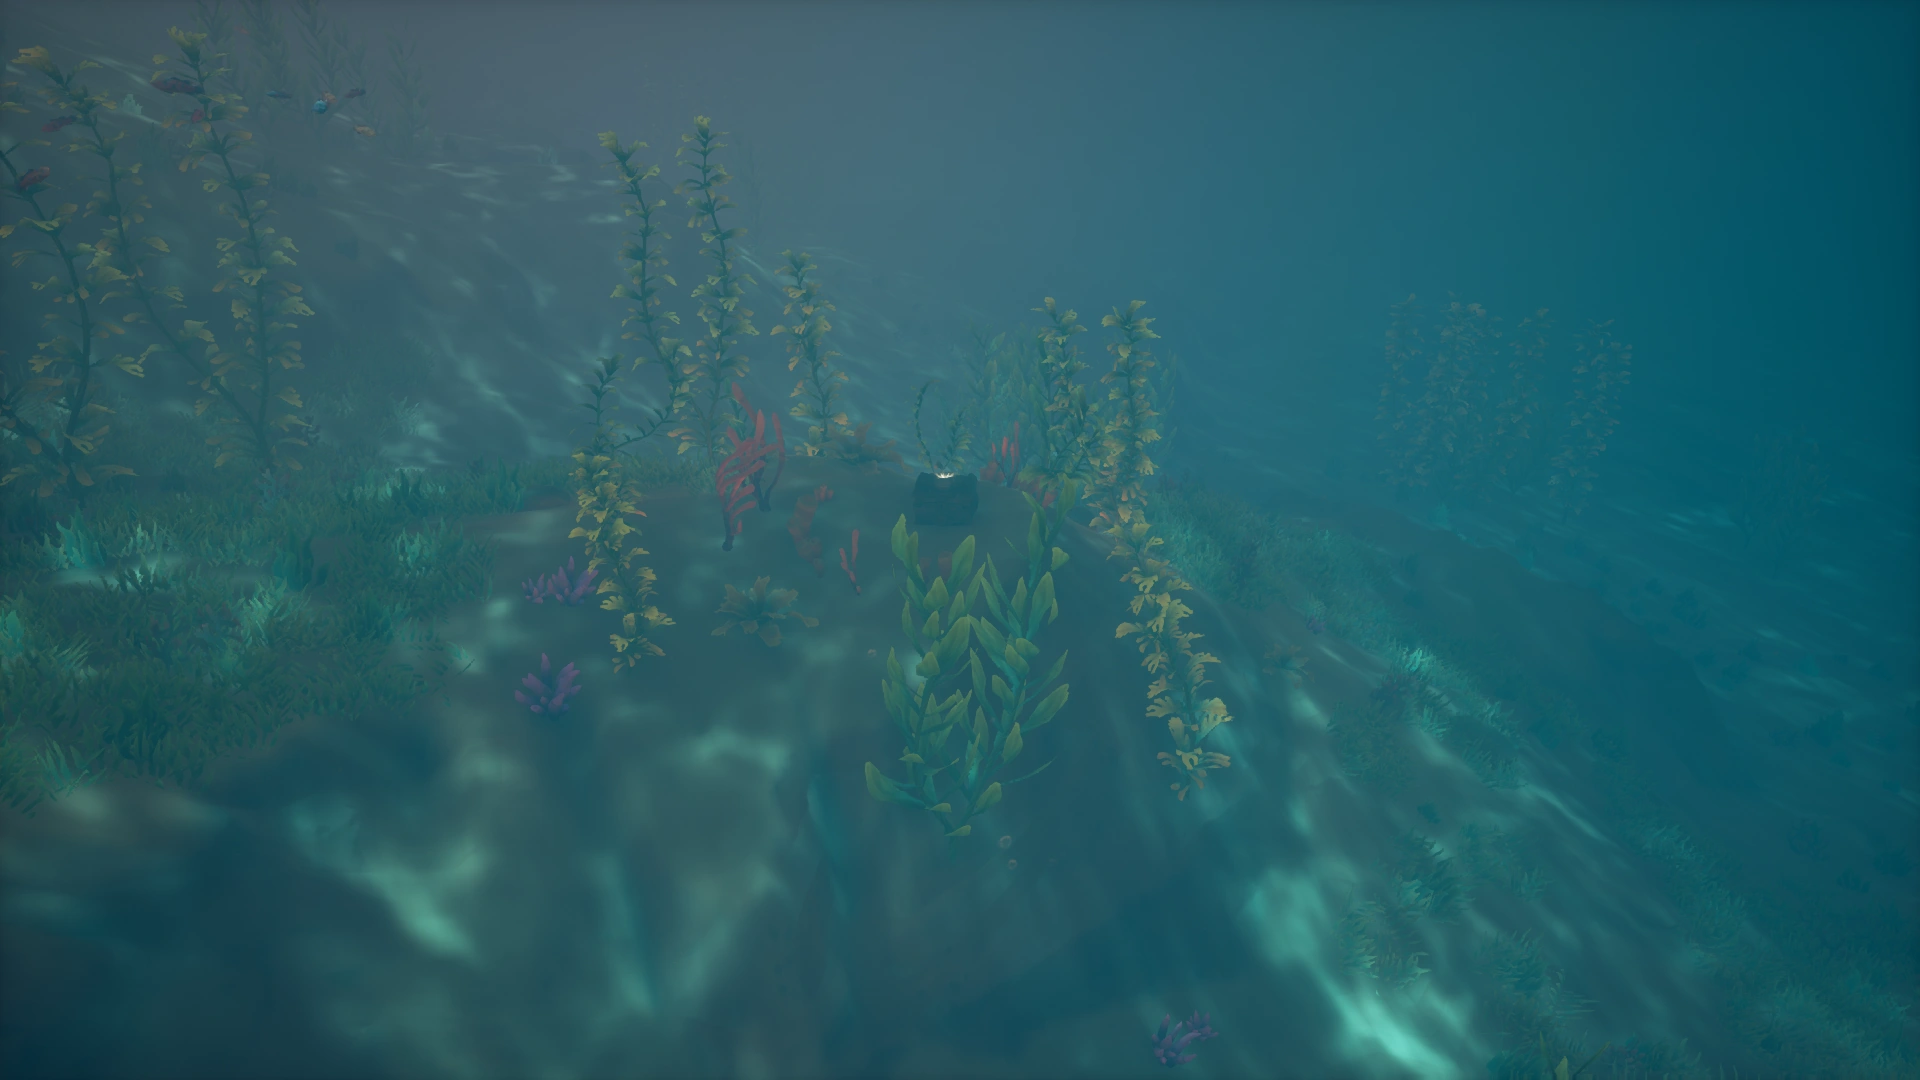
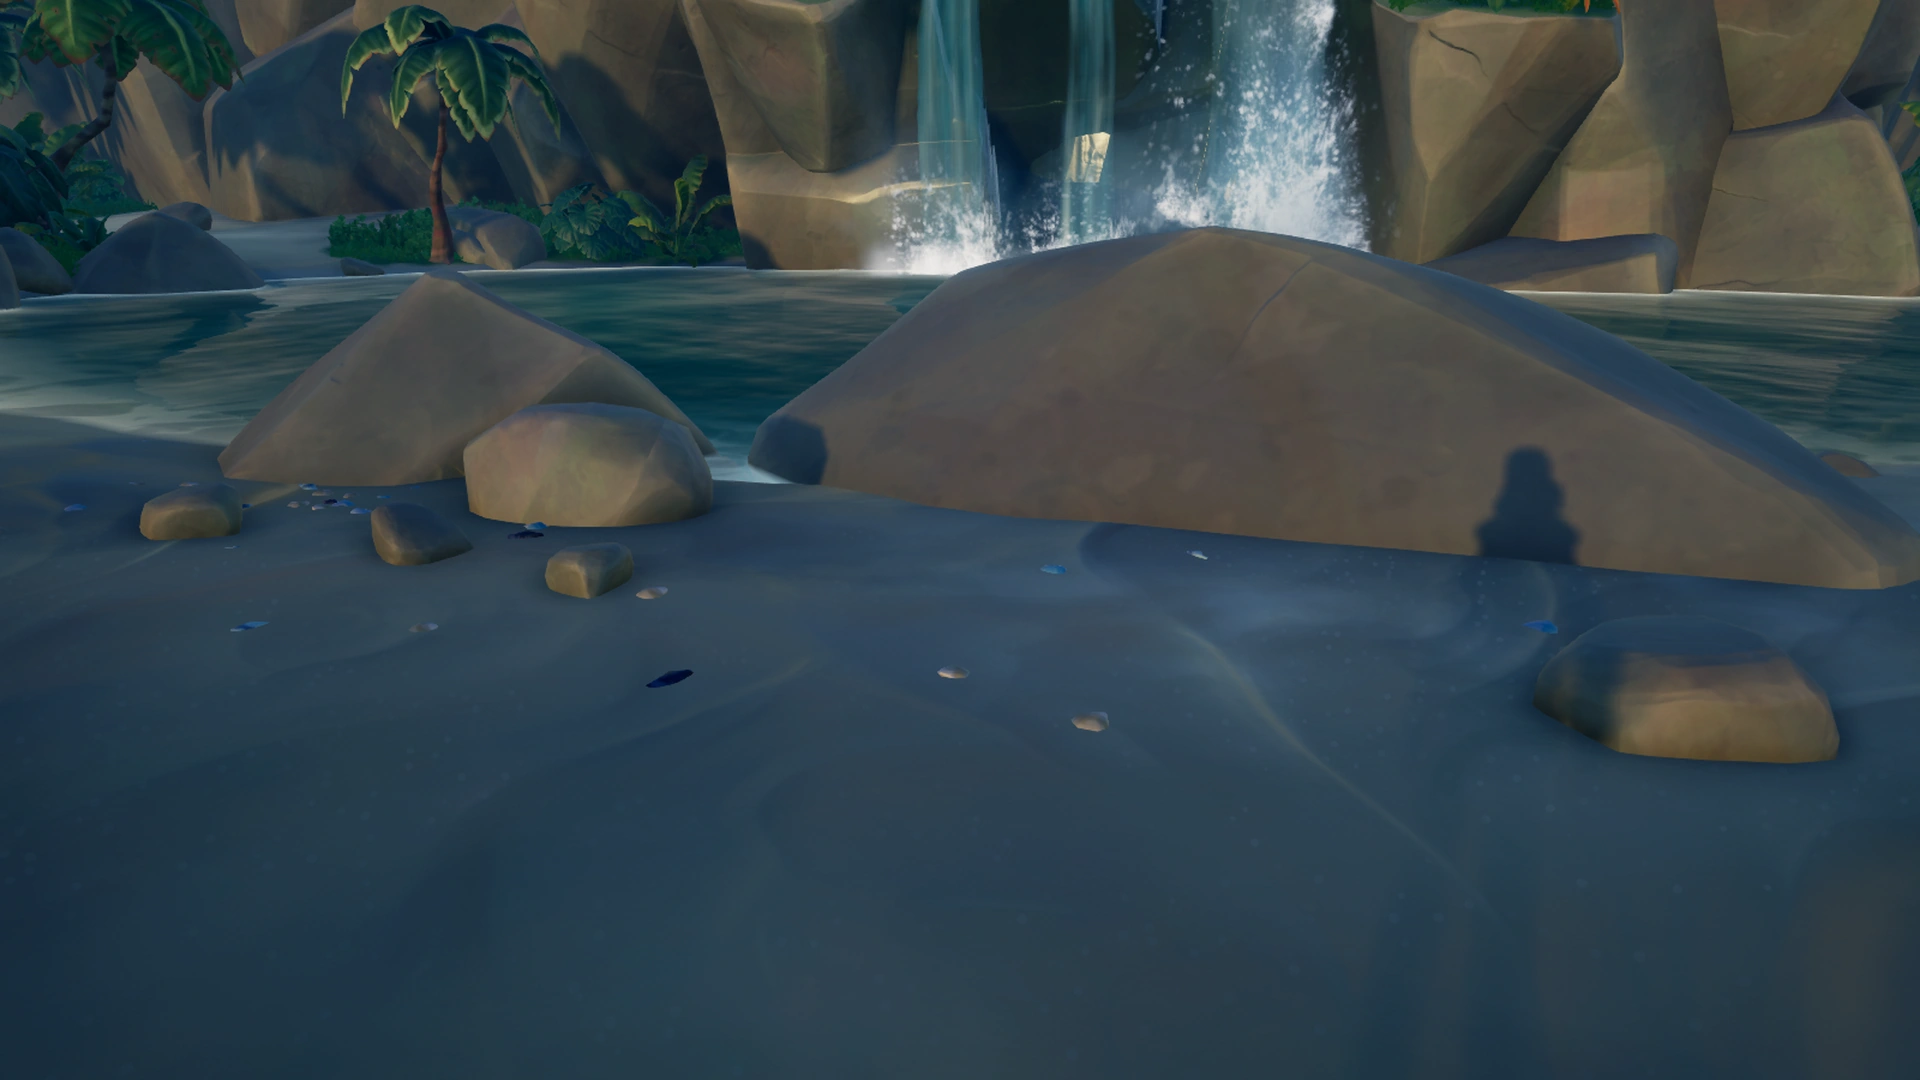
Once you have pin-pointed the Island where the Ancient Chest was thrown overboard at, look at the direction from the Island itself where the Chest is supposed to be dropped at. This may be described with Compass directions or simply Top or Bottom of the Island, signifying North and South respectively. Your next task is to swim towards the coast of that direction until you notice a White Glint in the sands. If you are having trouble locating the Glint, you may want to swim from different sides or to different distances, as the Chest can either be quite far from the shoreline, too close to notice the Glint, or hidden by structures and water foliage.
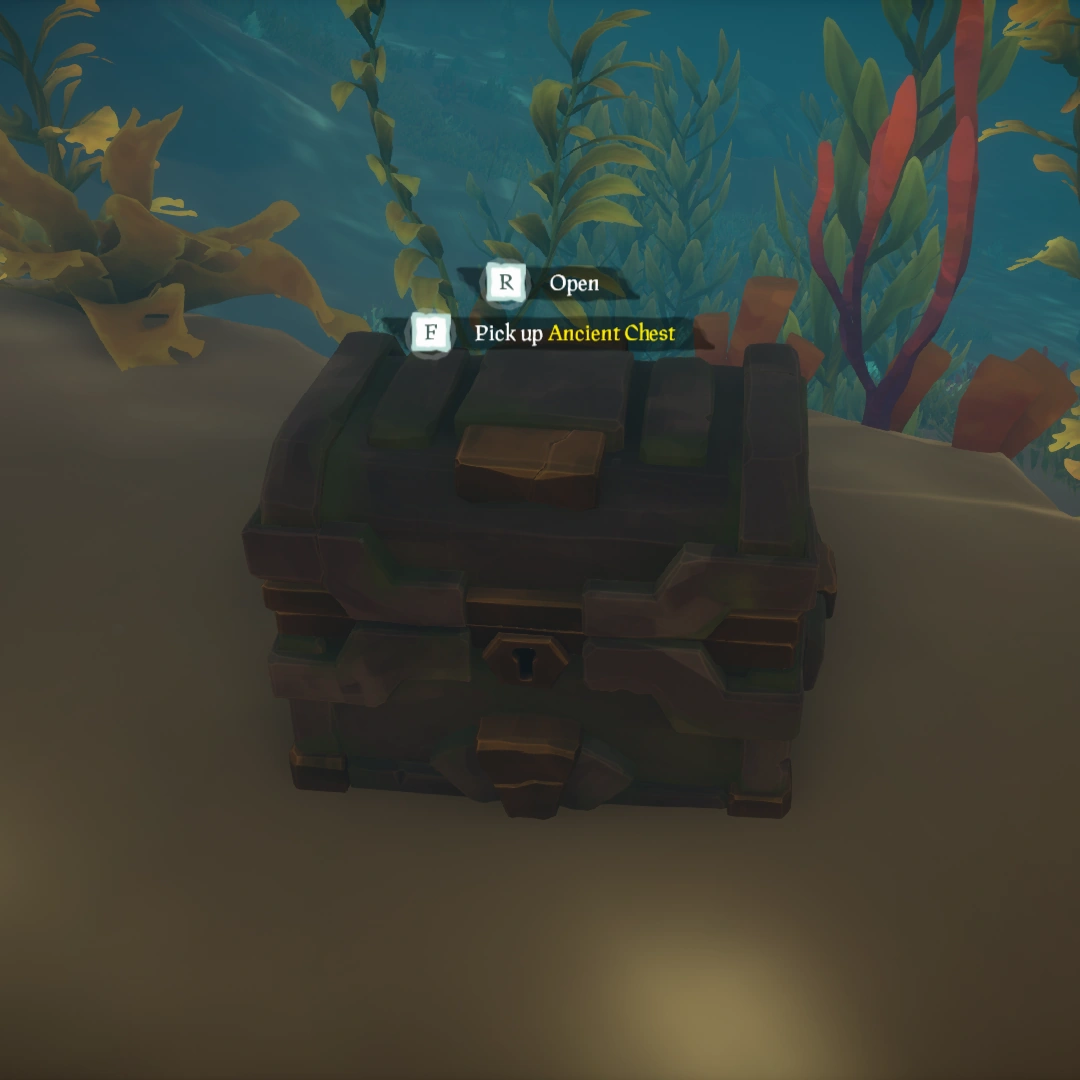
After you have located the submerged Chest, you can take it with you or open it and take the contents. The chest contains a random Vault Totem and additional Tale Book pages with clues regarding the Vault's location.
Image Guide[]
The Ancient Chest is lying on the ocean floor off of the marked island. Look for the white glint.
The Ancient Chest up close.
Vault of the Ancients[]
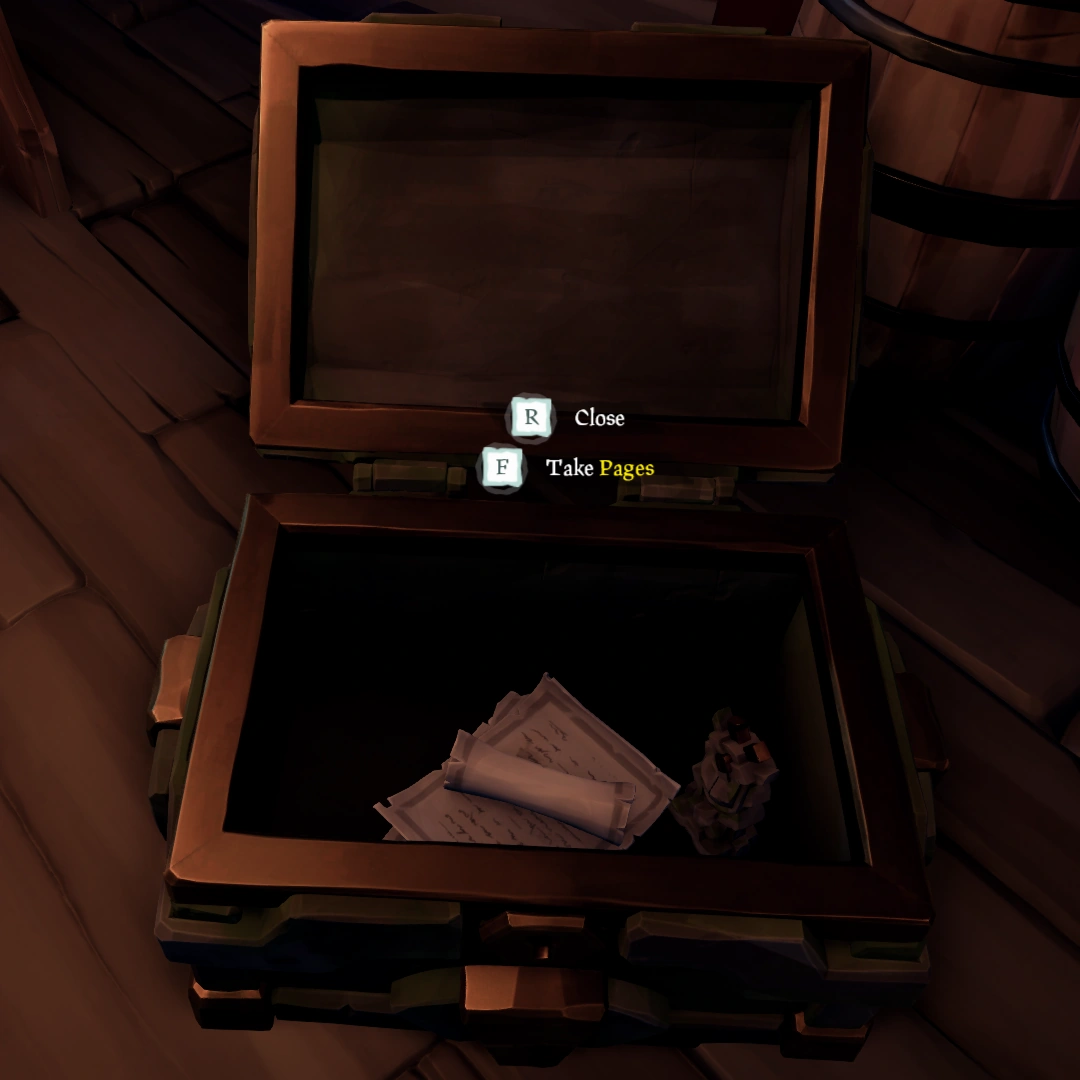
When you have acquired the Ancient Chest, you will find additional Tale Book pages and a Totem Key inside. The additional pages give you clues regarding the Totem Vault's location and cryptic hieroglyphs to help you solve the Puzzle of the Vault. The second Checkpoint of the Tall Tale is unlocked after picking up the Totem Key. When the second Checkpoint is voted for at the Voyage Table a Totem Key will appear on the Table.
Note: Now would be a good time to pick up Mercia's Journal #3 on Devil's Ridge and #4 hidden on Thieves' Haven.
The first item in the Ancient Chest should be additional Pages for your Tale Book.
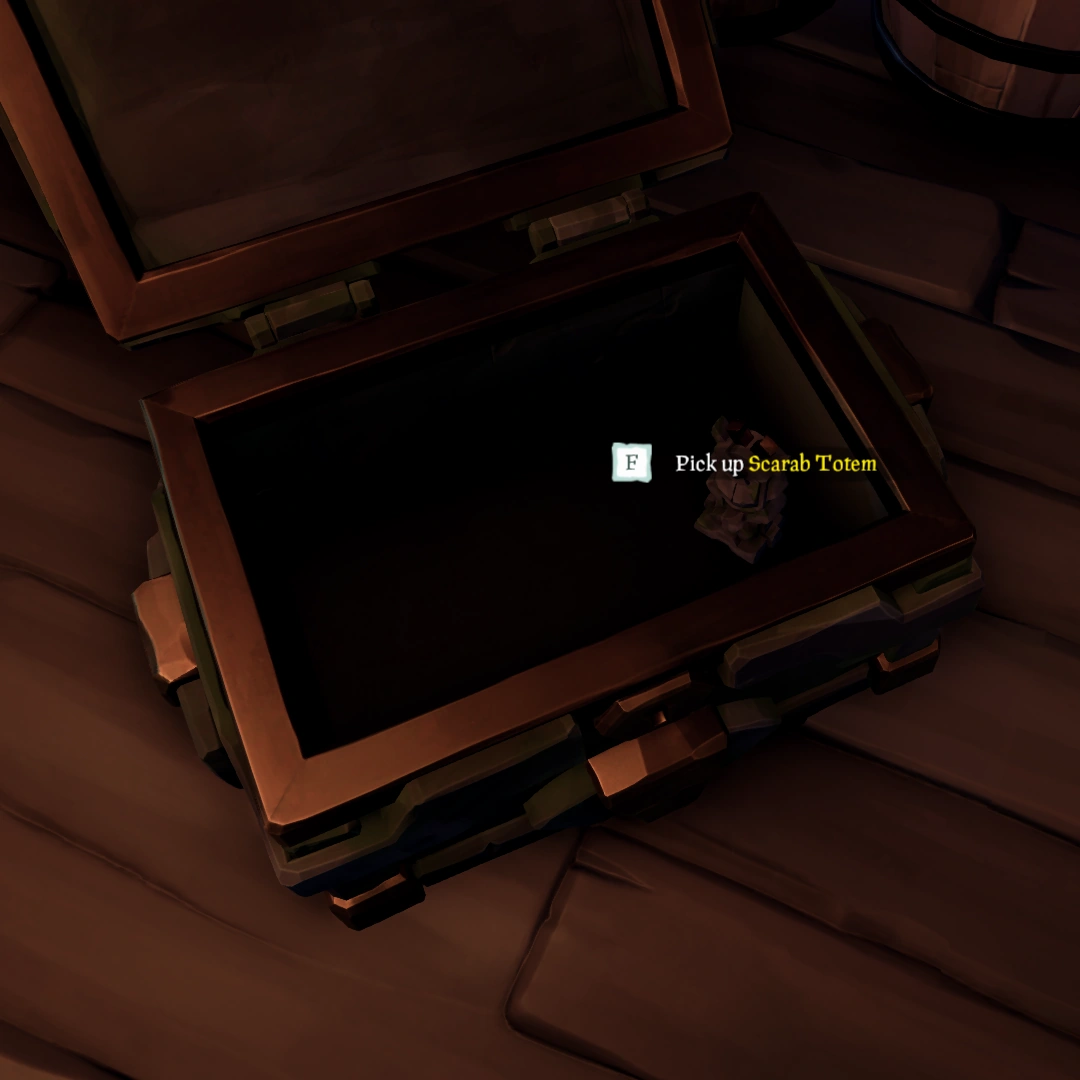
The second item will be the Totem Key needed to unlock the Vault, in this case the Scarab Totem.
There is a rough illustration of the Vault Key placed on a pedestal on the 4th page of the Tale Book.
The Scarab Totem in hand.
The Boar Totem in hand.
The Moon Totem Key
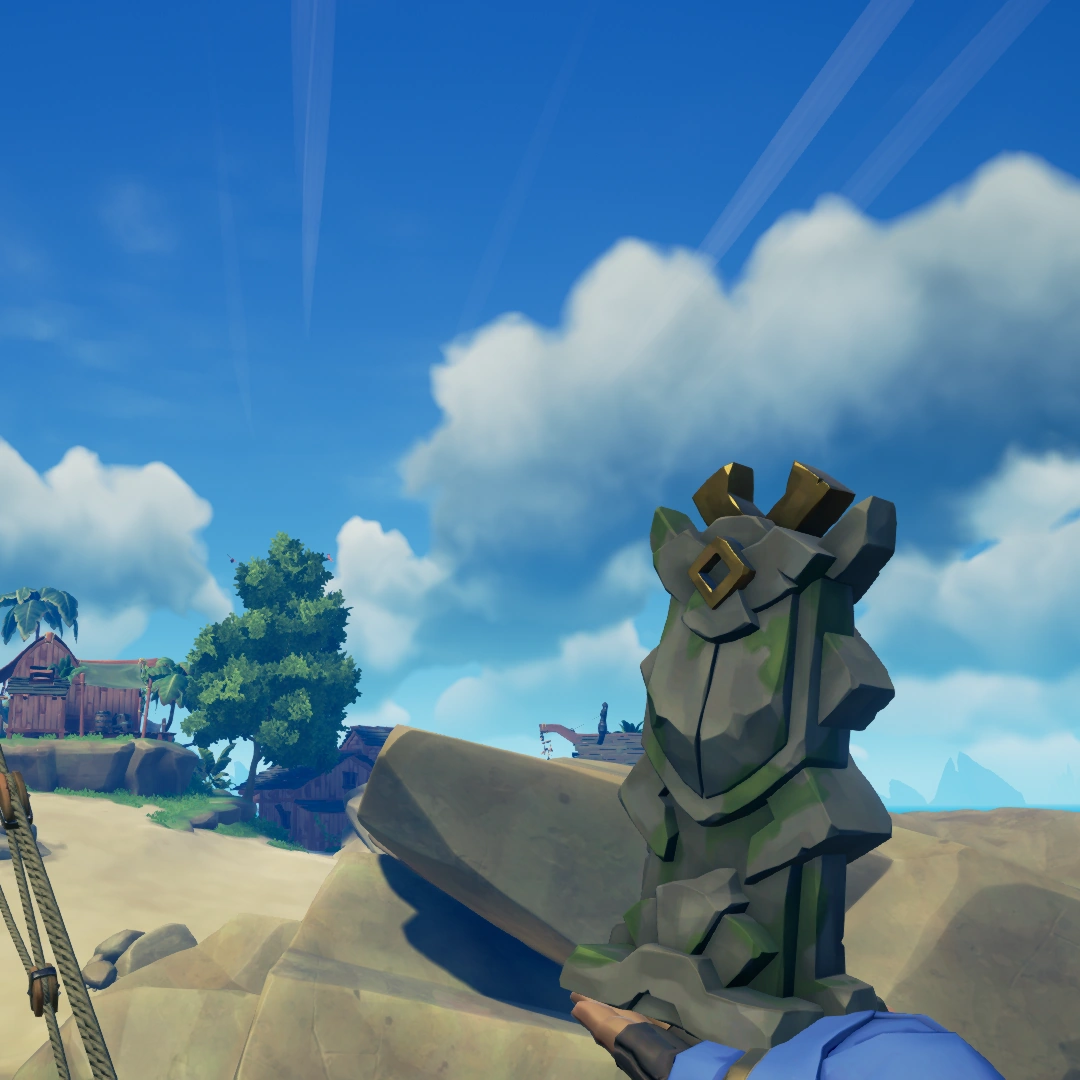
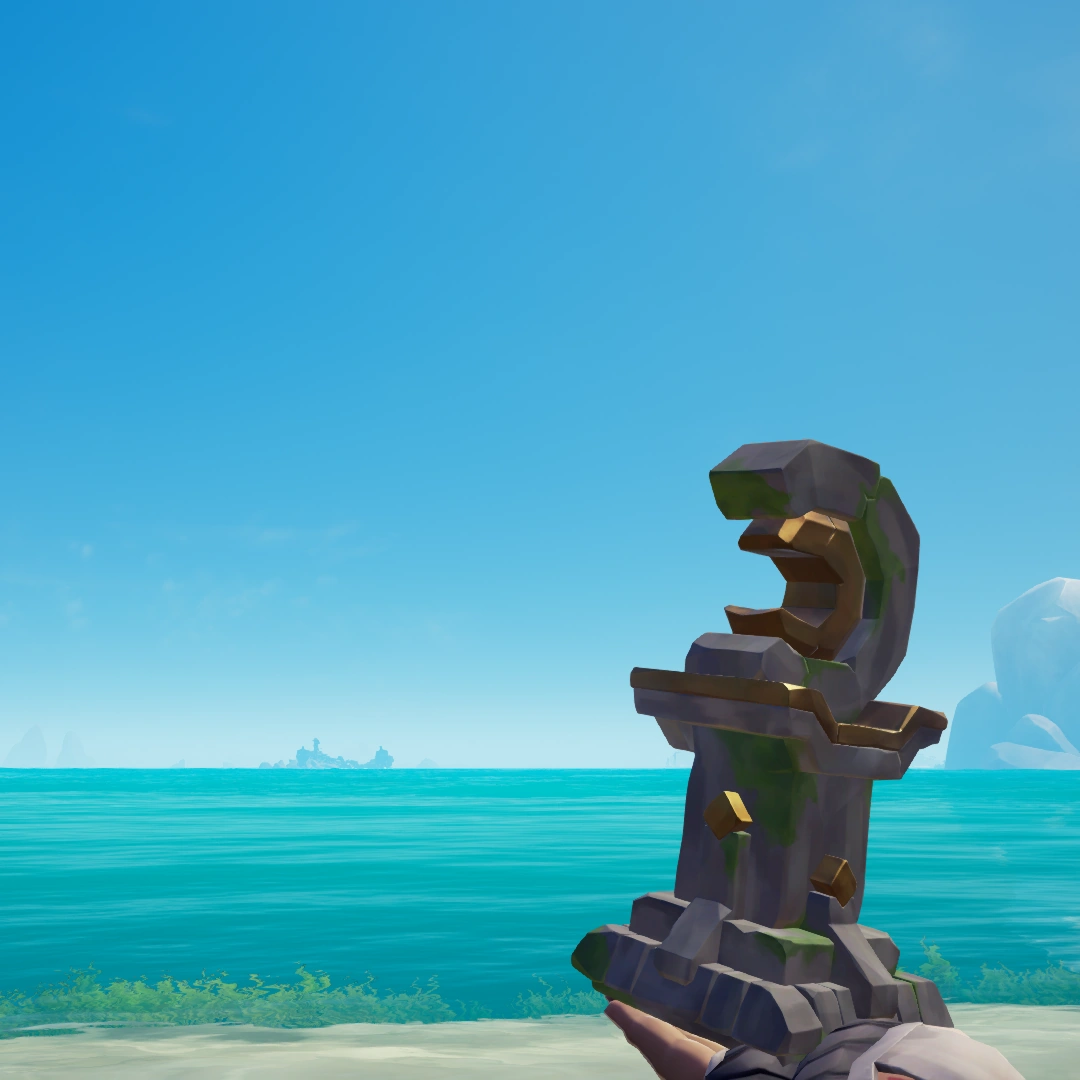
There are a total of 6 different Totem Keys and Totem Vaults that the player can acquire at this step of the Tall Tale. The possible Key items are: The Moon Totem, Scarab Totem, Snake Totem, Shark Totem, Crab Totem, Boar Totem. The first additional page of the Journal will clue you in on the Island of the Totem Vault matching the Totem Key.
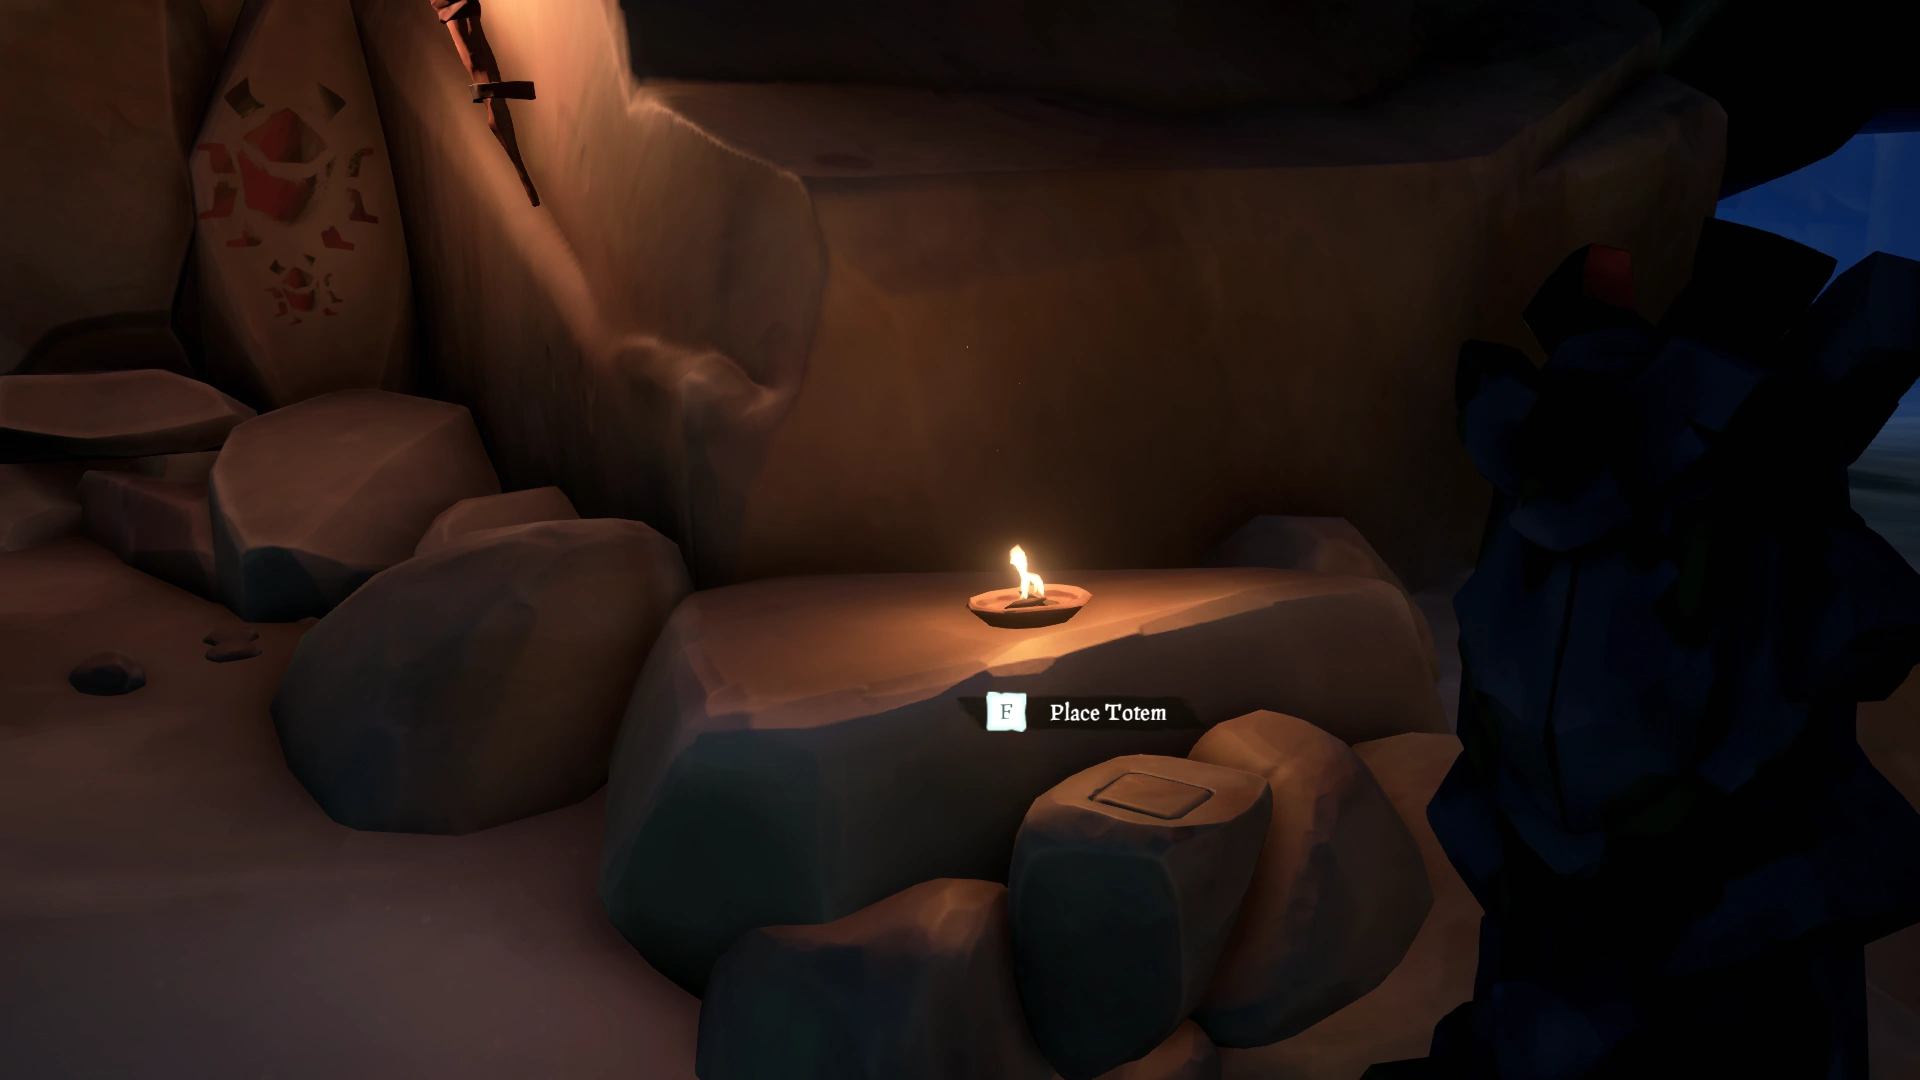
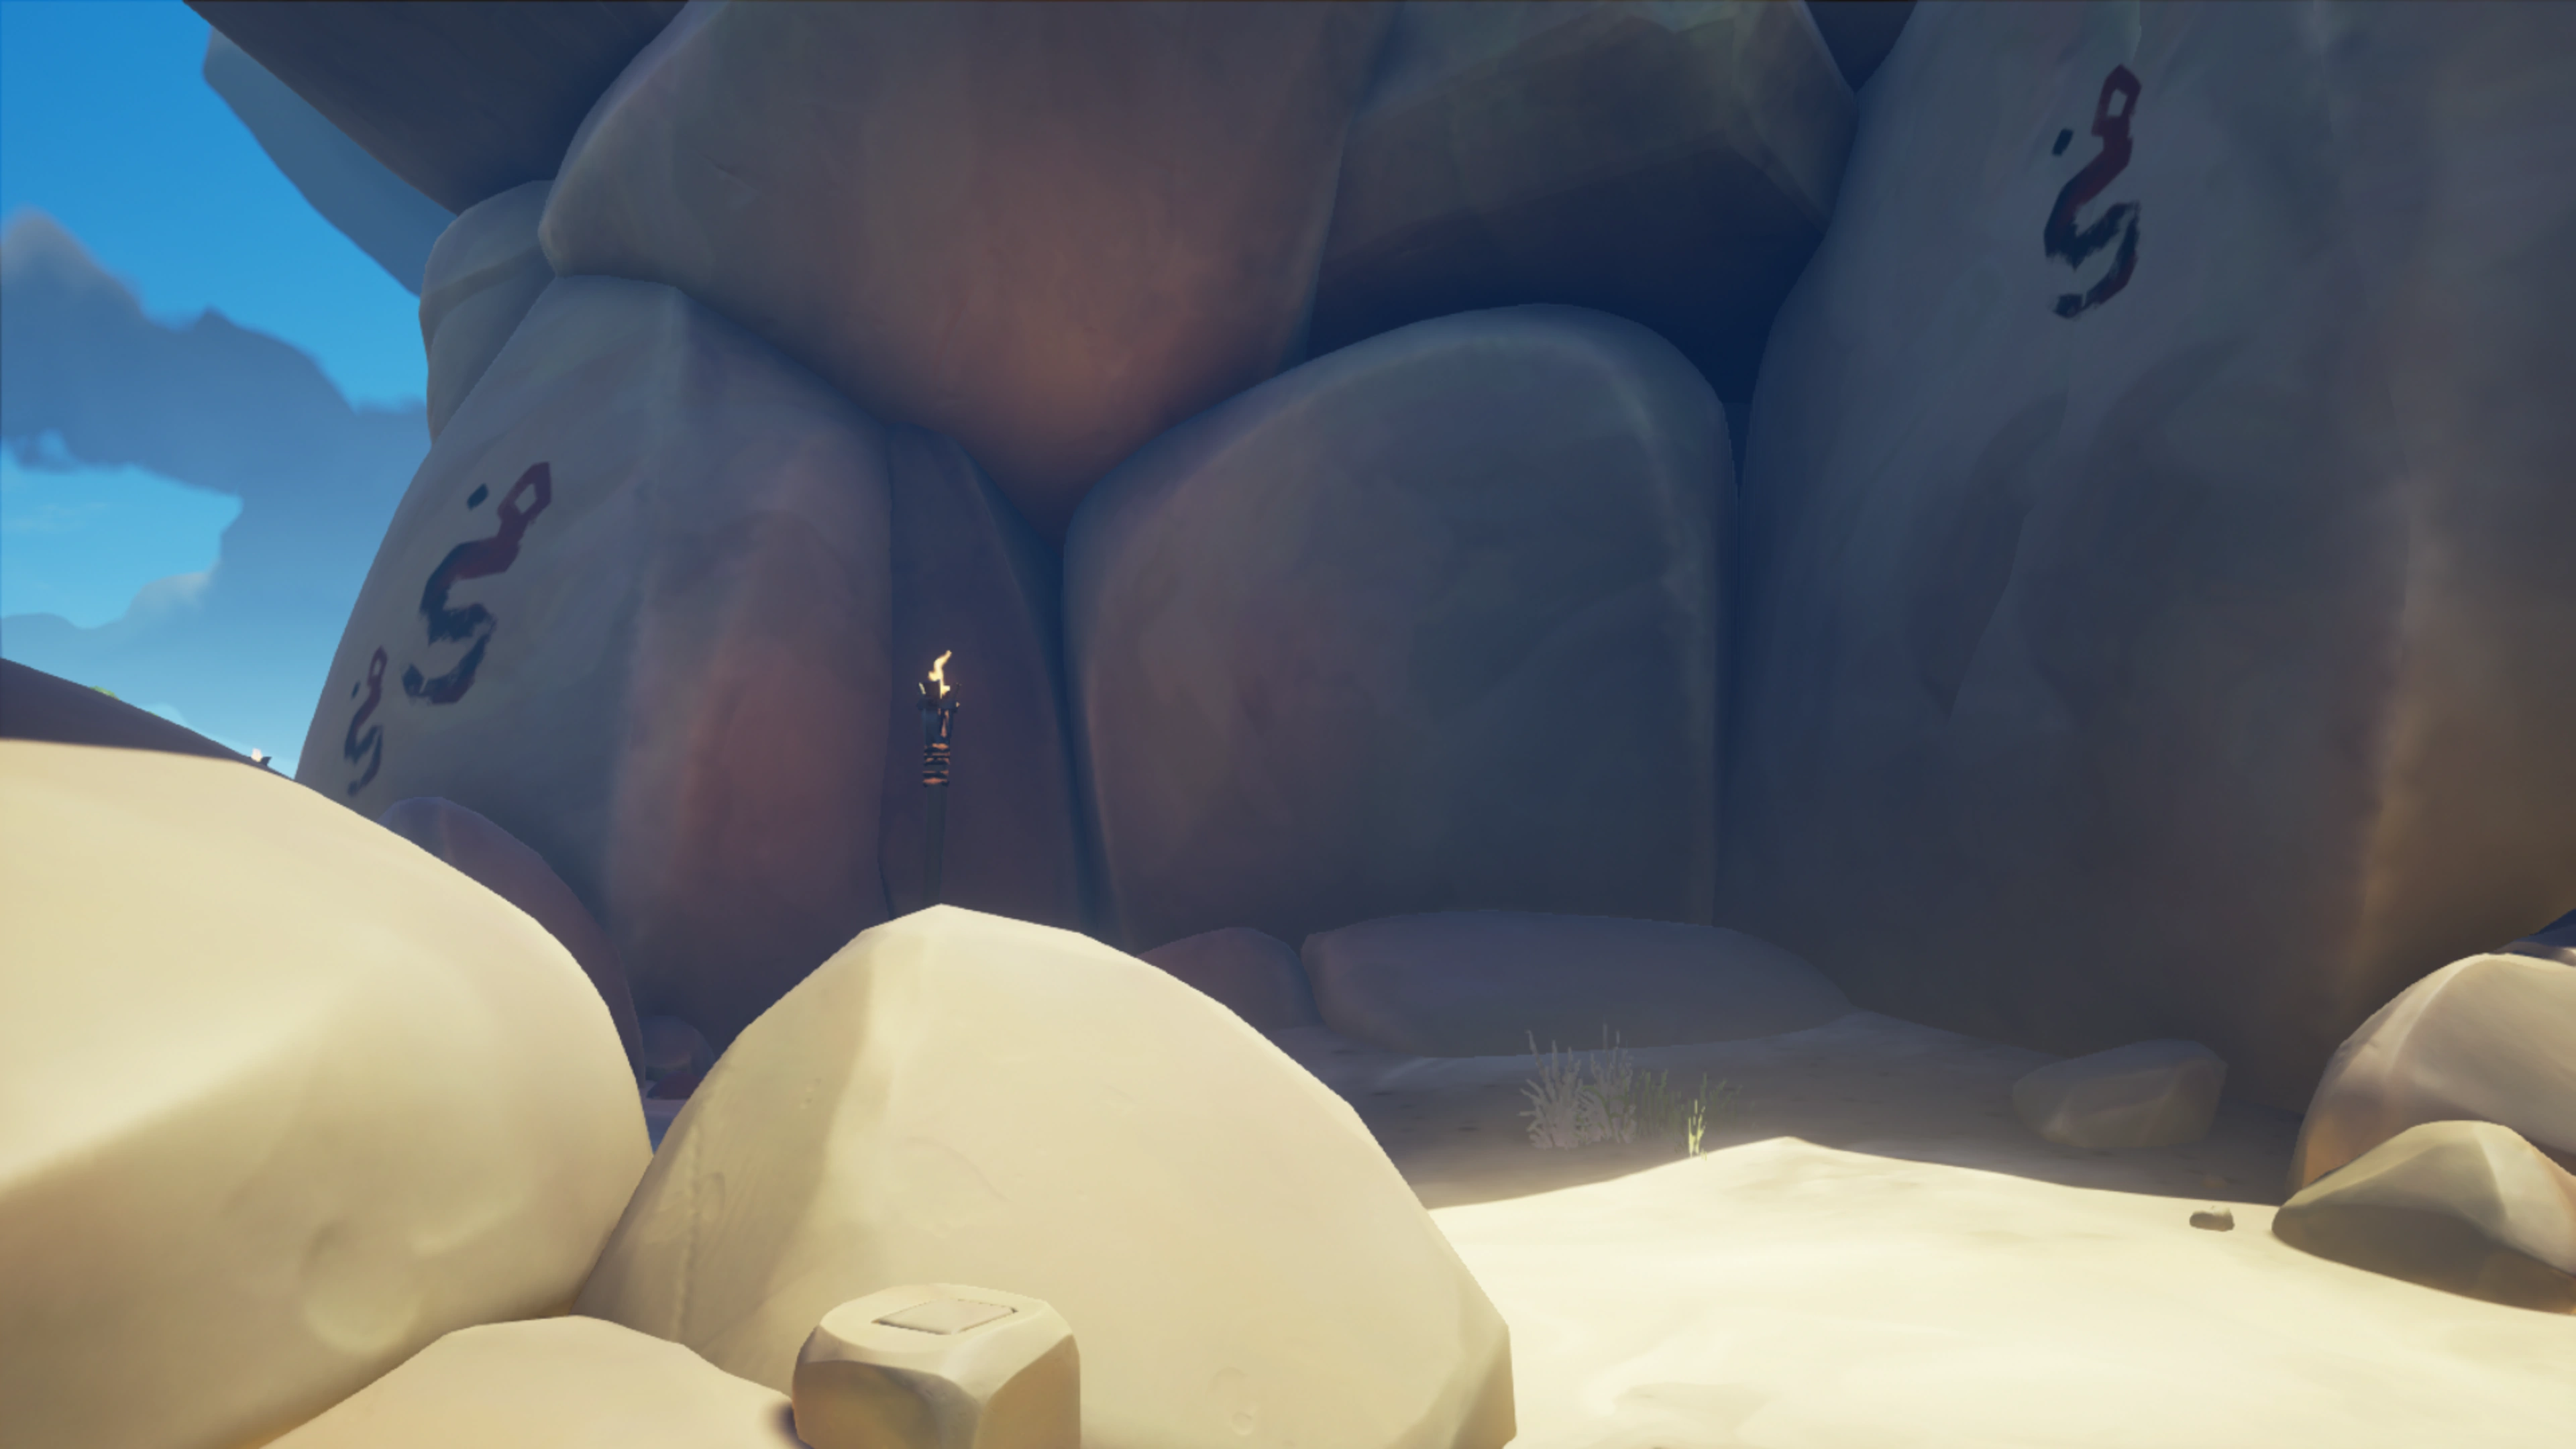
When you have located the Island you will have to look for the actual location of the Vault on the Island by following the Riddle in the Tale Book and searching for the matching Cave Paintings. All of these locations have a well-hidden square shaped rock Totem Pedestal where the Totem Key can be placed to open the Totem Vault.
Note:This Tall Tale always defaults to the Scarab Totem Key and Scarab Totem Vault on Crook's Hollow, however when another Crew is doing this Tall Tale, the Crew will be given a different Totem Key and Island to go to.
Finding and opening the Totem Vault will unlock the Vault of the Ancients Commendation.
Hints[]
Look at the first additional Tale Book page. It highlights the Large Island you should be looking for. Find it on the Map Table! The most common vault is the Scarab vault at Crook's Hollow!
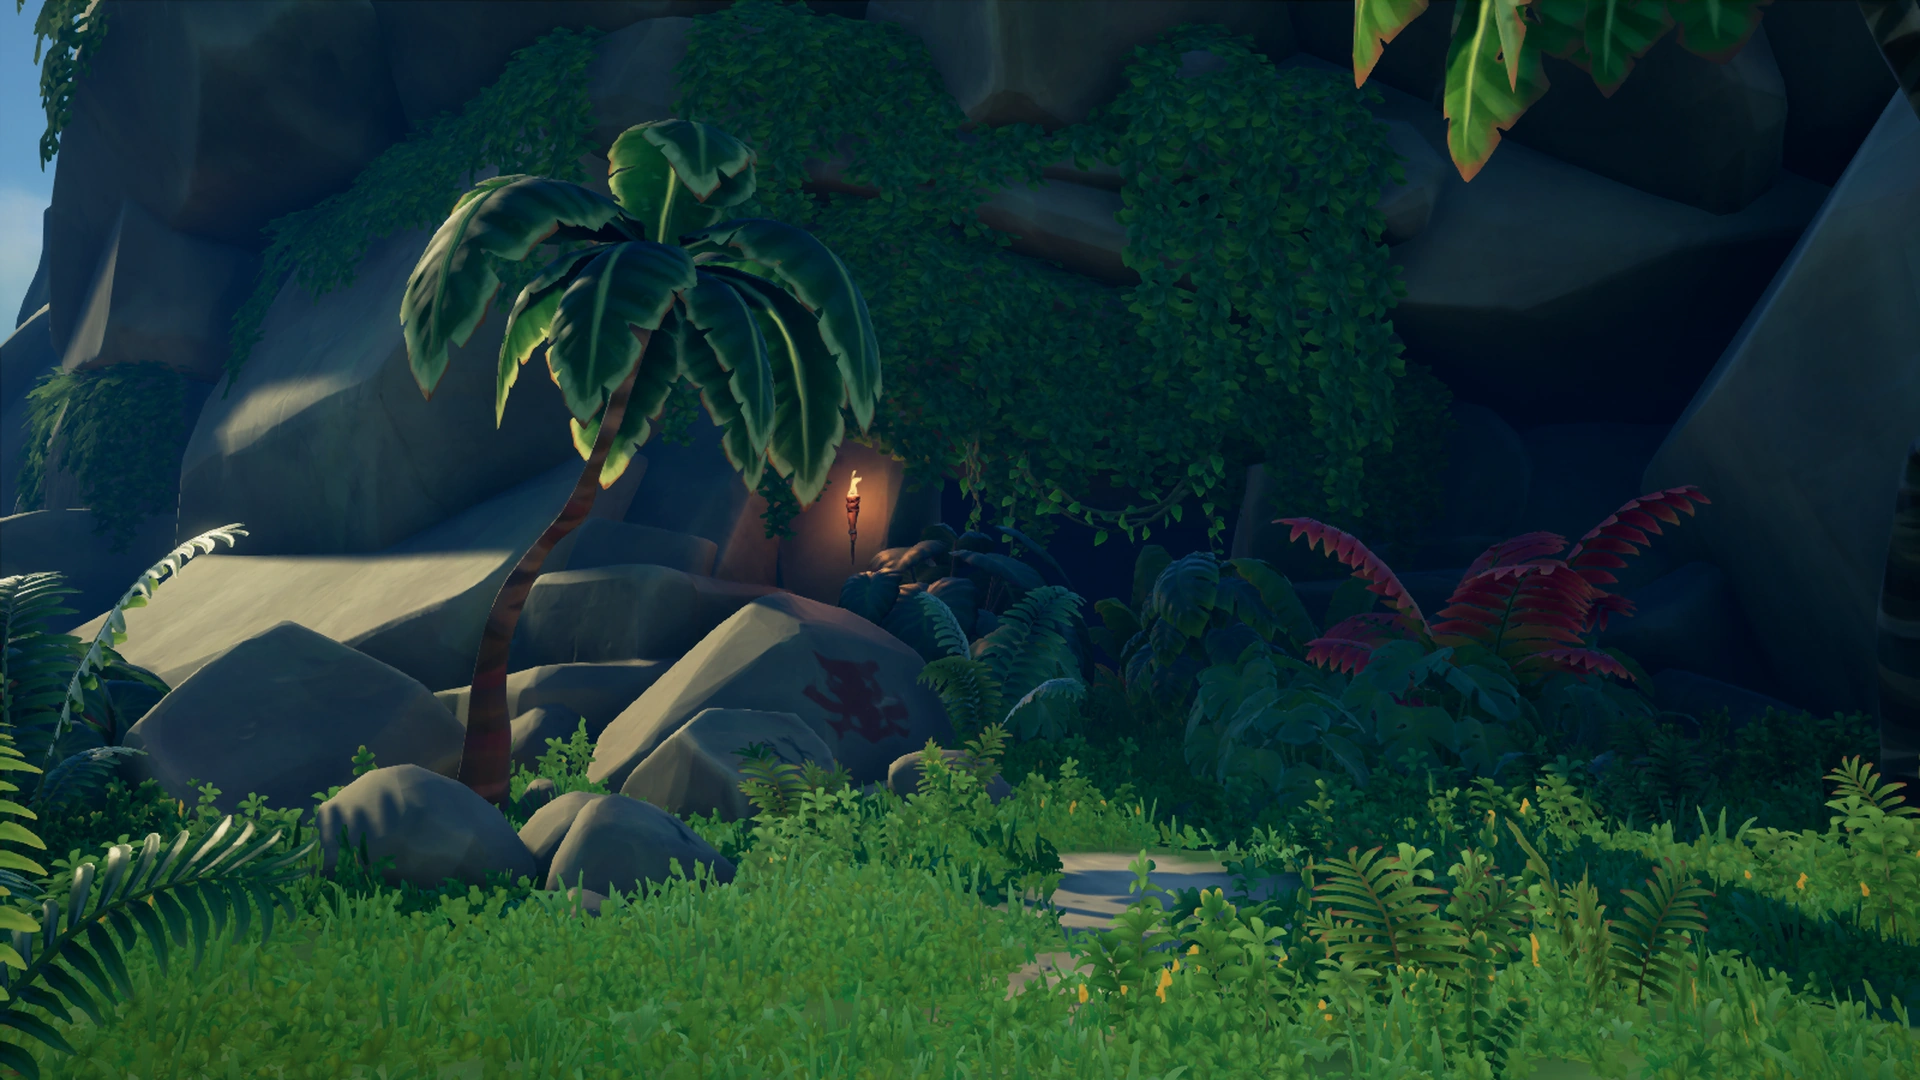
You have all the clues on the first additional Tale Book page. There is a riddle for the location and small sketches of matching cave paintings close to the Vault! If you are still stumped, look below for the walkthrough section with detailed locations of the Vaults. The most common Vault is the Scarab Vault on Crook's Hollow by the waterfall.
Okay, so the Totem pedestal or the "keyhole" is always hidden among rocks. There is a rough illustration on the 4th page of the Tale Book. Look for a small Totem sized square shaped carving on the rocks. If you have trouble, hold the Totem in your hand and look for button prompts to place it to make it easier. See the Gallery section below the walkthrough to see what it should look like.
CLICK FOR WALKTHROUGH AND GALLERY
|
|---|
Walkthrough[]
So at this point, you will have two new additional Tale Book pages and a specific Totem Key. The first additional page will tell you most everything you need to know for this part. It will highlight the island with the specific Totem Vault for your Totem Key with a riddle for its location and paintings of the Totem itself. You can find the location of all the Vaults in the table below:
| Totem | Vault | Island | Location |
|---|---|---|---|
| Scarab Totem | Scarab Vault | Crook's Hollow | Southern cave wall close to the waterfall. |
| Moon Totem | Moon Vault | Crescent Isle | Inside the Northern side of the Cave system. |
| Snake Totem | Snake Vault | Mermaid's Hideaway | Under the North Western Arch. |
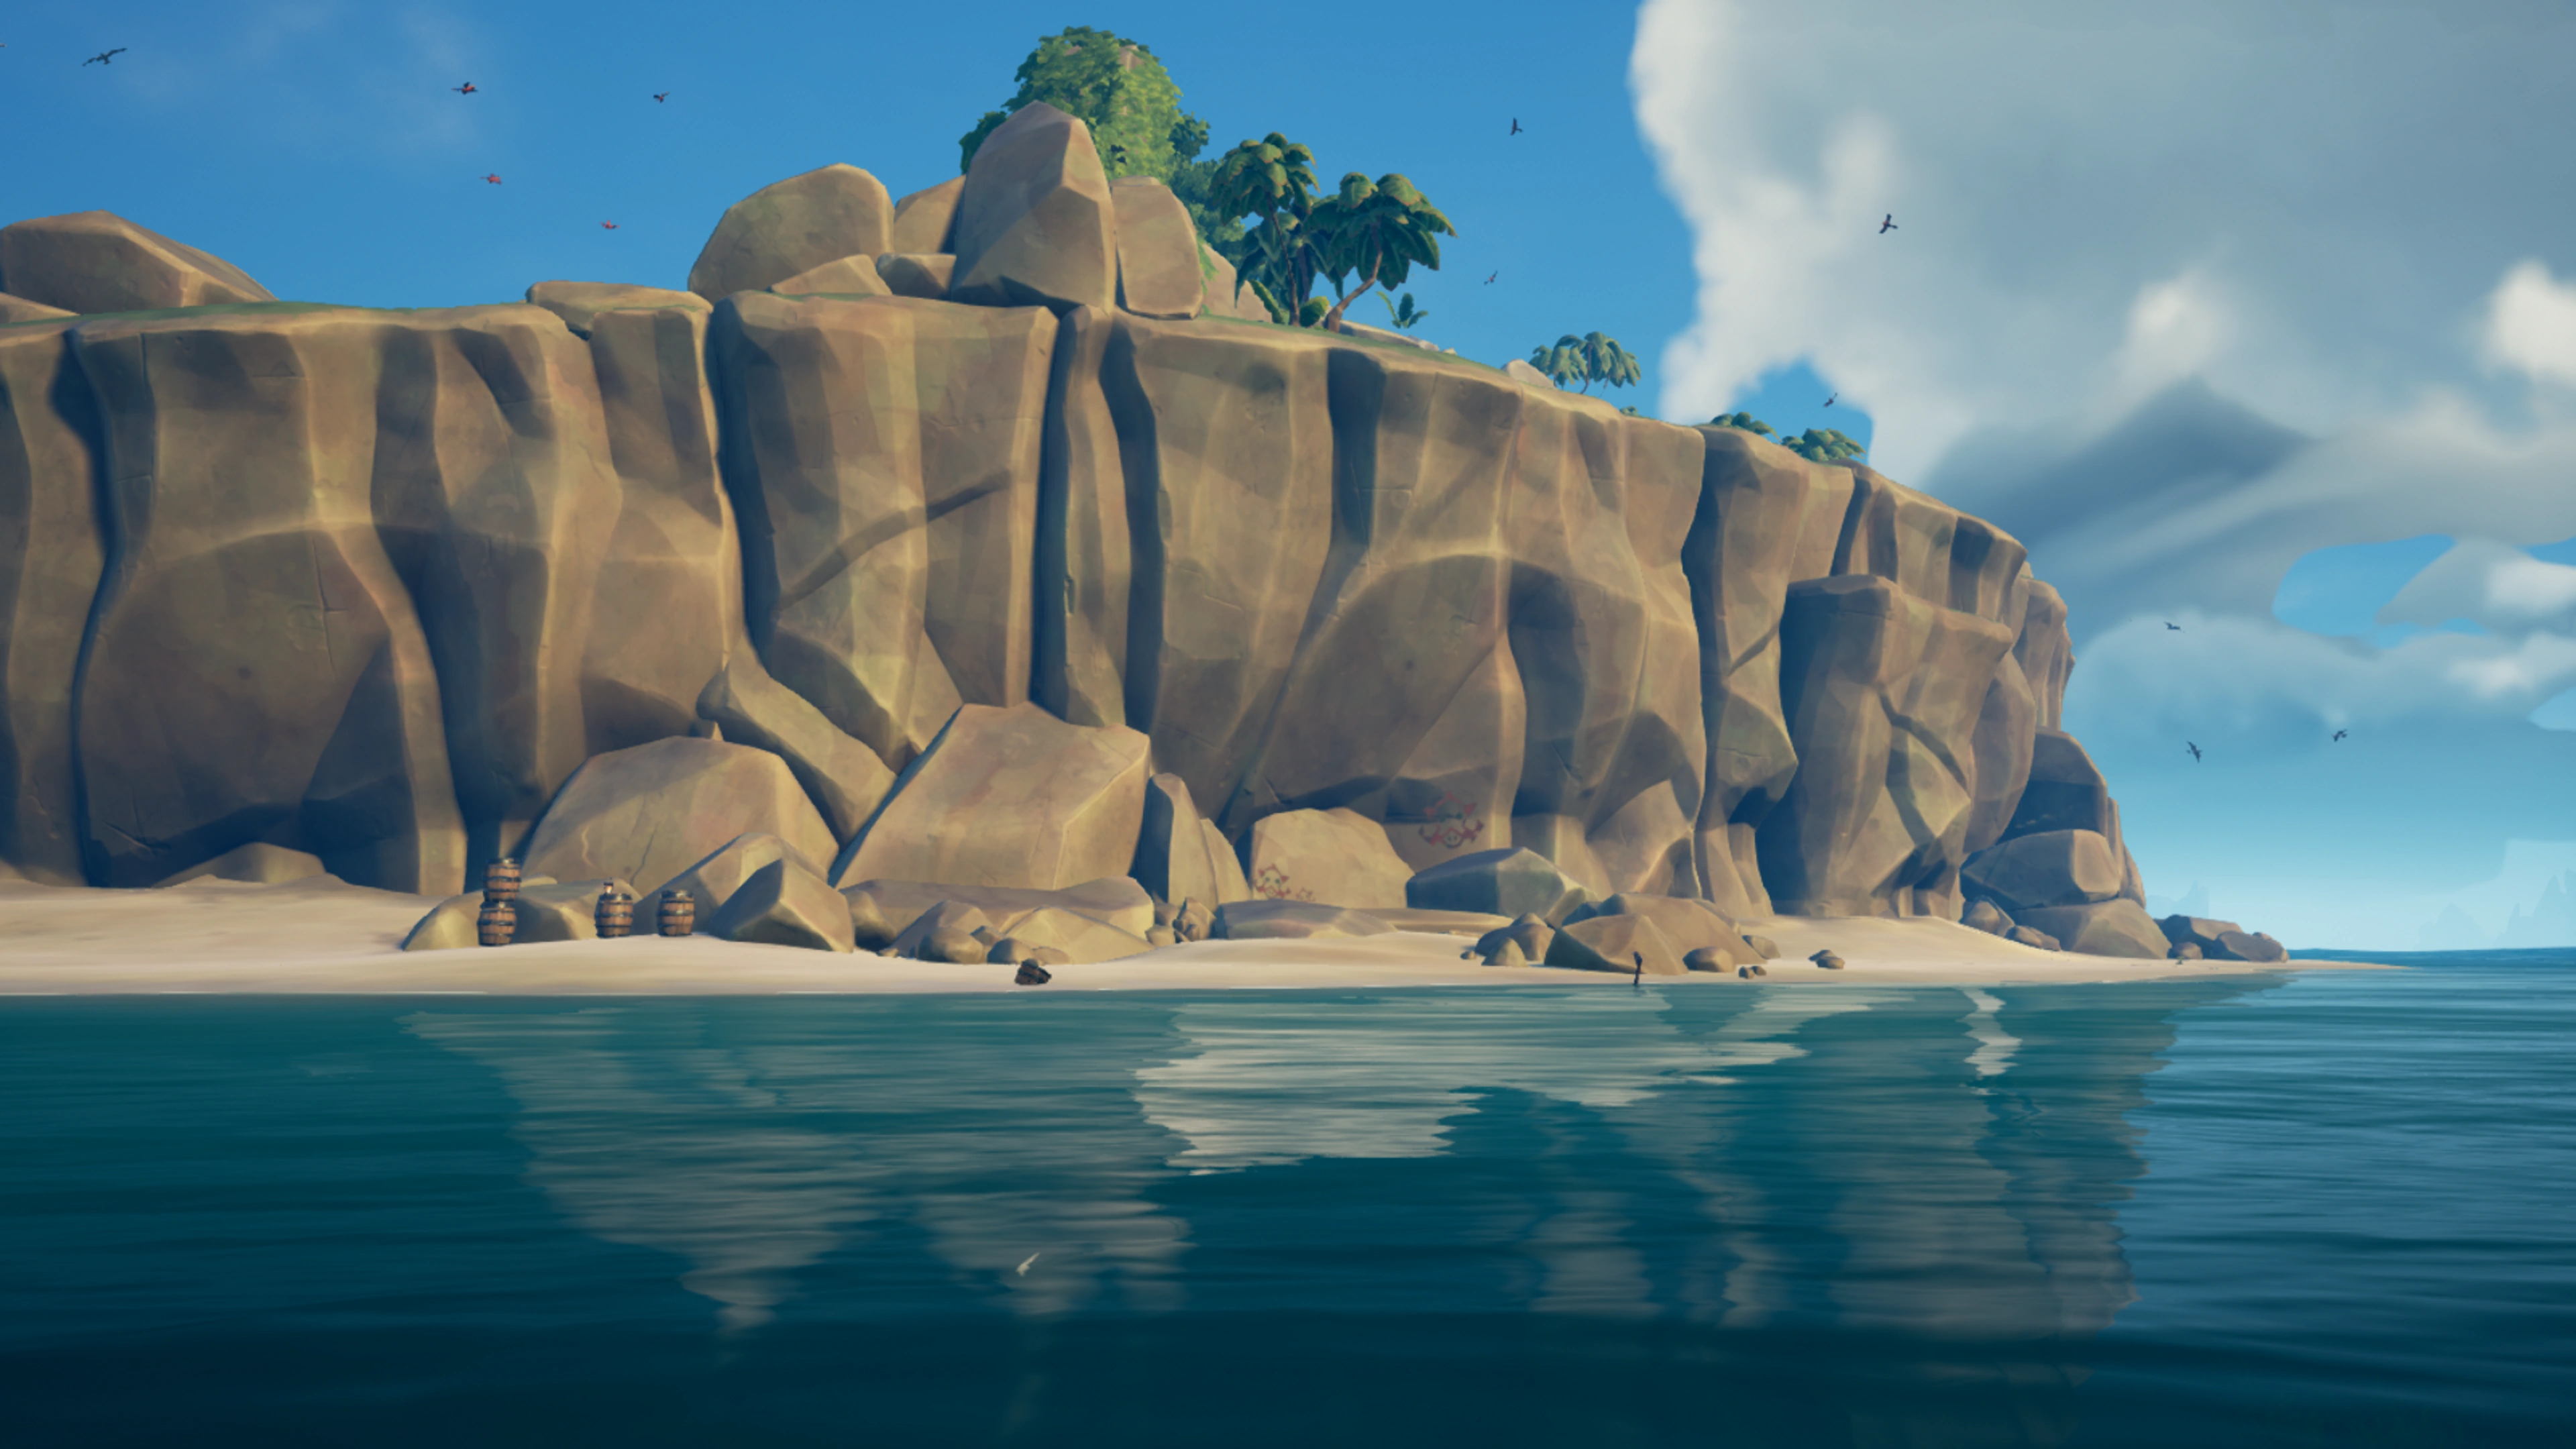
| Boar Totem | Boar Vault | Devil's Ridge | Amidst rocks on the South East beach. |
| Shark Totem | Shark Vault | Kraken's Fall | Amidst rocks to the North under the big Arch. |
| Crab Totem | Crab Vault | Uncharted Island (N-13) | In an underwater cave hidden among the coral reefs. |
Every Vault has 'Cave Paintings matching the Totem close to its location to show you that you are at the right place. Now you need to search for the "Keyhole". This keyhole is going to be a small square-shaped carving on a smaller stone pedestal. The keyhole is mostly hidden in or among rocks close to the Cave Paintings. If you look in the direction of the keyhole, it will give you a "Key needed to unlock" prompt (see Gallery below). The keyhole is easier to find if you hold the Totem Key in hand and try looking around for the prompt to Place the Totem to appear (see Gallery below).
The Tall Tale gives you the Scarab Totem by default, requiring you to go to the Scarab Vault on Crook's Hollow. Other Totem Keys and Island Vaults can be received if there is already a Crew doing the first Tall Tale on that server.
Image Guide[]
Click Expand to see the exact locations of each Totem Vault below:
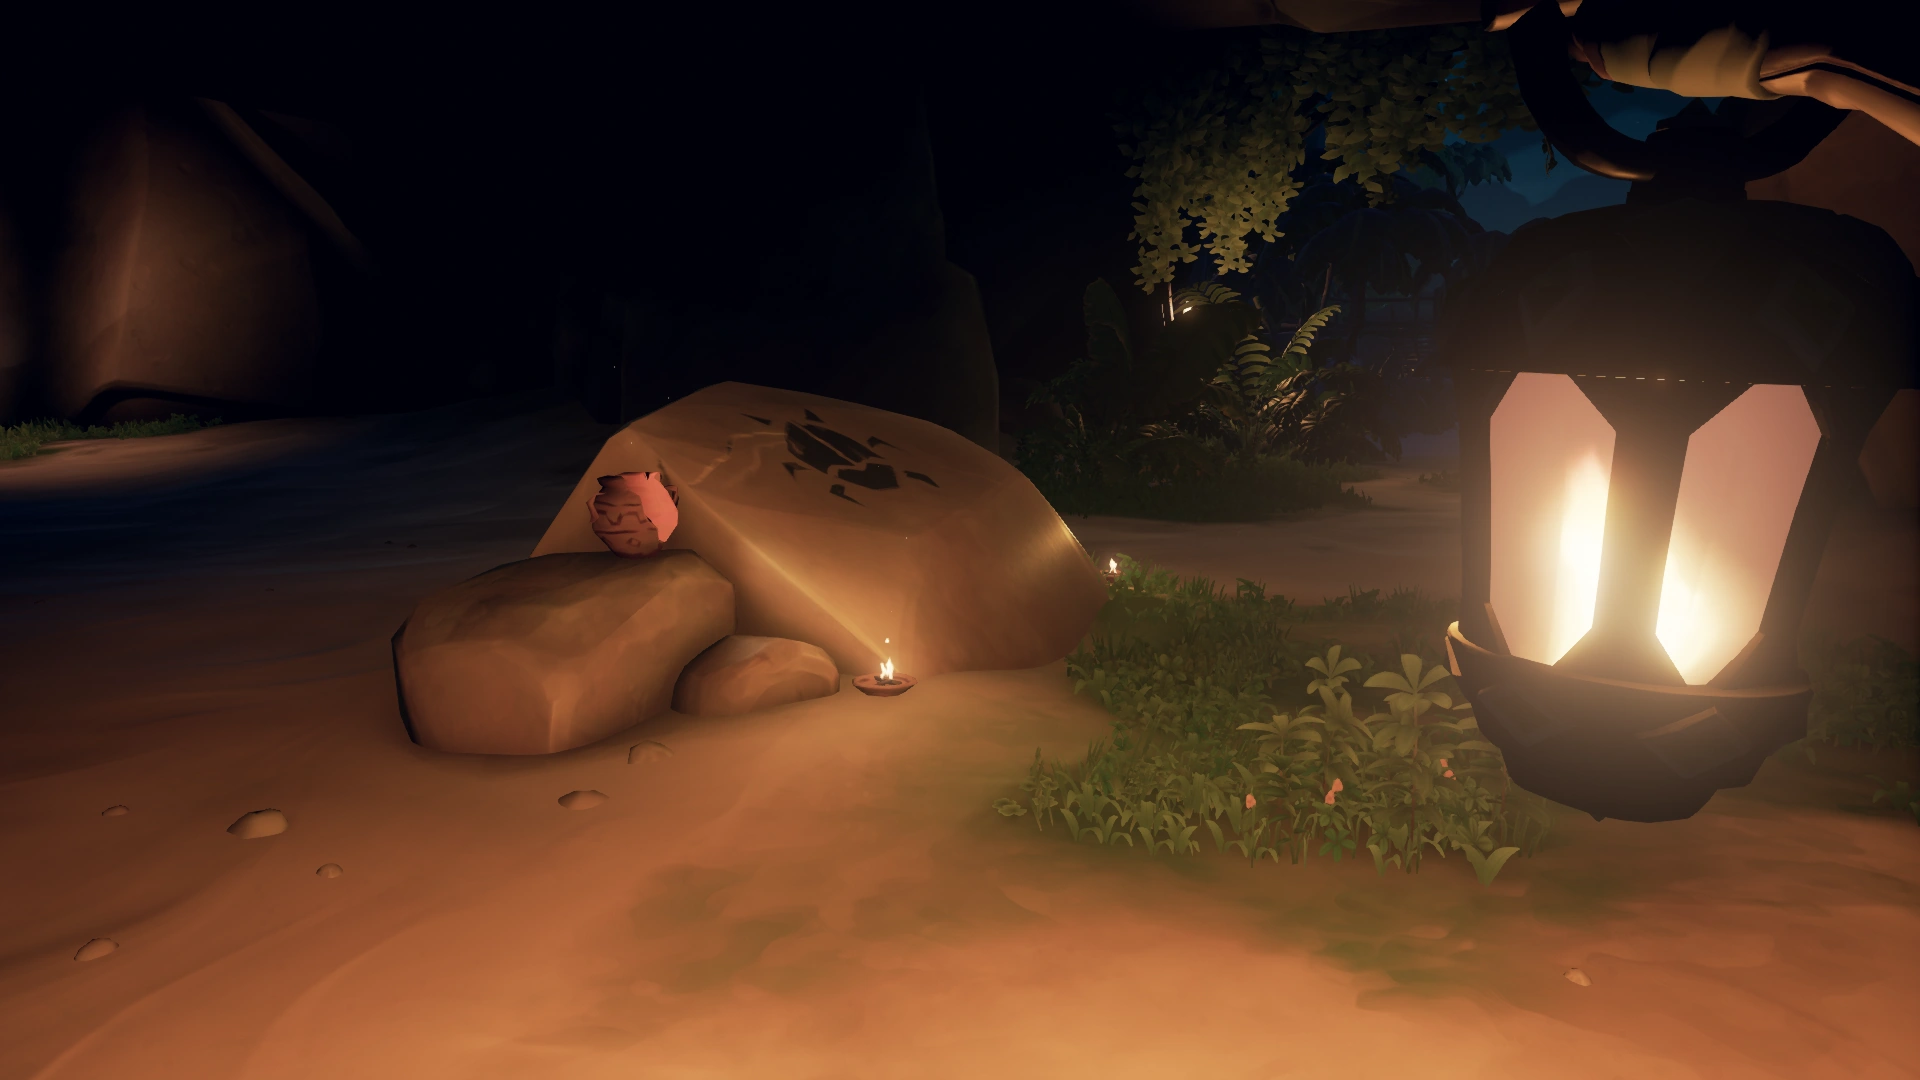
Island: Crook's Hollow
The Scarab Totem Key.
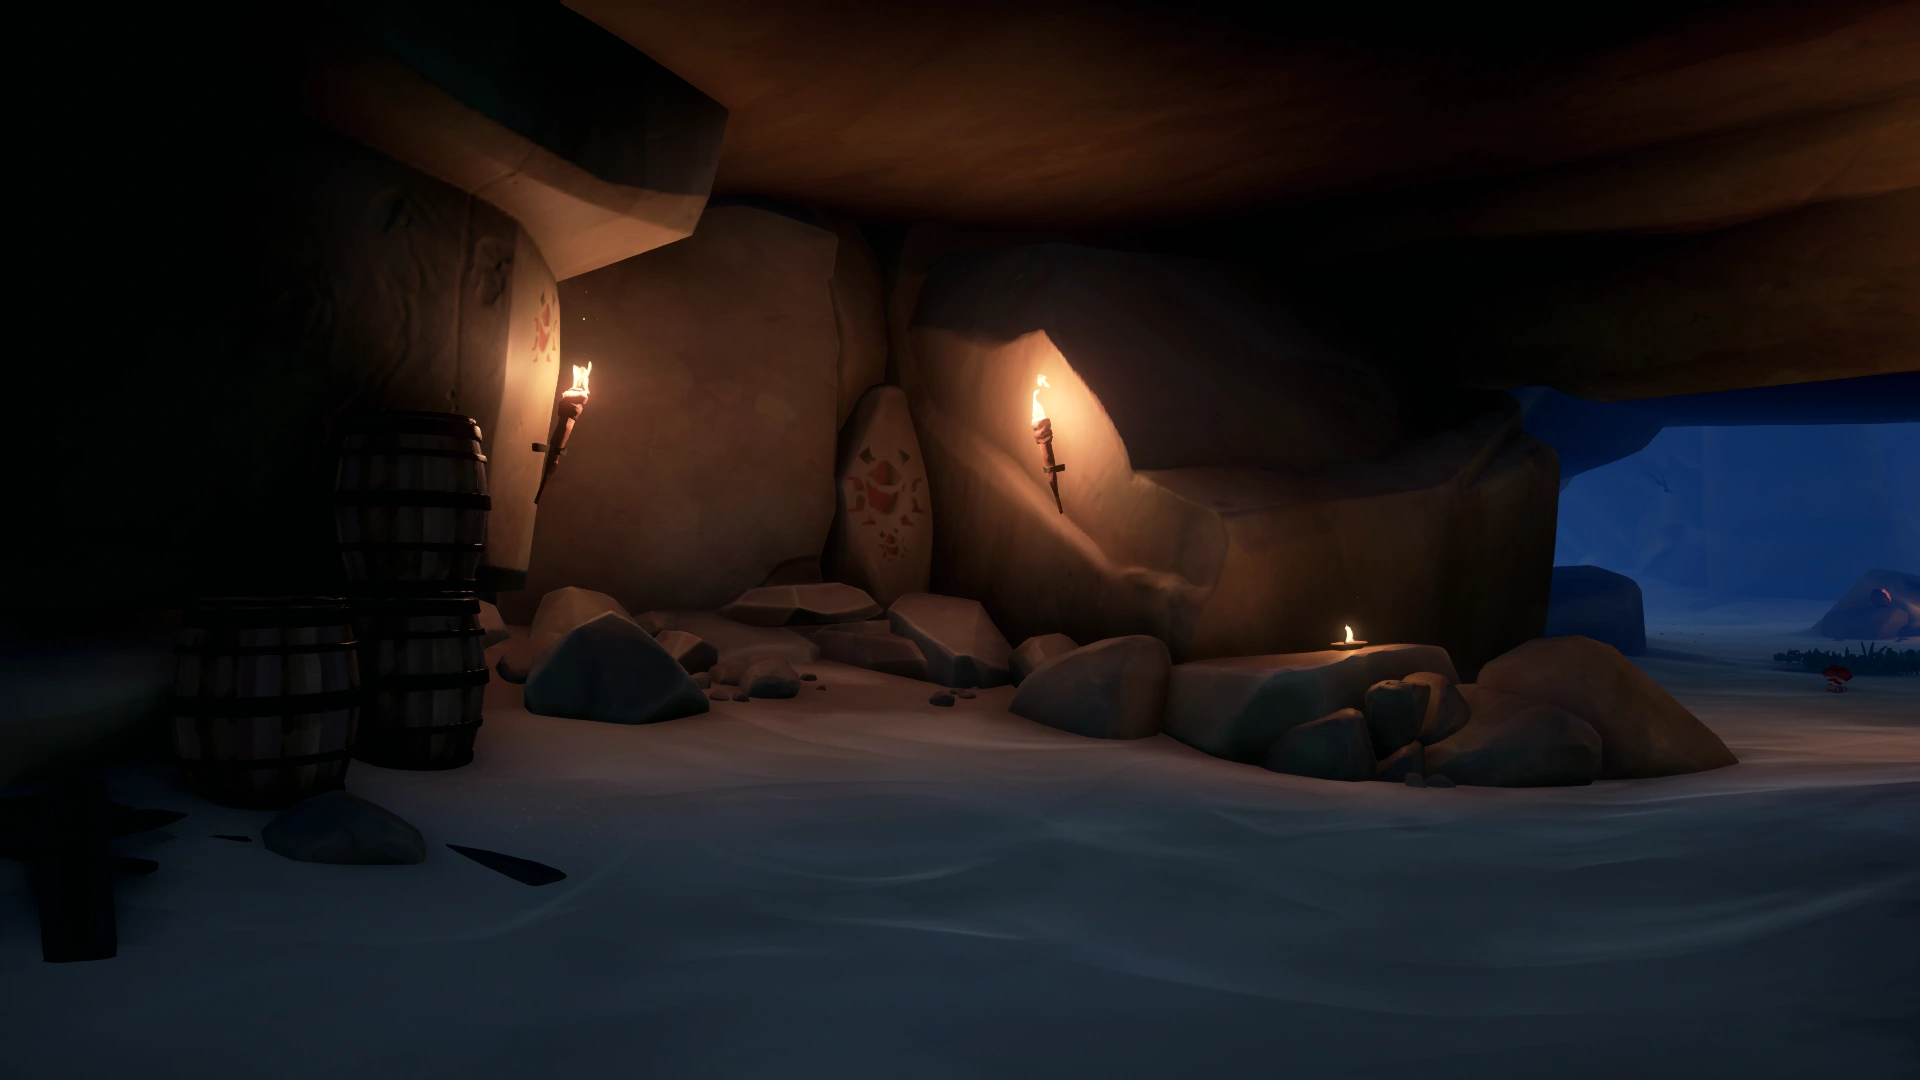
The Vault is hidden in the caves below the island's waterfall
The Vault entrance is signified by Scarab wall paintings.
Island: Devil's Ridge
The Boar Vault Totem Key.
The Vault is hidden in the cliffs on the South East beach.
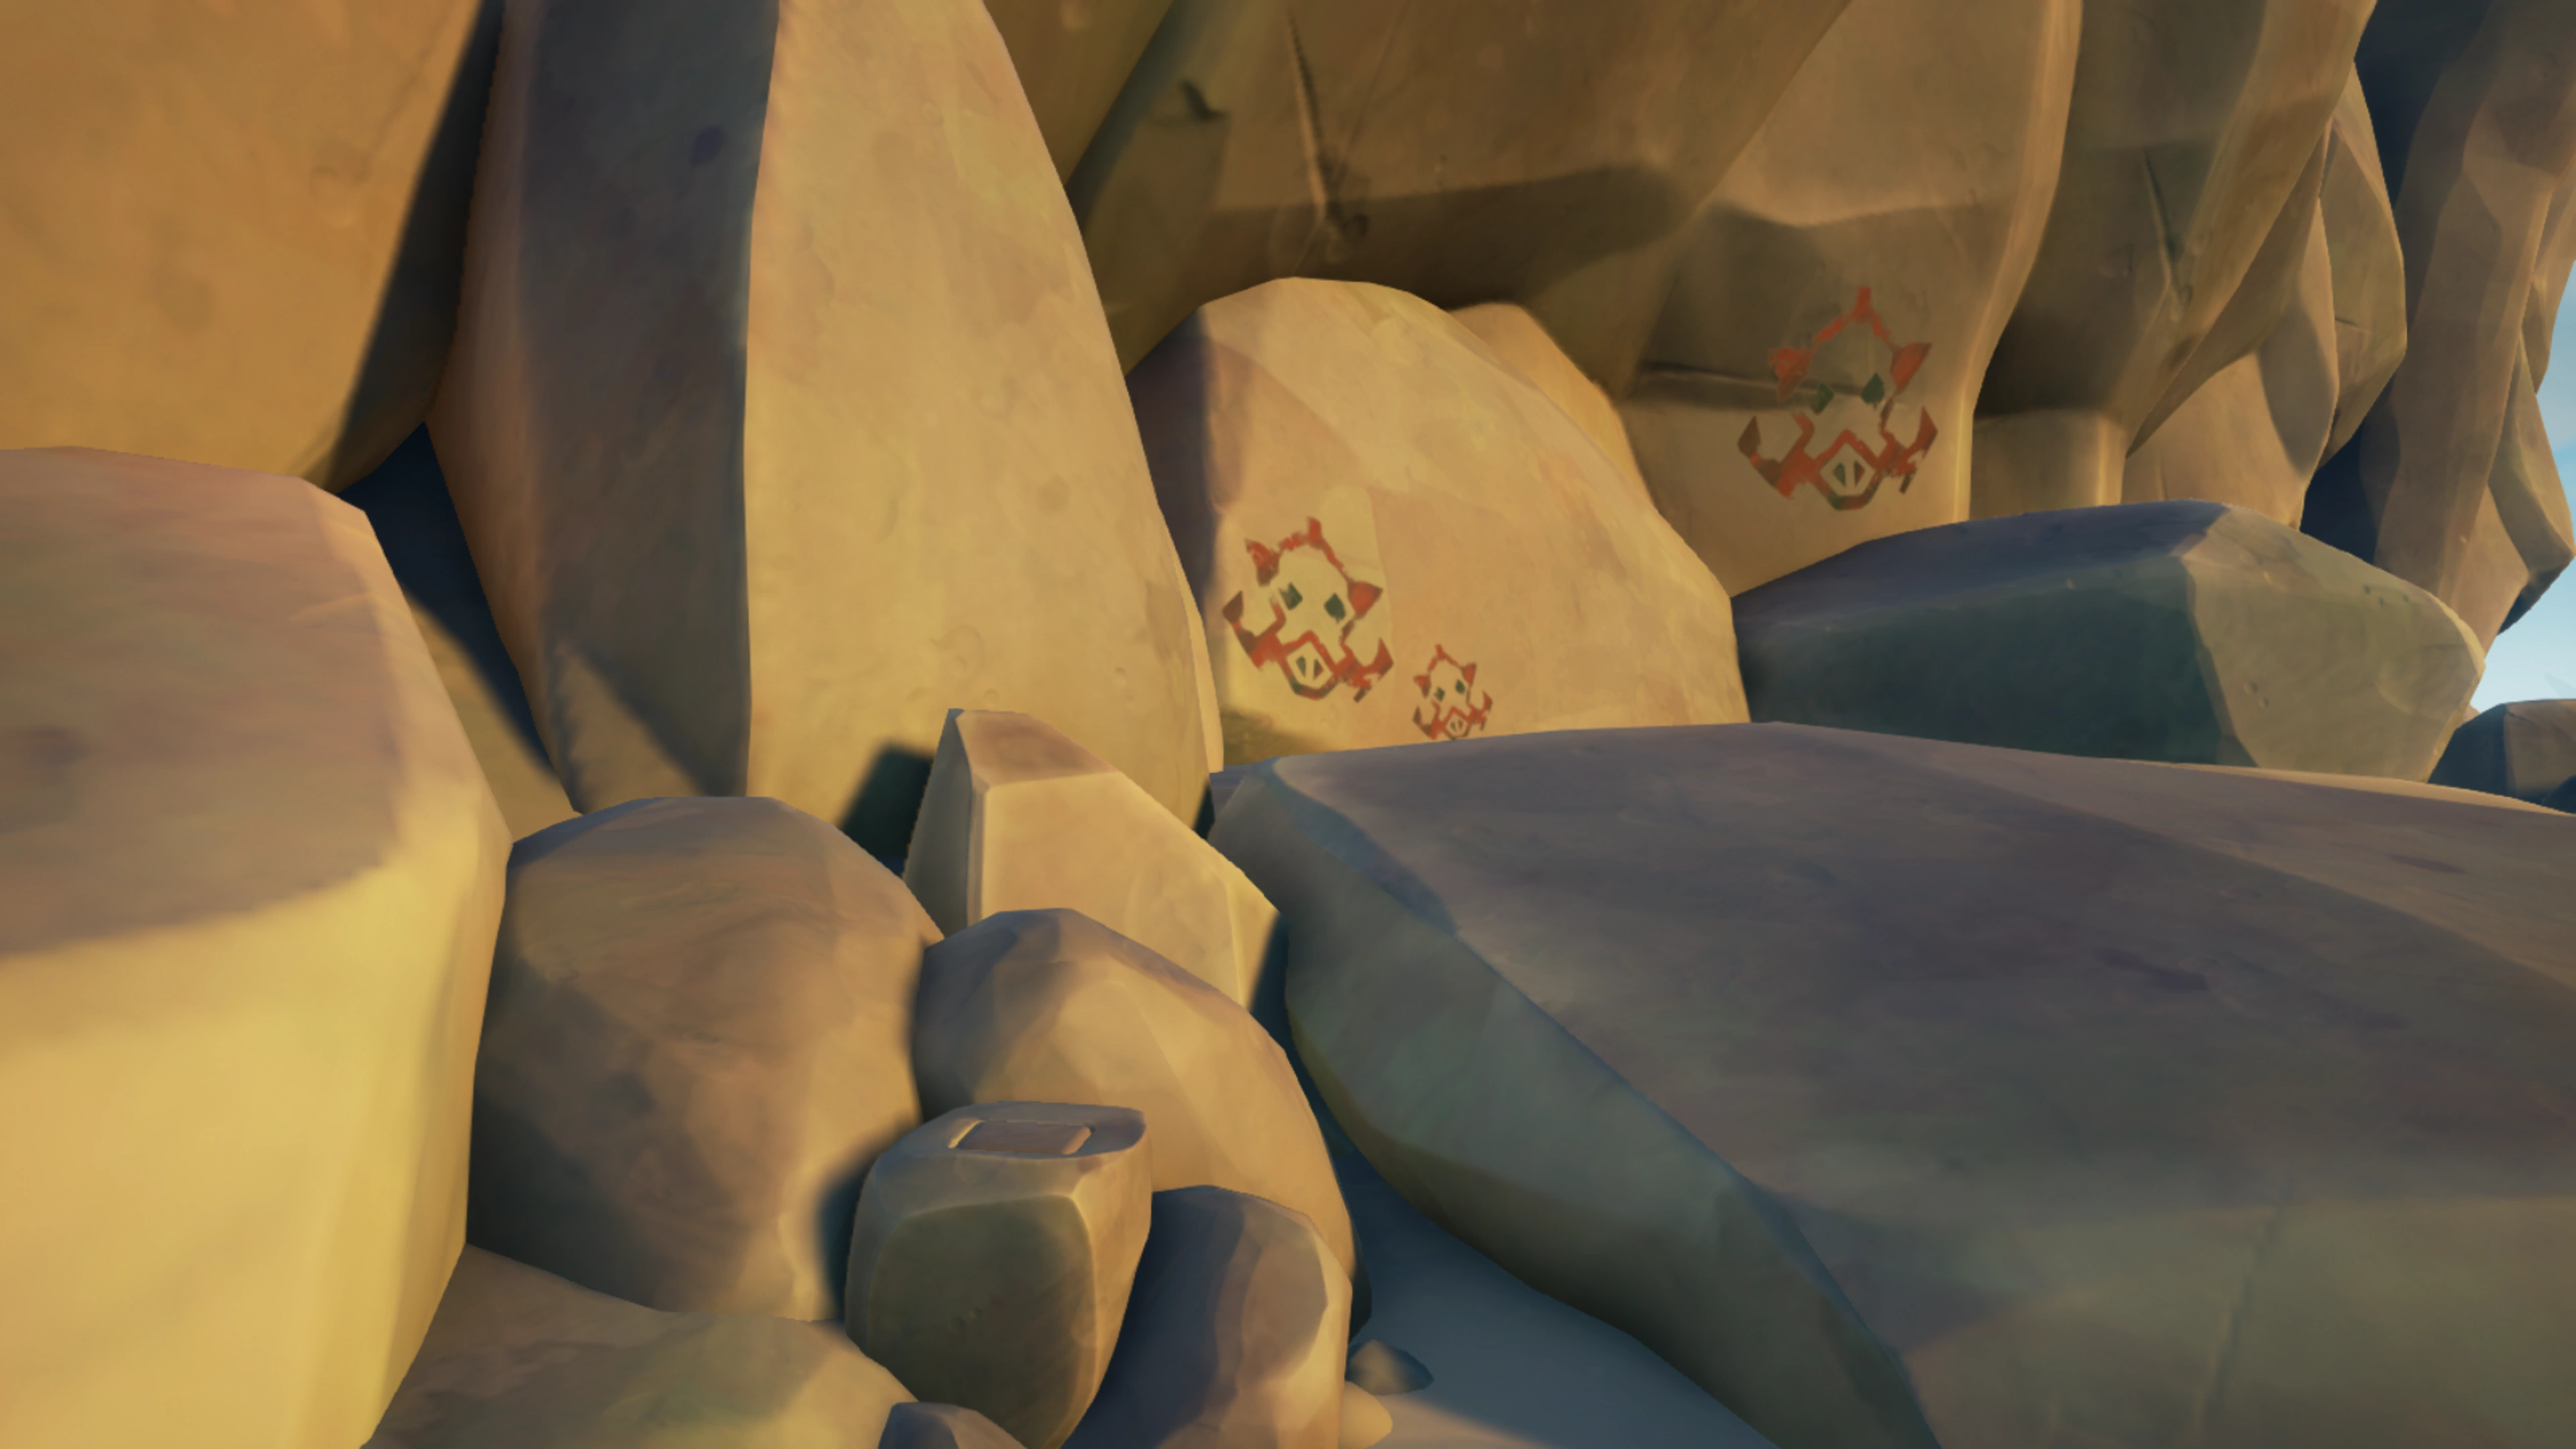
The Keyhole has rock paintings of Boars beside it.
Island: Uncharted Island (N-13)
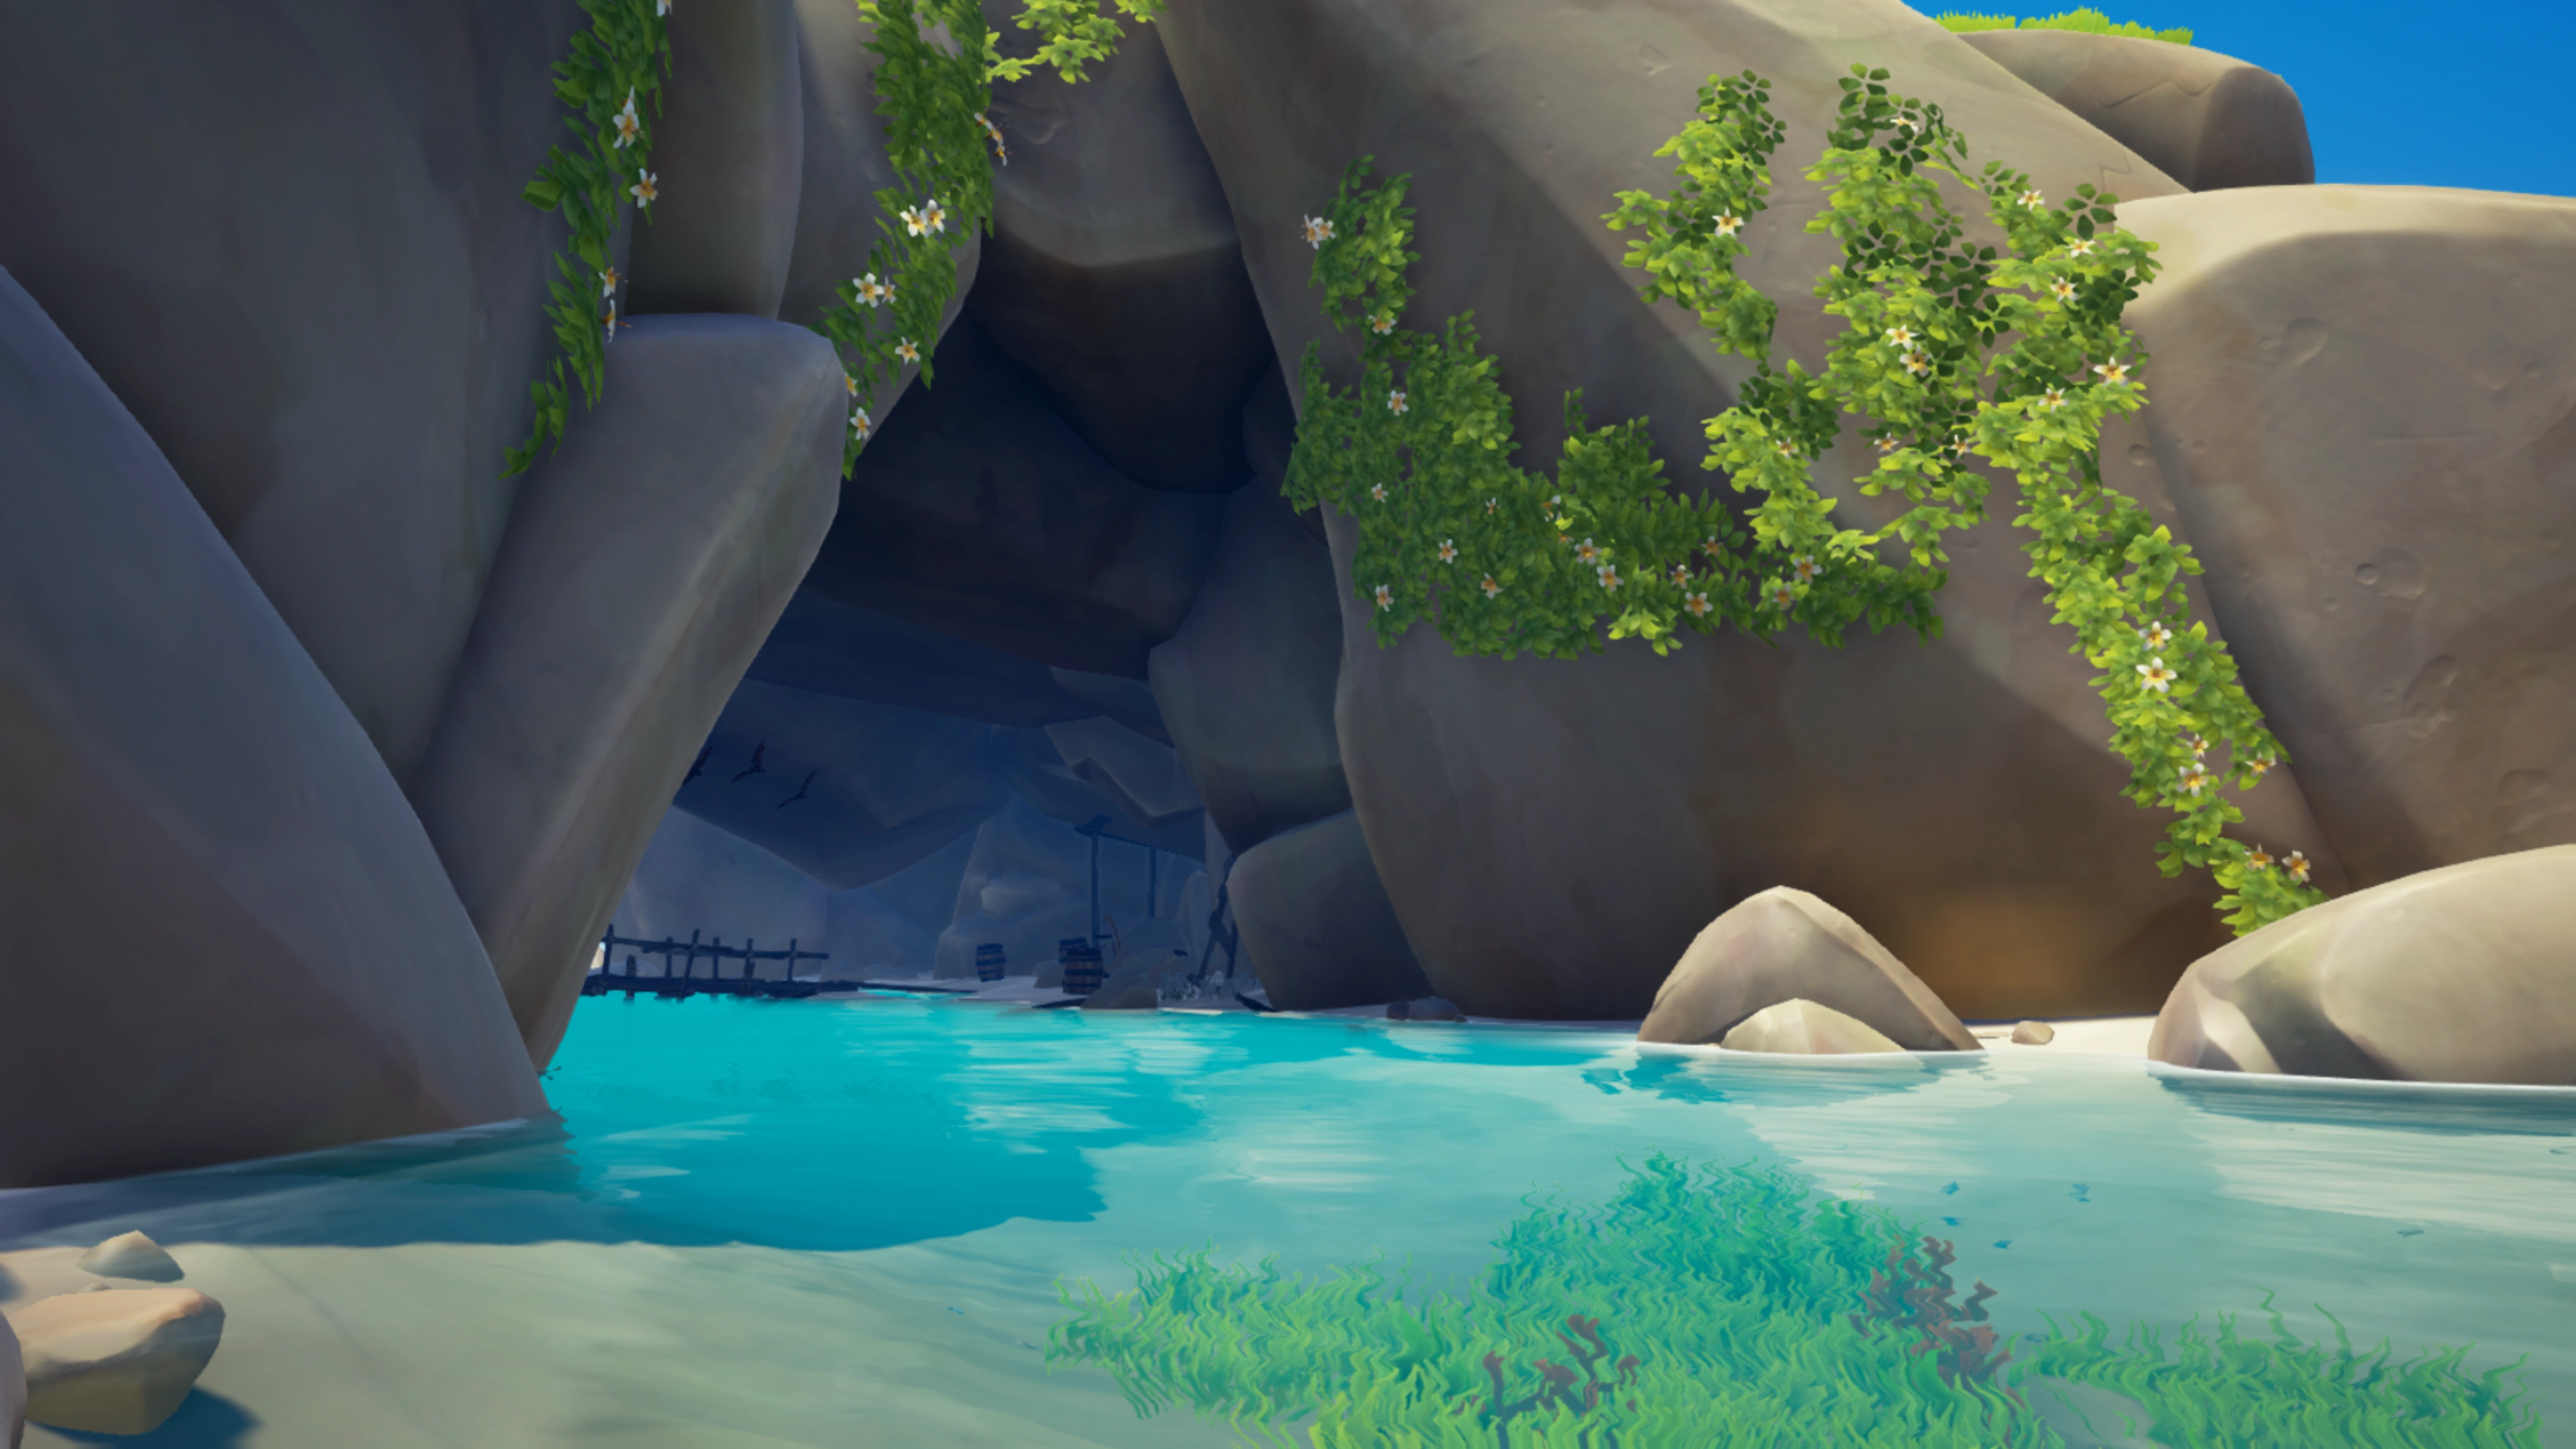
The Crab Vault is hidden inside underwater Caves below the Uncharted Island, Look for an underwater gate entrance.
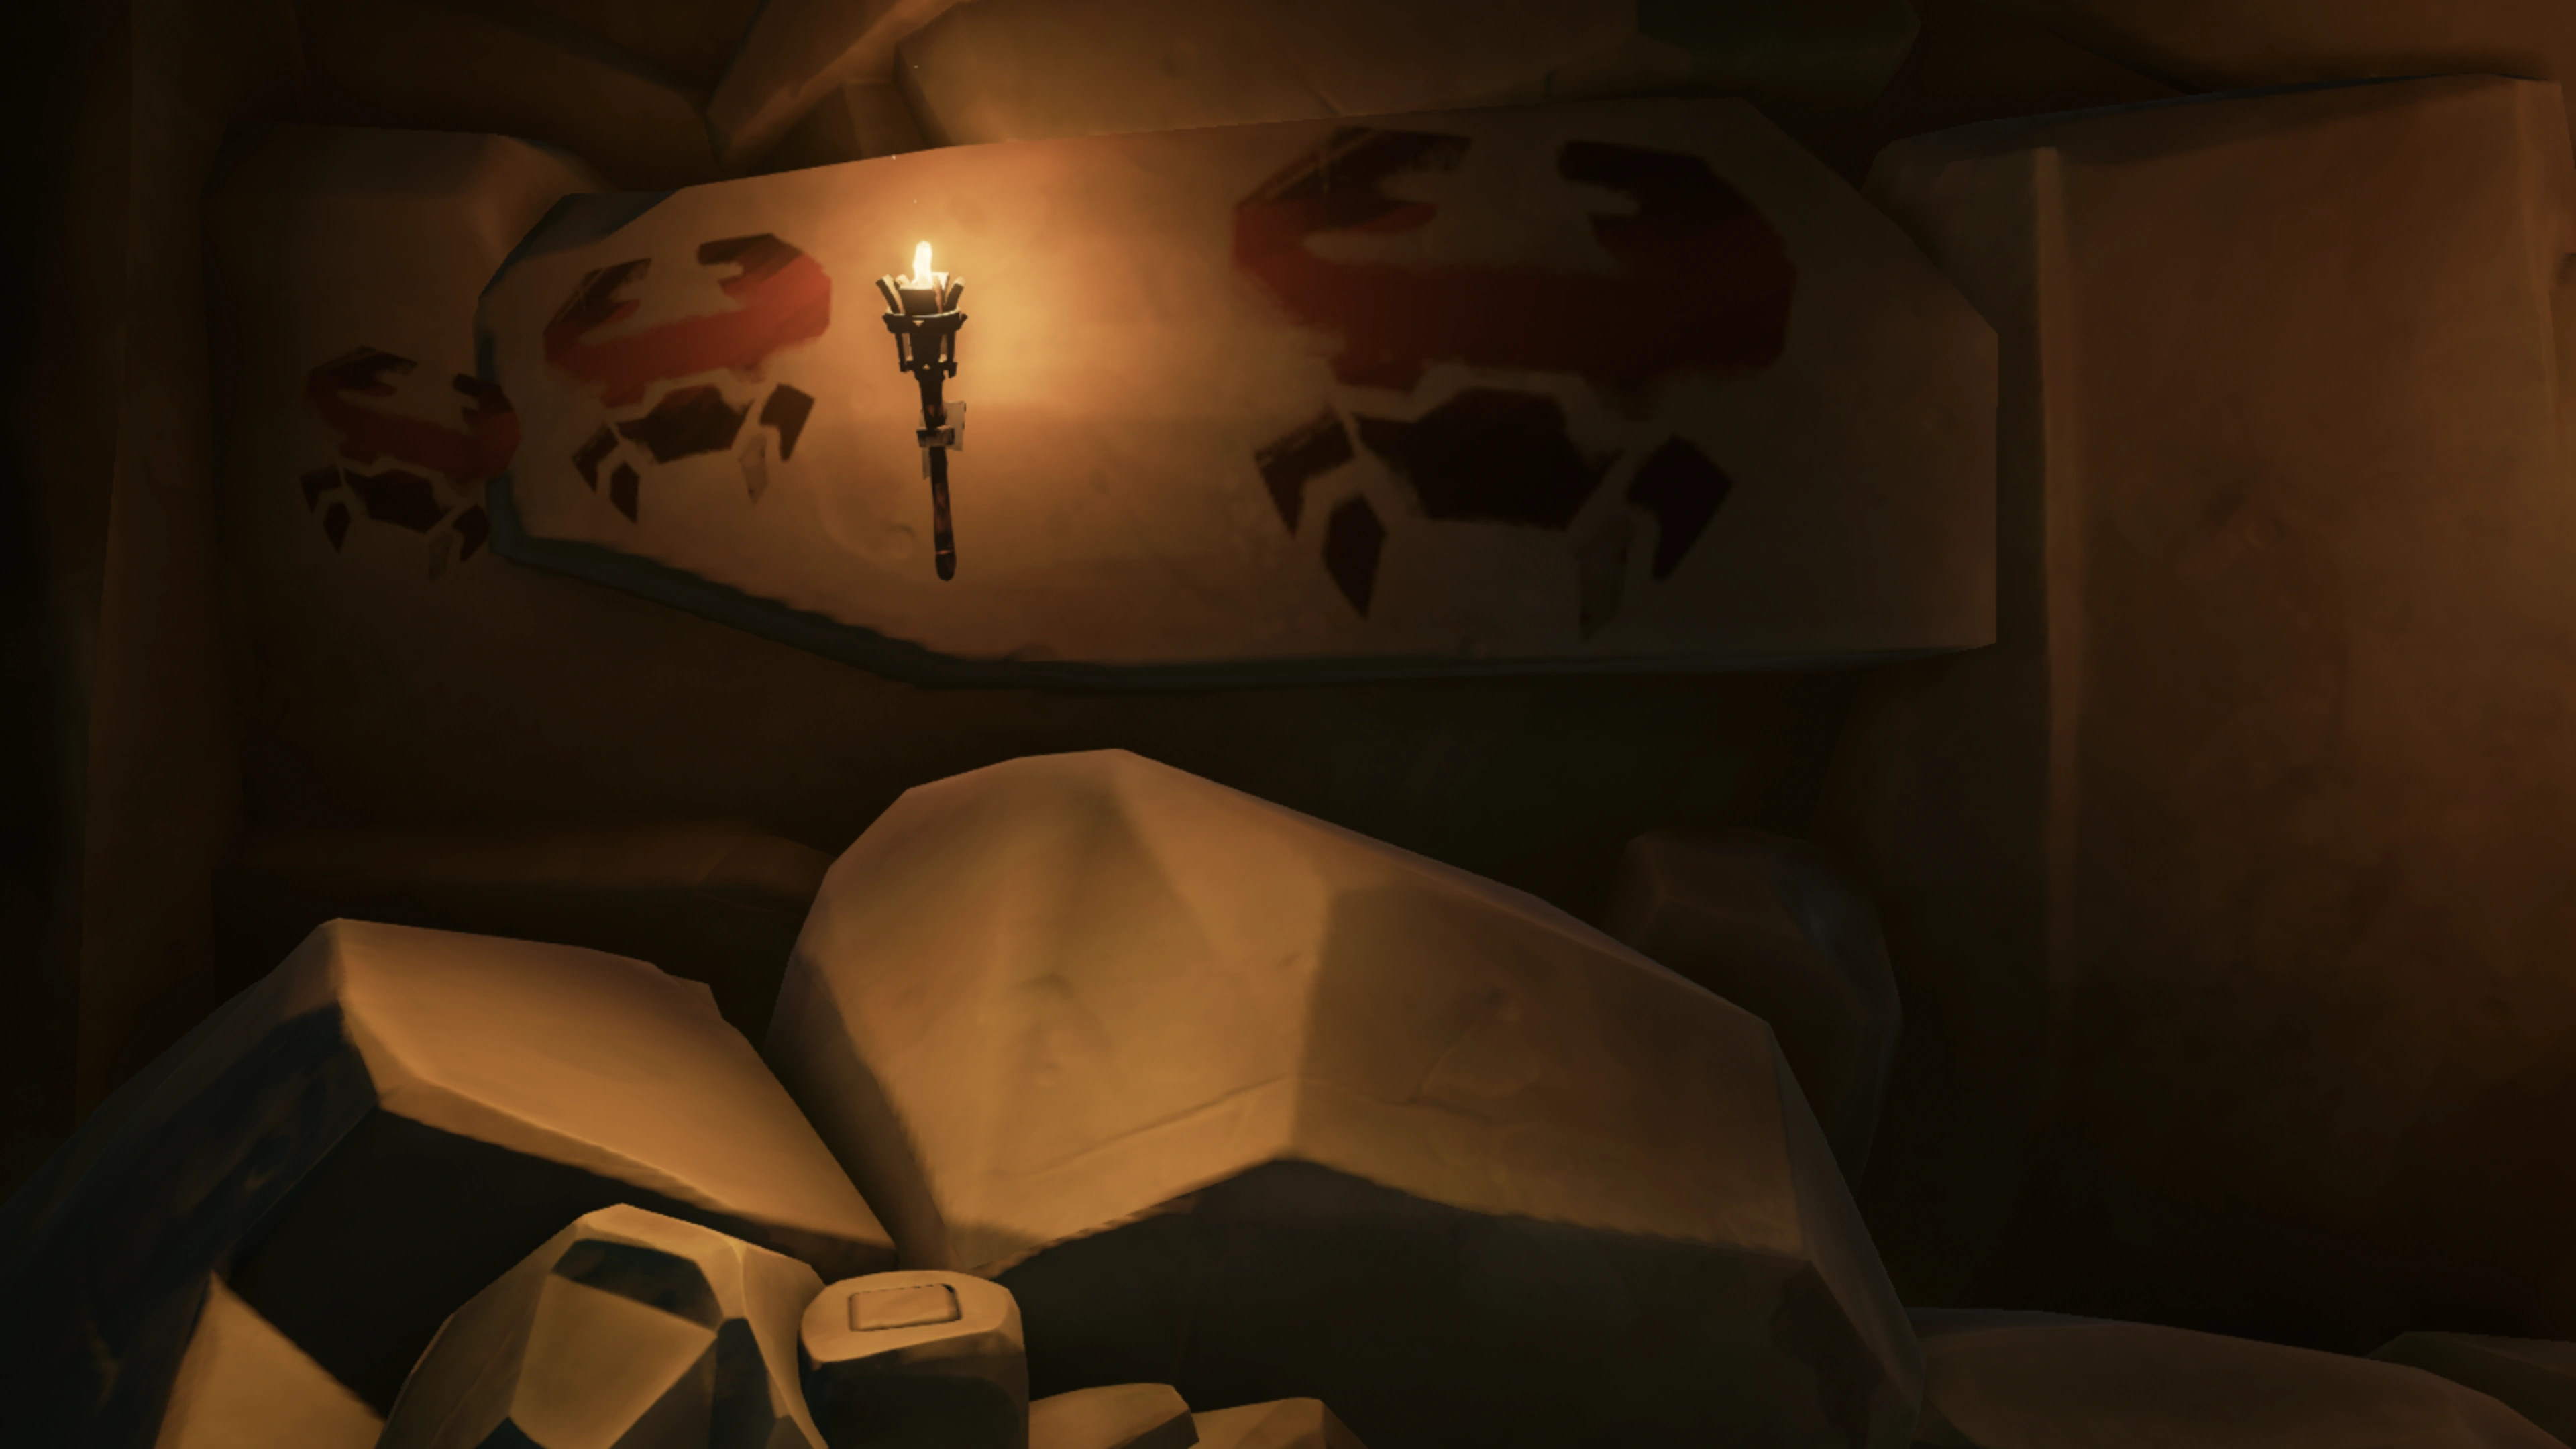
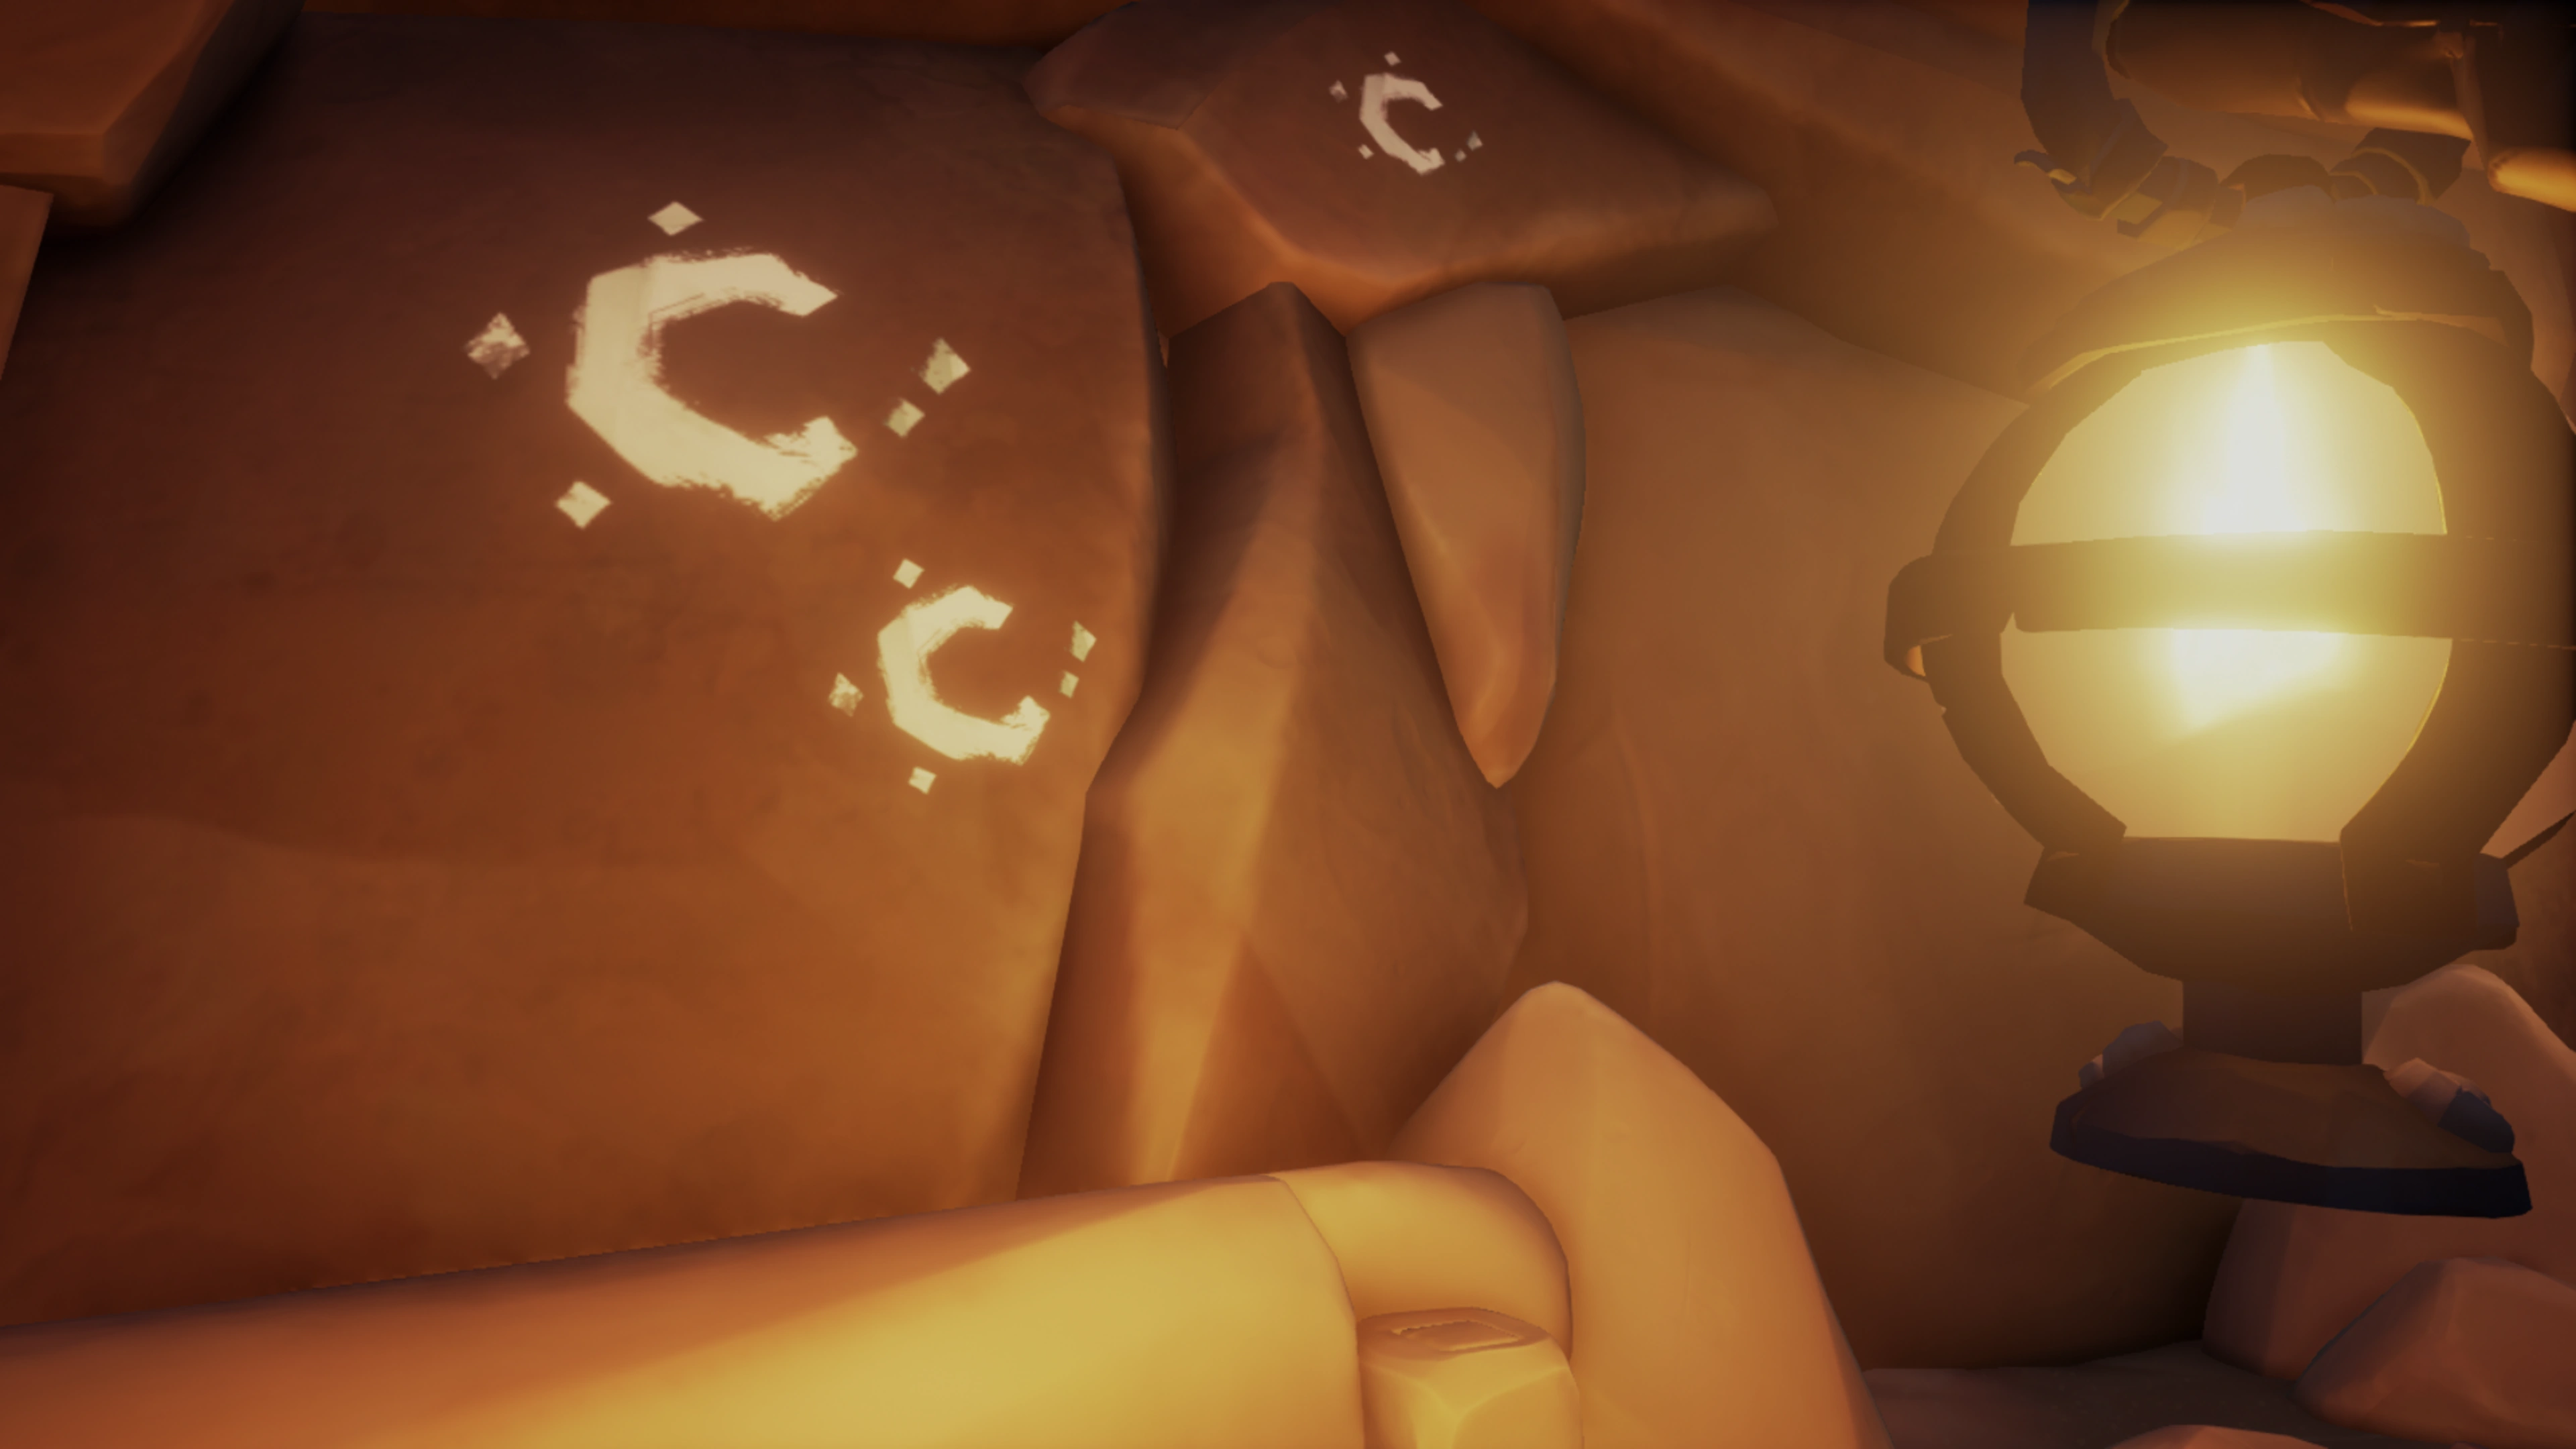
The Vault entrance is signified by wall paintings of Crabs.

Island: Crescent Isle
The Moon Totem Key.
The Vault is hidden in the northern inner caves of the Island.
The Vault entrance is signified by wall paintings of three Moons.
Island: Kraken's Fall
The Vault is hidden under the northern arch of the Island.
The Keyhole is quite a distance away from the Shark Wall Paintings.

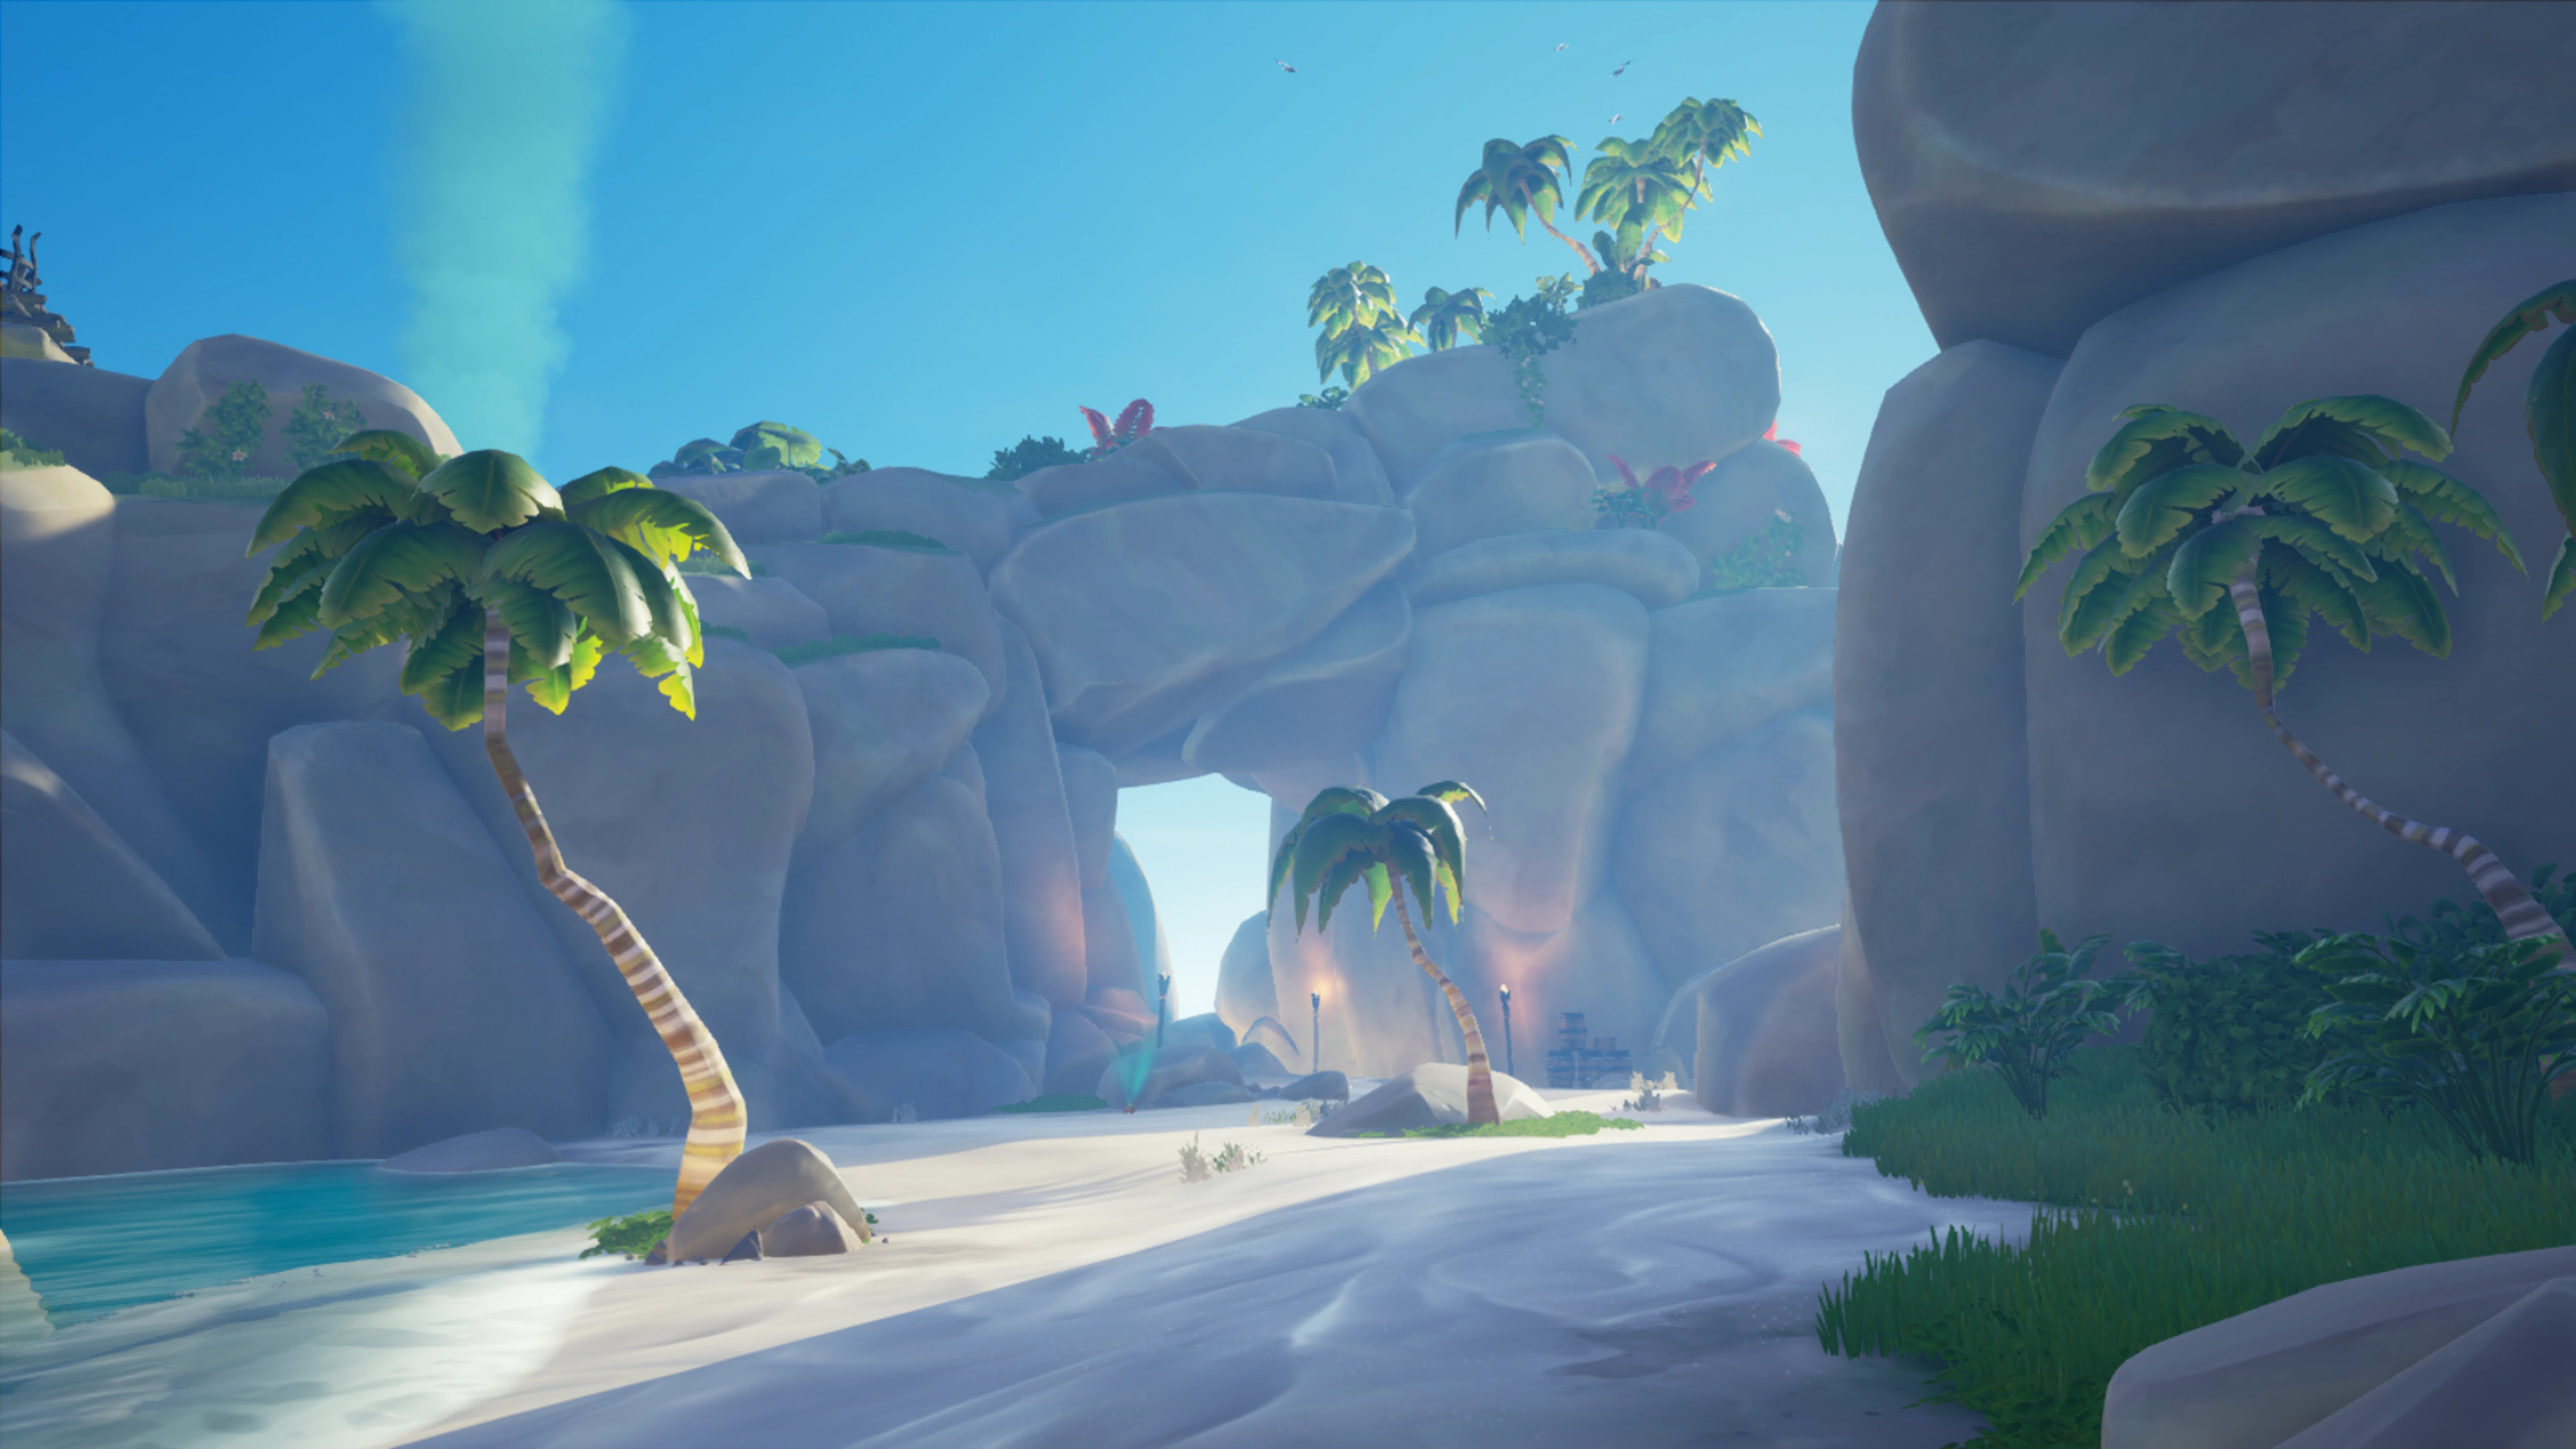
Island: Mermaid's Hideaway
The Vault is hidden under the North-Western Arch of the Island.
The Vault's entrance is signified by two painted Snakes on the walls.
The Key to Adventure[]
When you have managed to locate and open the Totem Vault, proceed inside, but be careful as traps and puzzles await you! Every Totem Vault has two puzzles to overcome: A Pillar Puzzle and a Medallion Puzzle. Both of these puzzles are accompanied by their own dangers. Overcome these challenges and you will find what you were looking for inside the Vault! It it recommended that you read ahead as the first puzzle is timed and failure means starting over from the beginning of the quest.
After solving all the Puzzles of the Totem Vault and retrieving its Treasure, the Crew will be awarded the Vault of the Ancients Commendation and unlock the third and final Checkpoint.
The Pillar Puzzle[]
Once inside the Vault itself, you will have to first find a way to activate its mechanisms. Looking around the room should give you visible message prompts on what may be needed. The four Pillars will light up if you have managed to activate the mechanisms correctly, after which water will start filling up the room and you will have to solve three rounds of Puzzles regarding the correct placement and order of the four Pillars in the room. If you cannot manage to solve the puzzle in time, the vault will completely fill up with water leaving you locked in and you will immediately fail the Tall Tale.
Also note the Bug in this section to avoid any undue frustration.
Hints[]
Perhaps use your Lantern to light up the room and see if you can spot it then!
Take a look at the last page of your Tale Book. It should give you all the information you need for solving this part of the puzzle. There are at least three rounds of the puzzle.
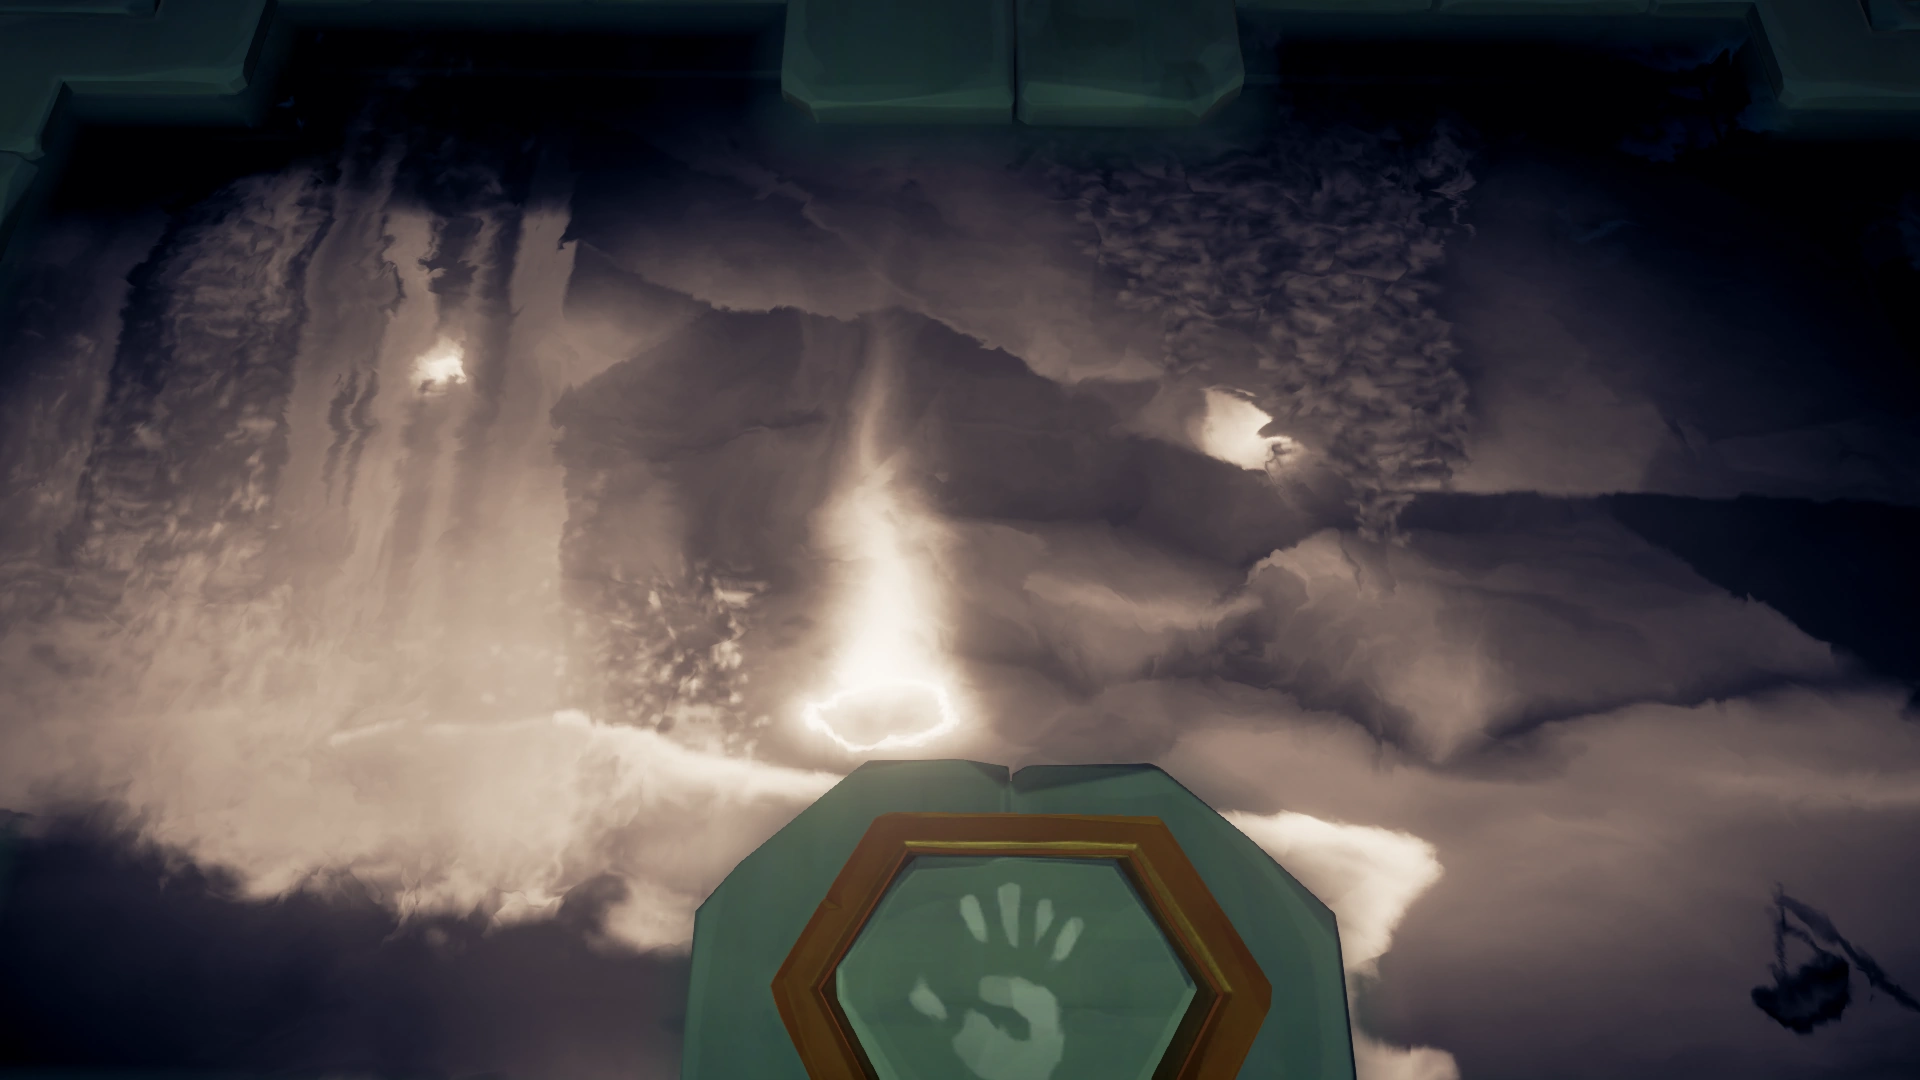
You have to Enter the Solution manually at the Table by pressing the hand Button.
CLICK FOR WALKTHROUGH AND GALLERY
|
|---|
Walkthrough[]
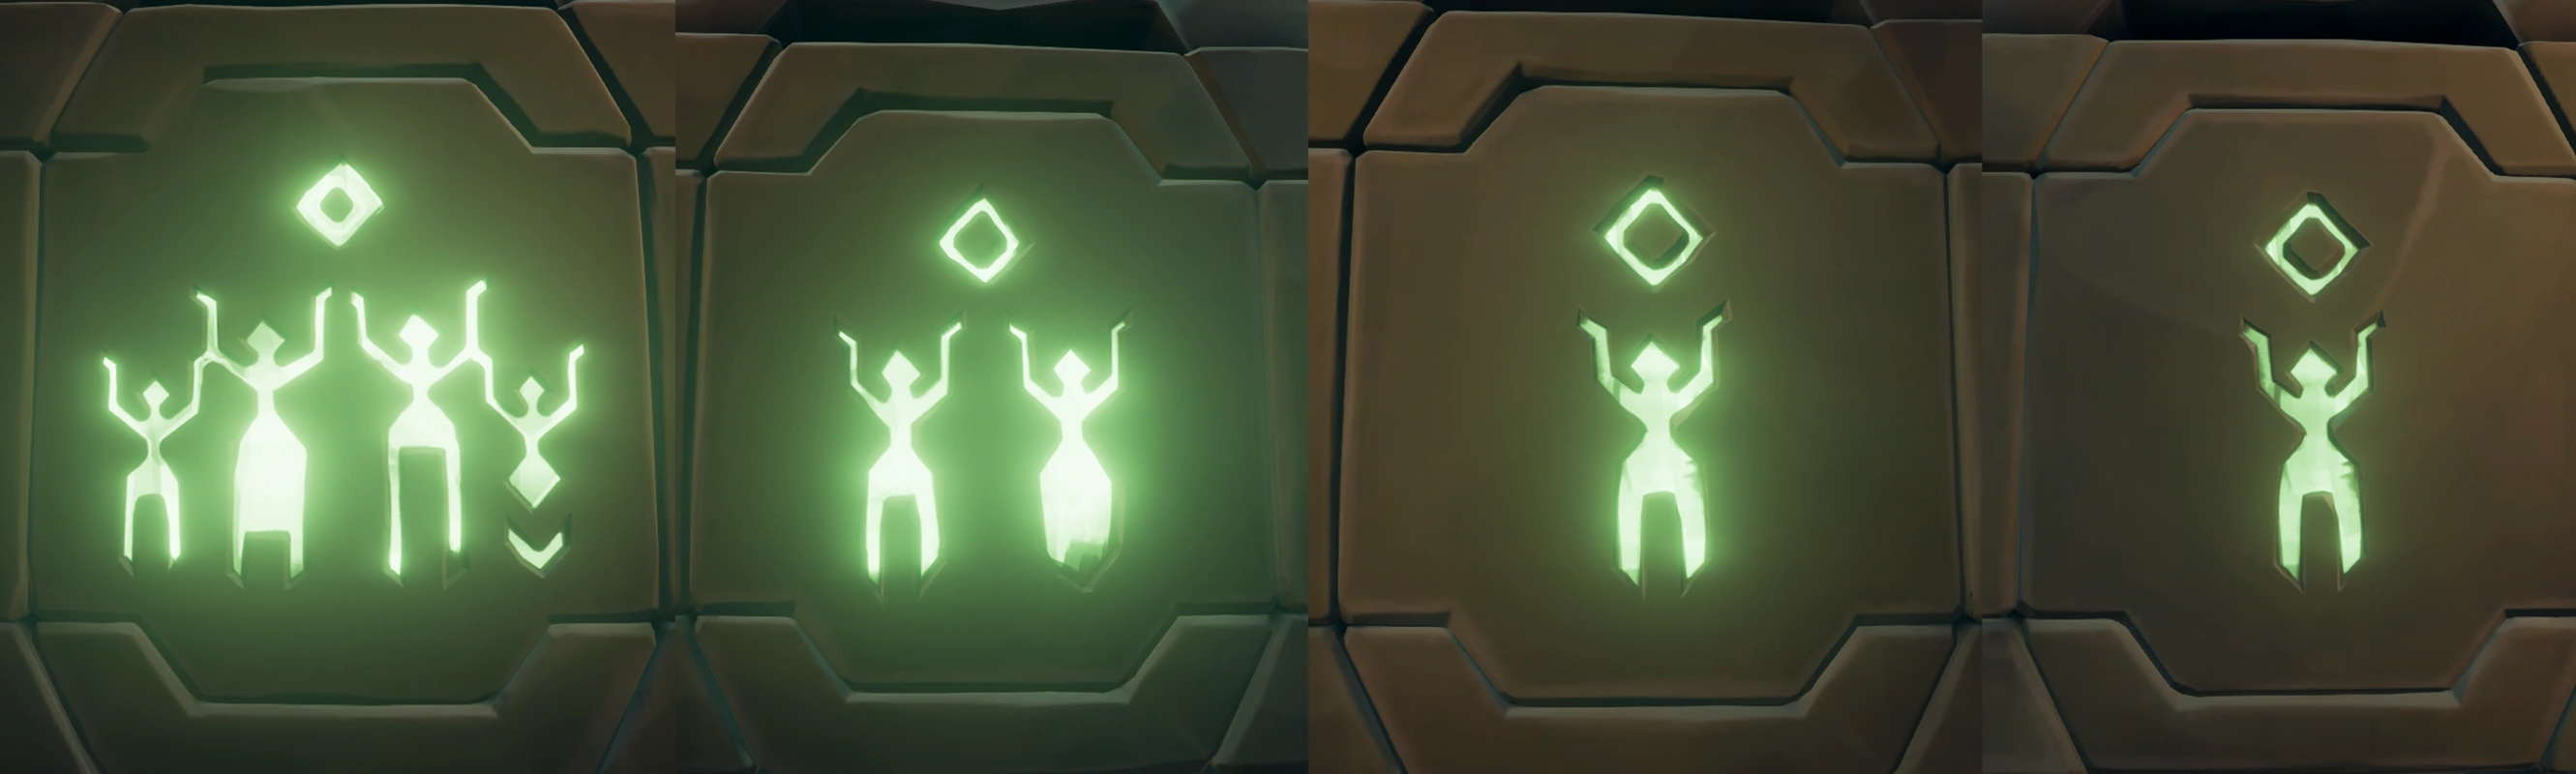
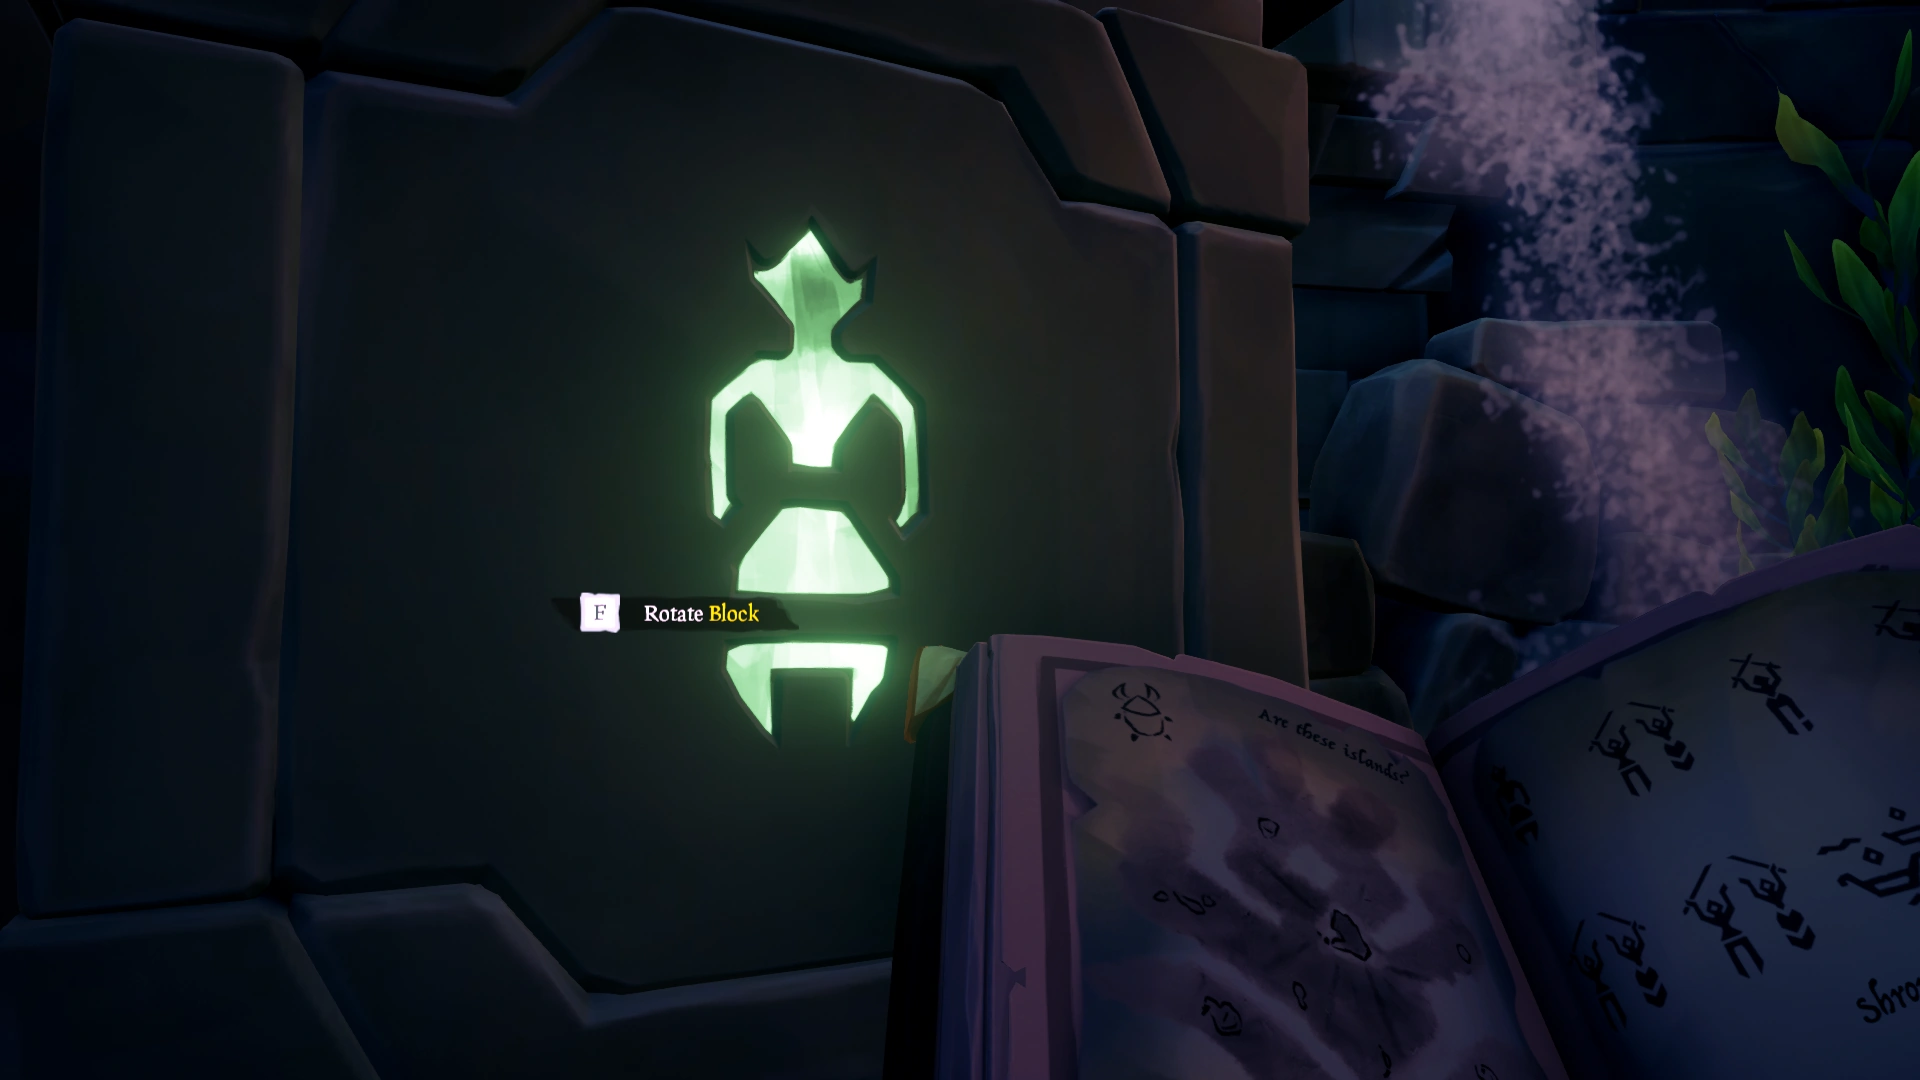
This is the part where the Tall Tale gets really interesting and you have to start thinking on your feet. To activate the Pillar mechanisms, you have to Raise your Lantern by the four braziers on the Table and light them up. After this, the room will start filling with water leaving you on a timer and no escape. You will notice that the four pillars will light up with neon-green figures. You can Rotate these pillars to switch between the figures.
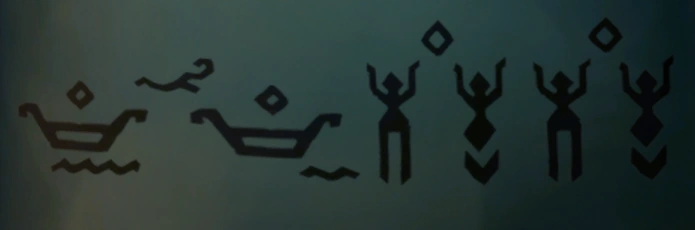
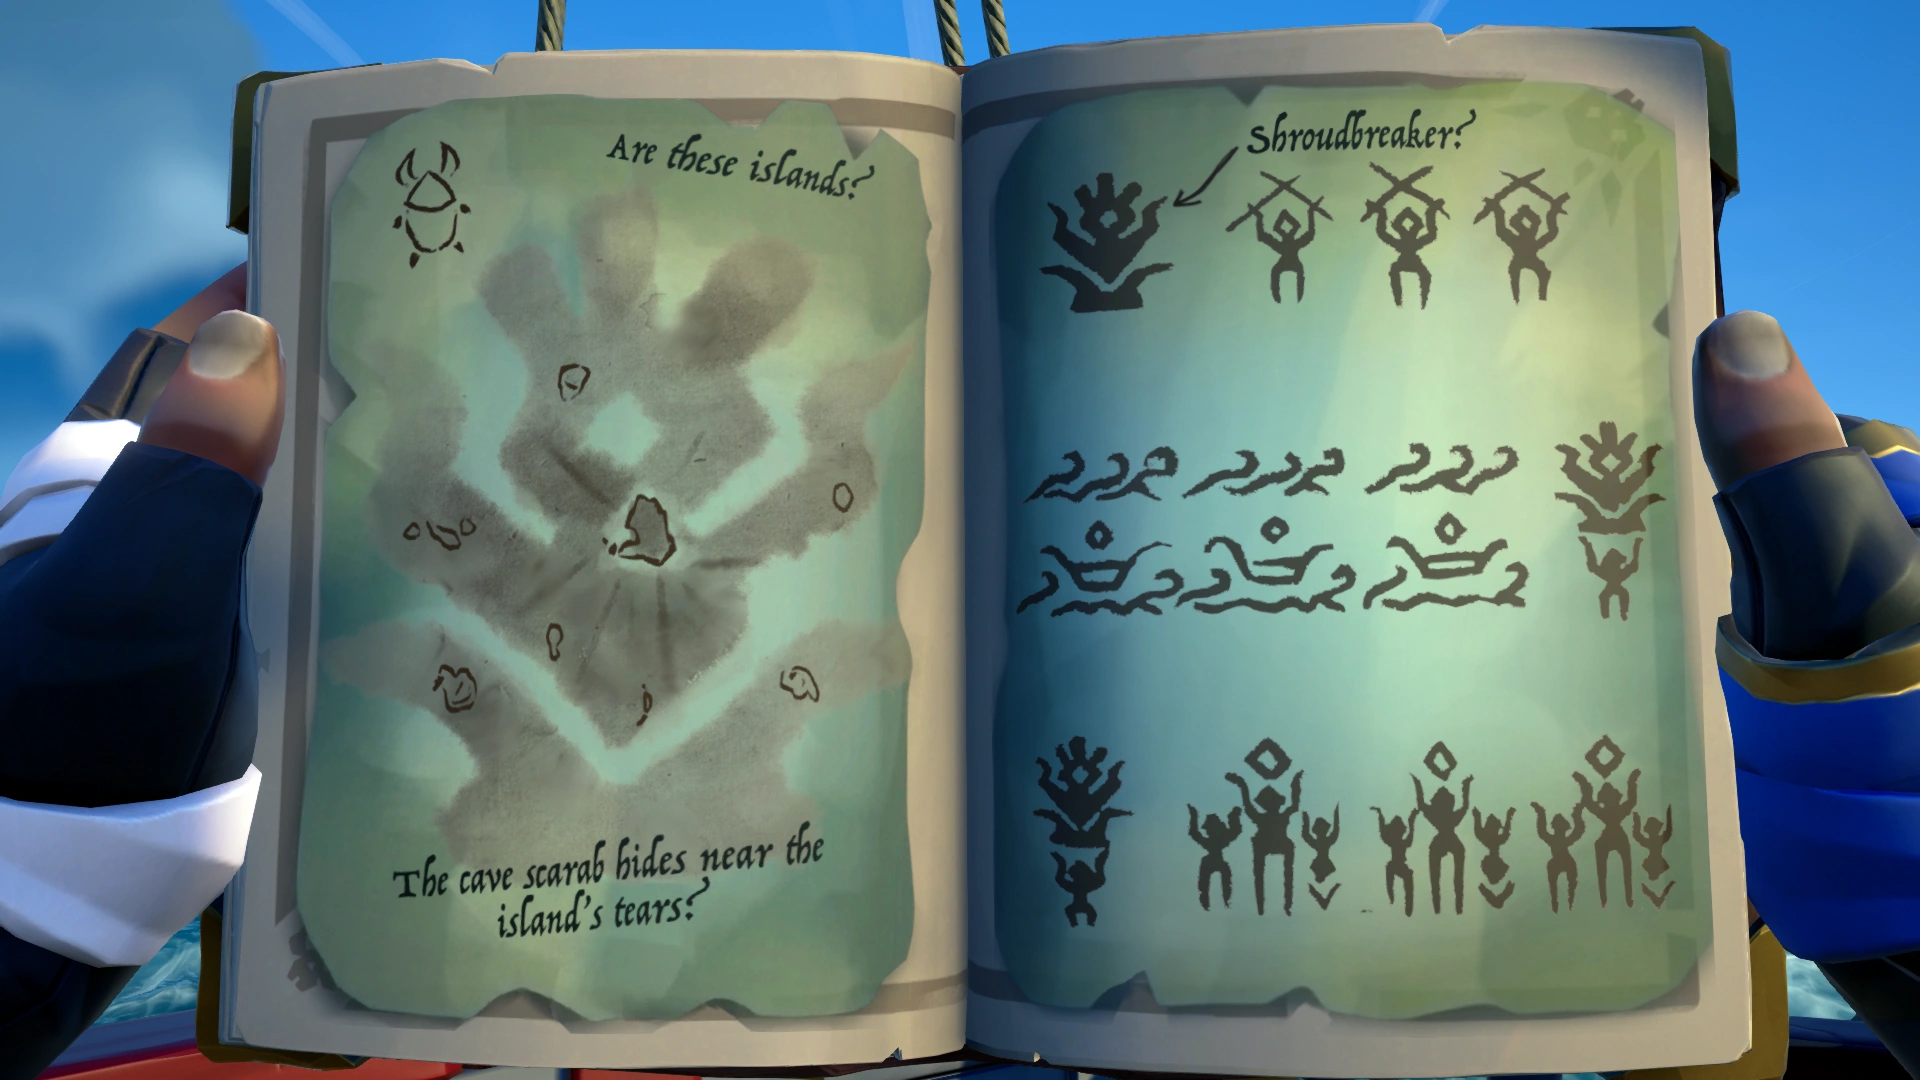
If you take a look at the last page of the Tale Book, you will notice three lines of figures similar to the pillars. Your goal here is to line up the four pillars to follow the instructions of the separate lines in the Tale Book starting with the first line.
Once you are satisfied with the pillar placement, go to the Table and press a button to Enter a Solution. If the solution is correct, the pillars will refresh with new images. If the solution is wrong, they will flash red. Once you have the correct pattern and entered the solution, you will move to the next line in the book and repeat the process.
There are two types of clues in the book.
- The lines in the book with only pictures and no number require you to match the symbols on the pillars to the pictures in the book.
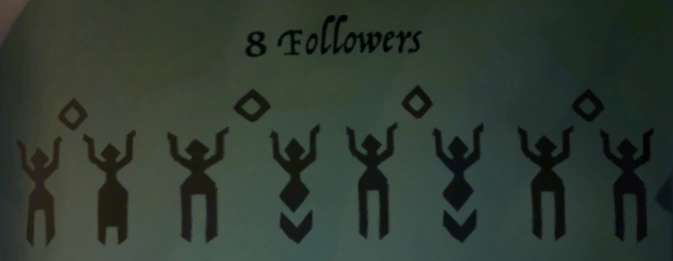
- The lines in the book with number and words require you use the symbols on all for pillars to add up to the numbers in the book. For example "8 Boats" would mean you would need a picture of 2 boats on each pillar, or 3 boats on two pillars and 1 boat on each of the other two, or any combination that adds up to 8.
The words and types of pictures also matter when matching.
- "Followers" means pictures of people with the diamond shape above them.
- "Warriors" means picture of people with swords.
- "Boats" means pictures of any boats.
- "Shroudbreaker" means the picture of a person holding a depiction of the Shroudbreaker over his head.
Keep these in mind when matching pictures or adding things together. Mixing warriors and followers to get a total number would not work for example.
Example clues and pillar placements can be found by clicking Expand Below:
Clue in the Book
Pillar Placement
Clue in the Book
Pillar Placement

Clue in the Book
Pillar Placement


Image Guide[]
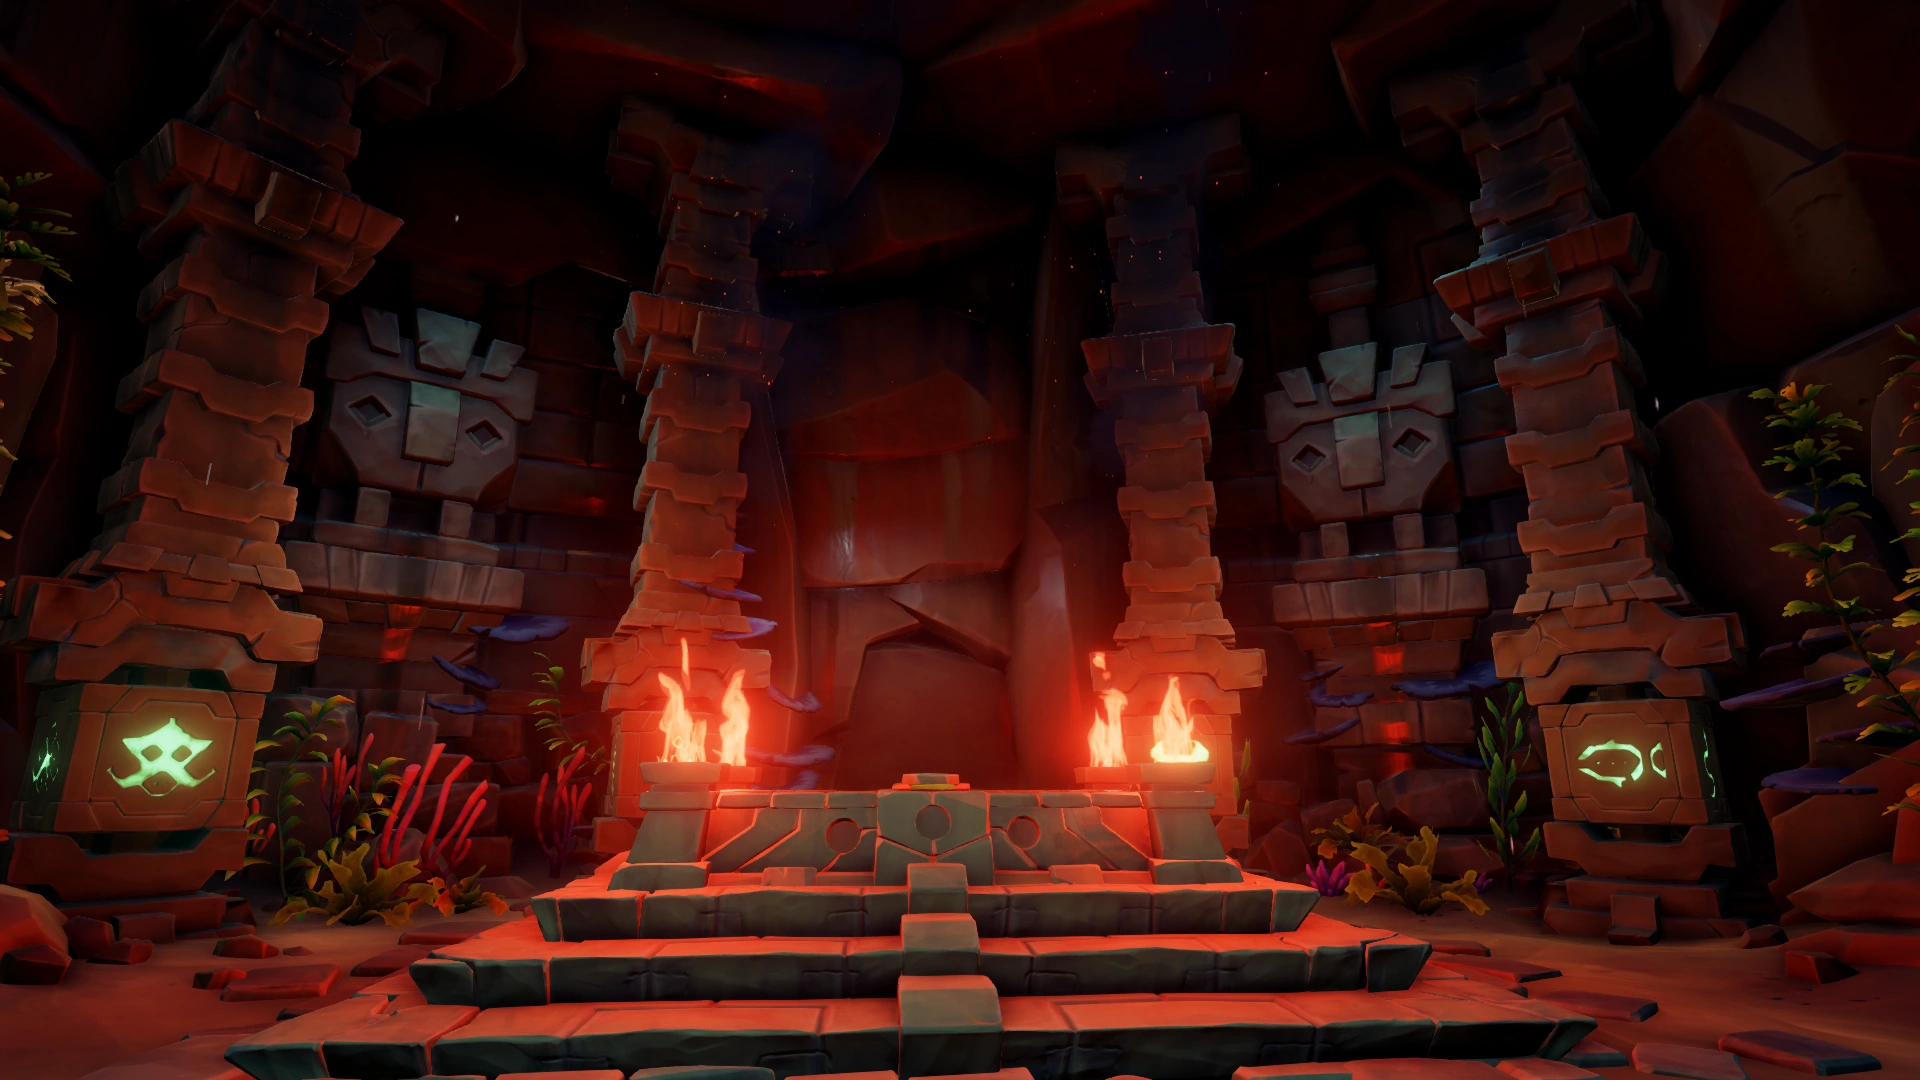
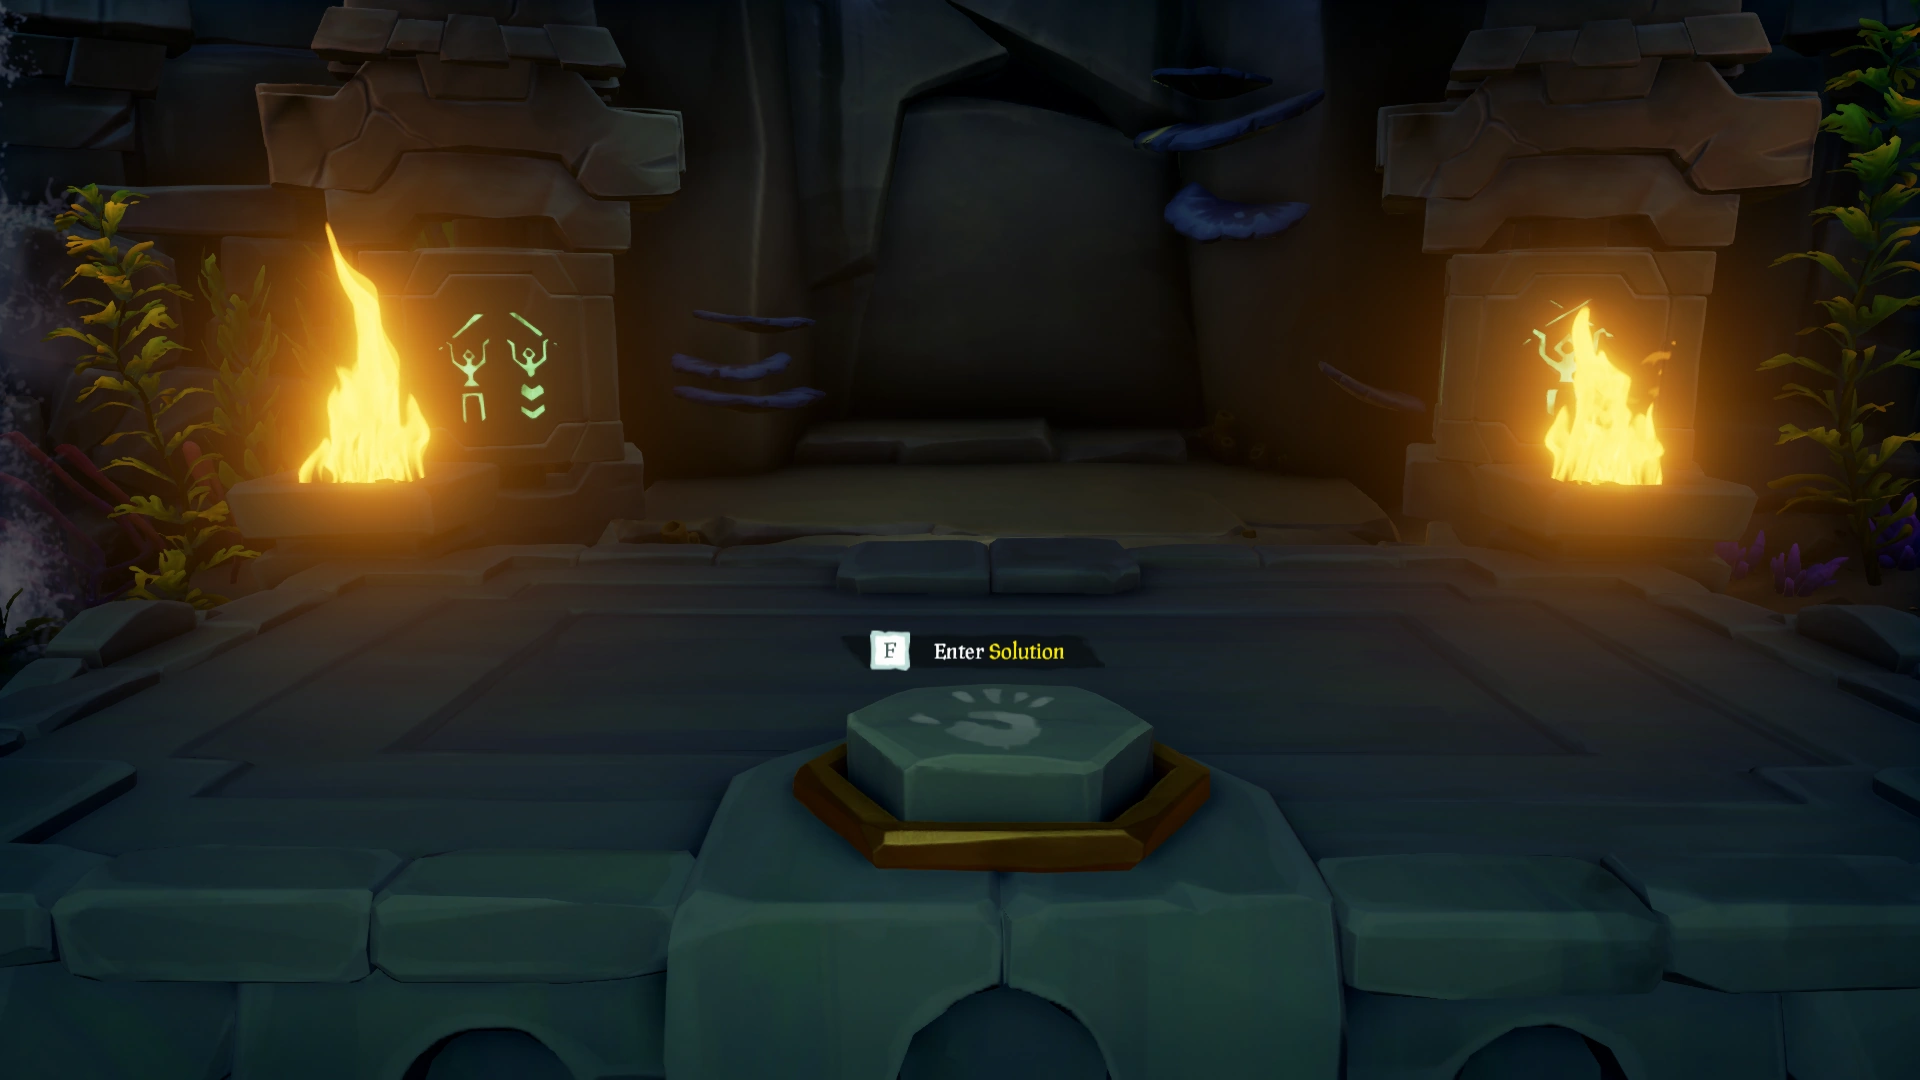
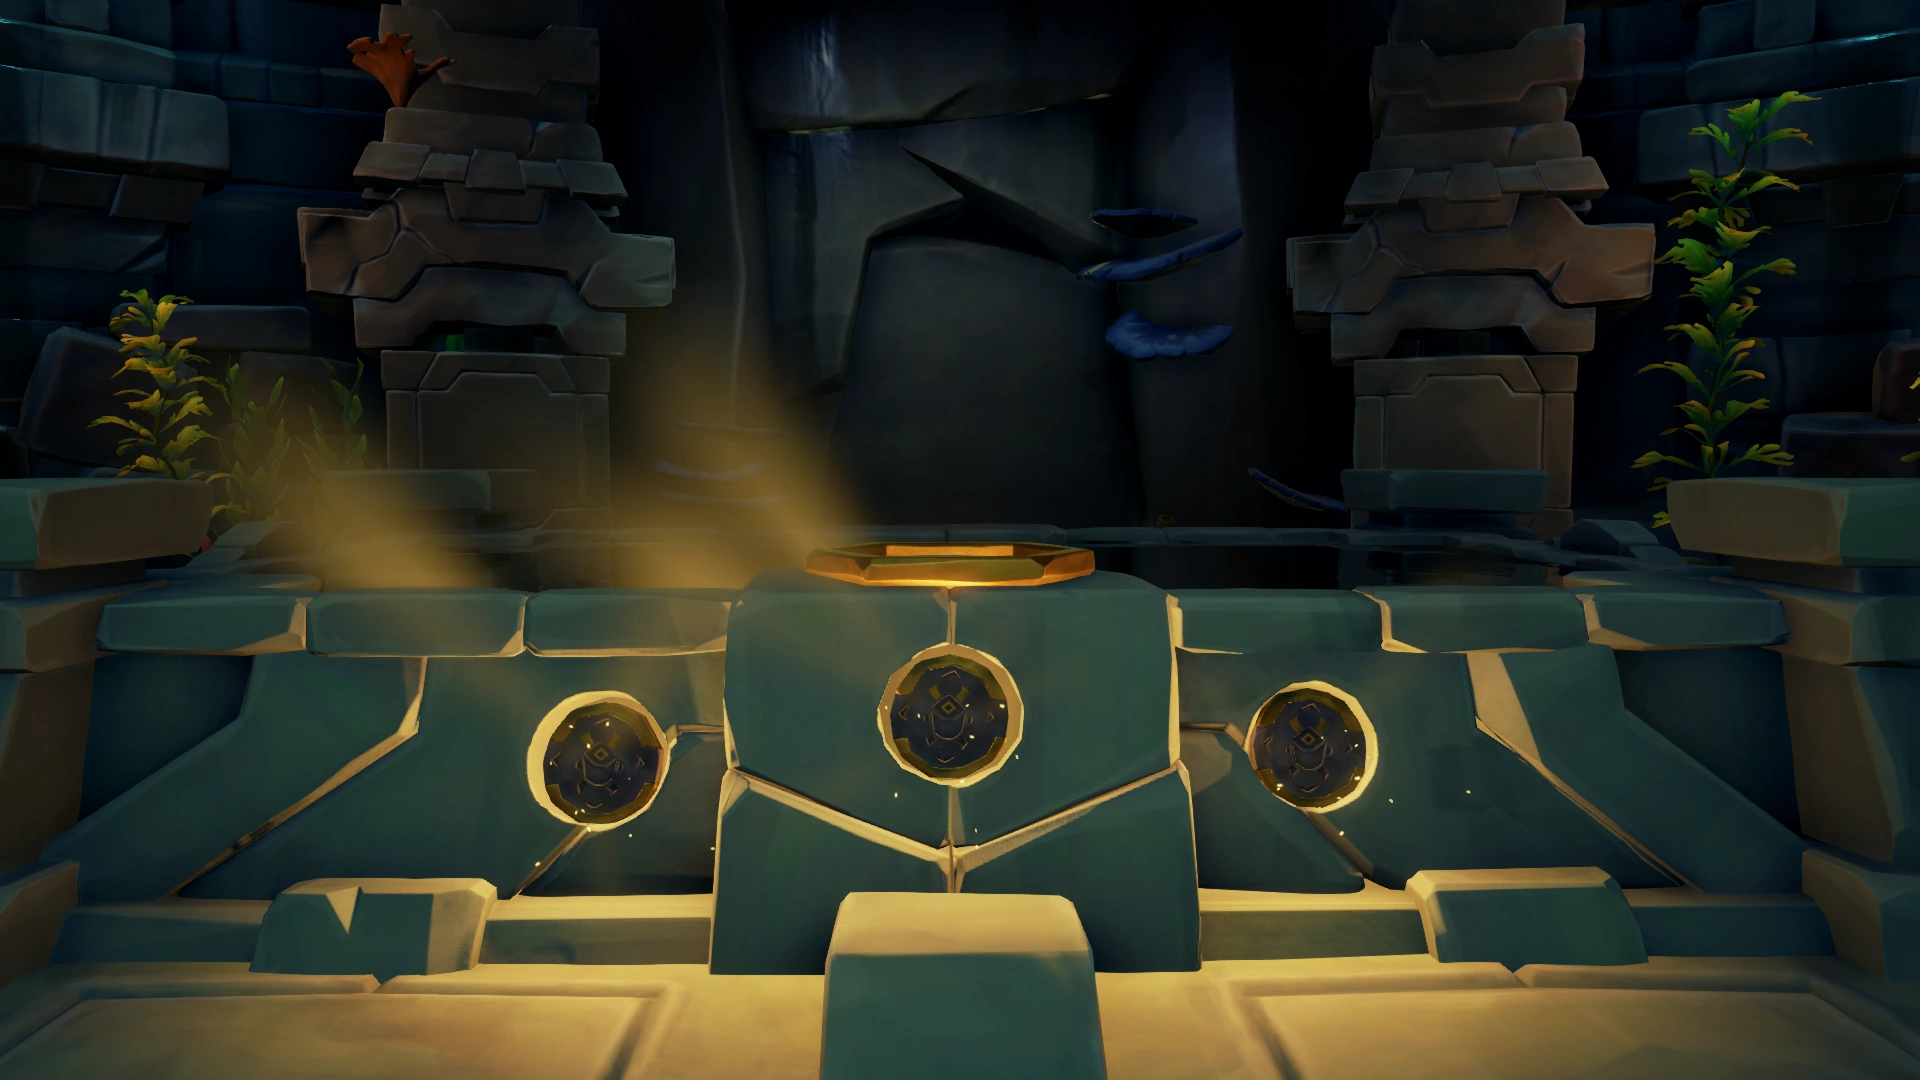
The Ancient Totem Vault is composed of a Table with four braziers and 3 keyholes, 4 rotatable pillars and two statues that start filling the room with water.
Investigating the Vault Table will clue you in on how to activate the Vault mechanisms.
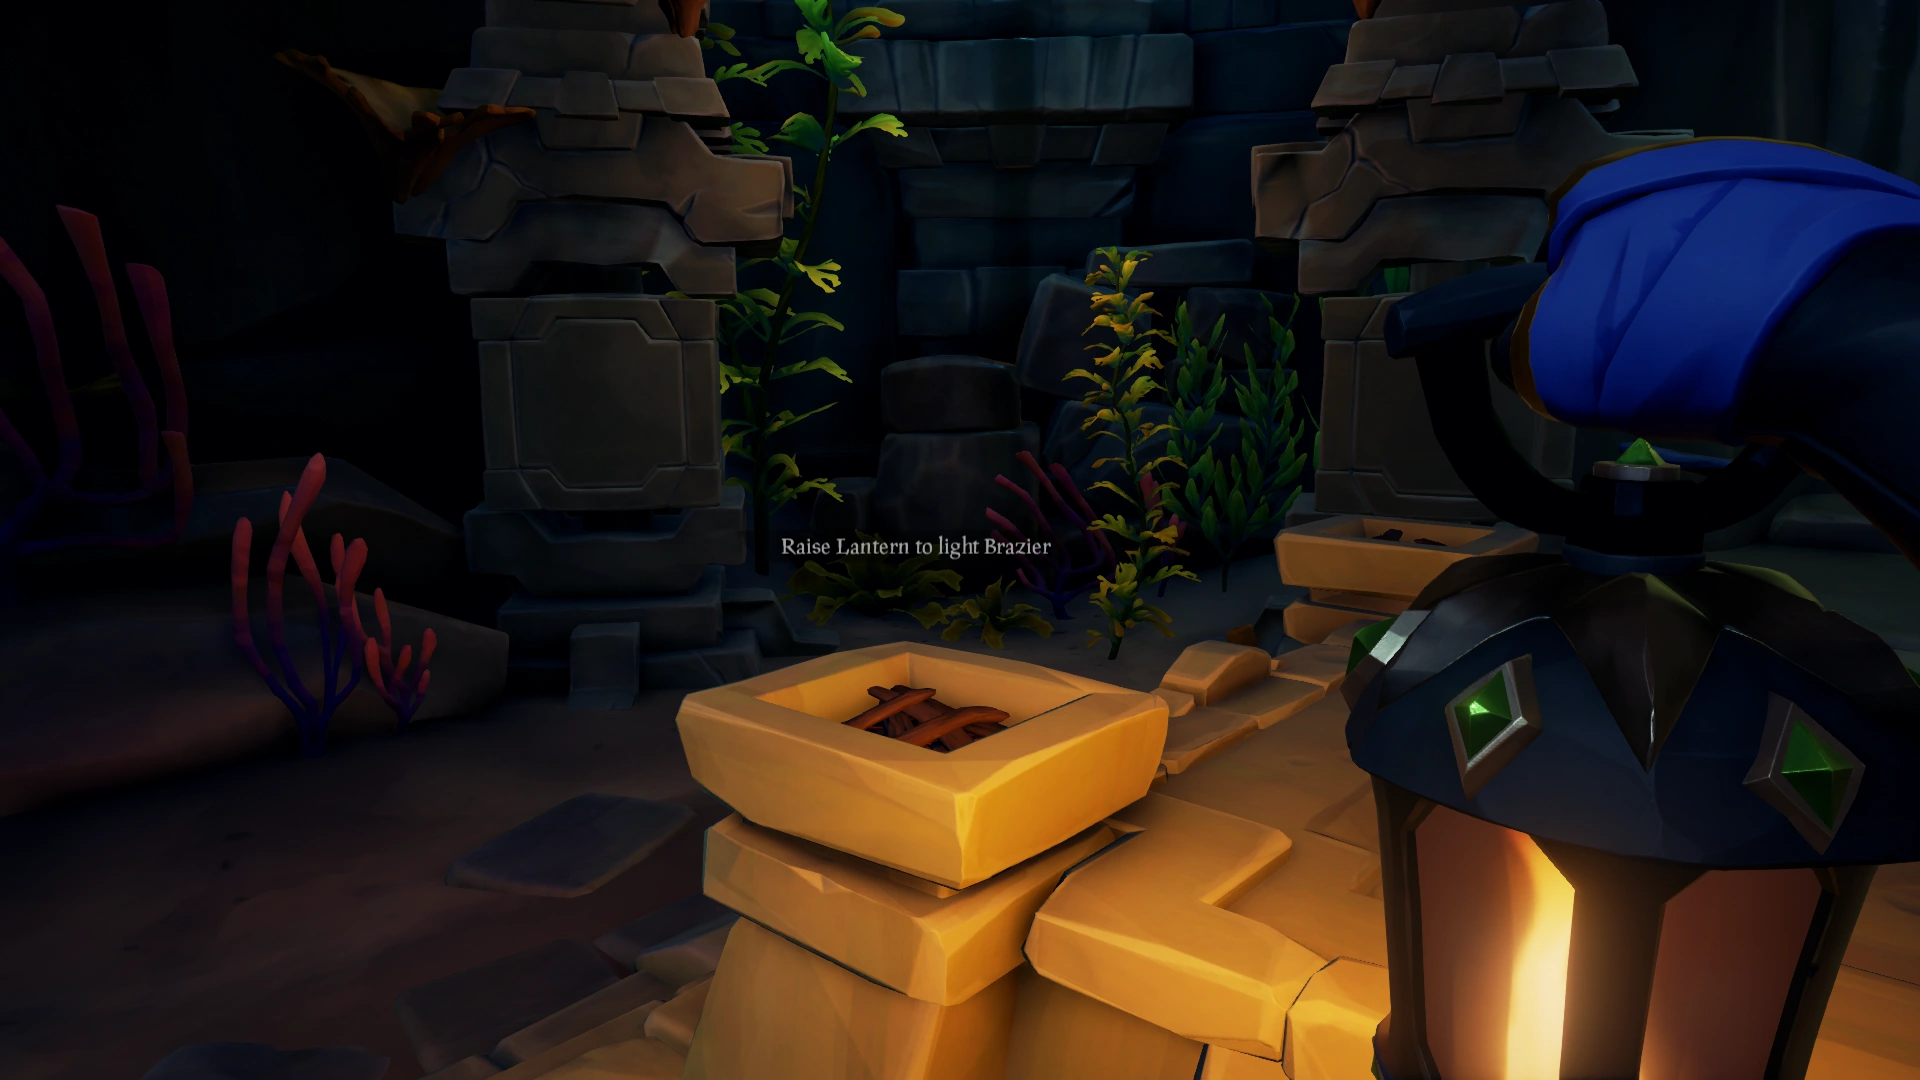
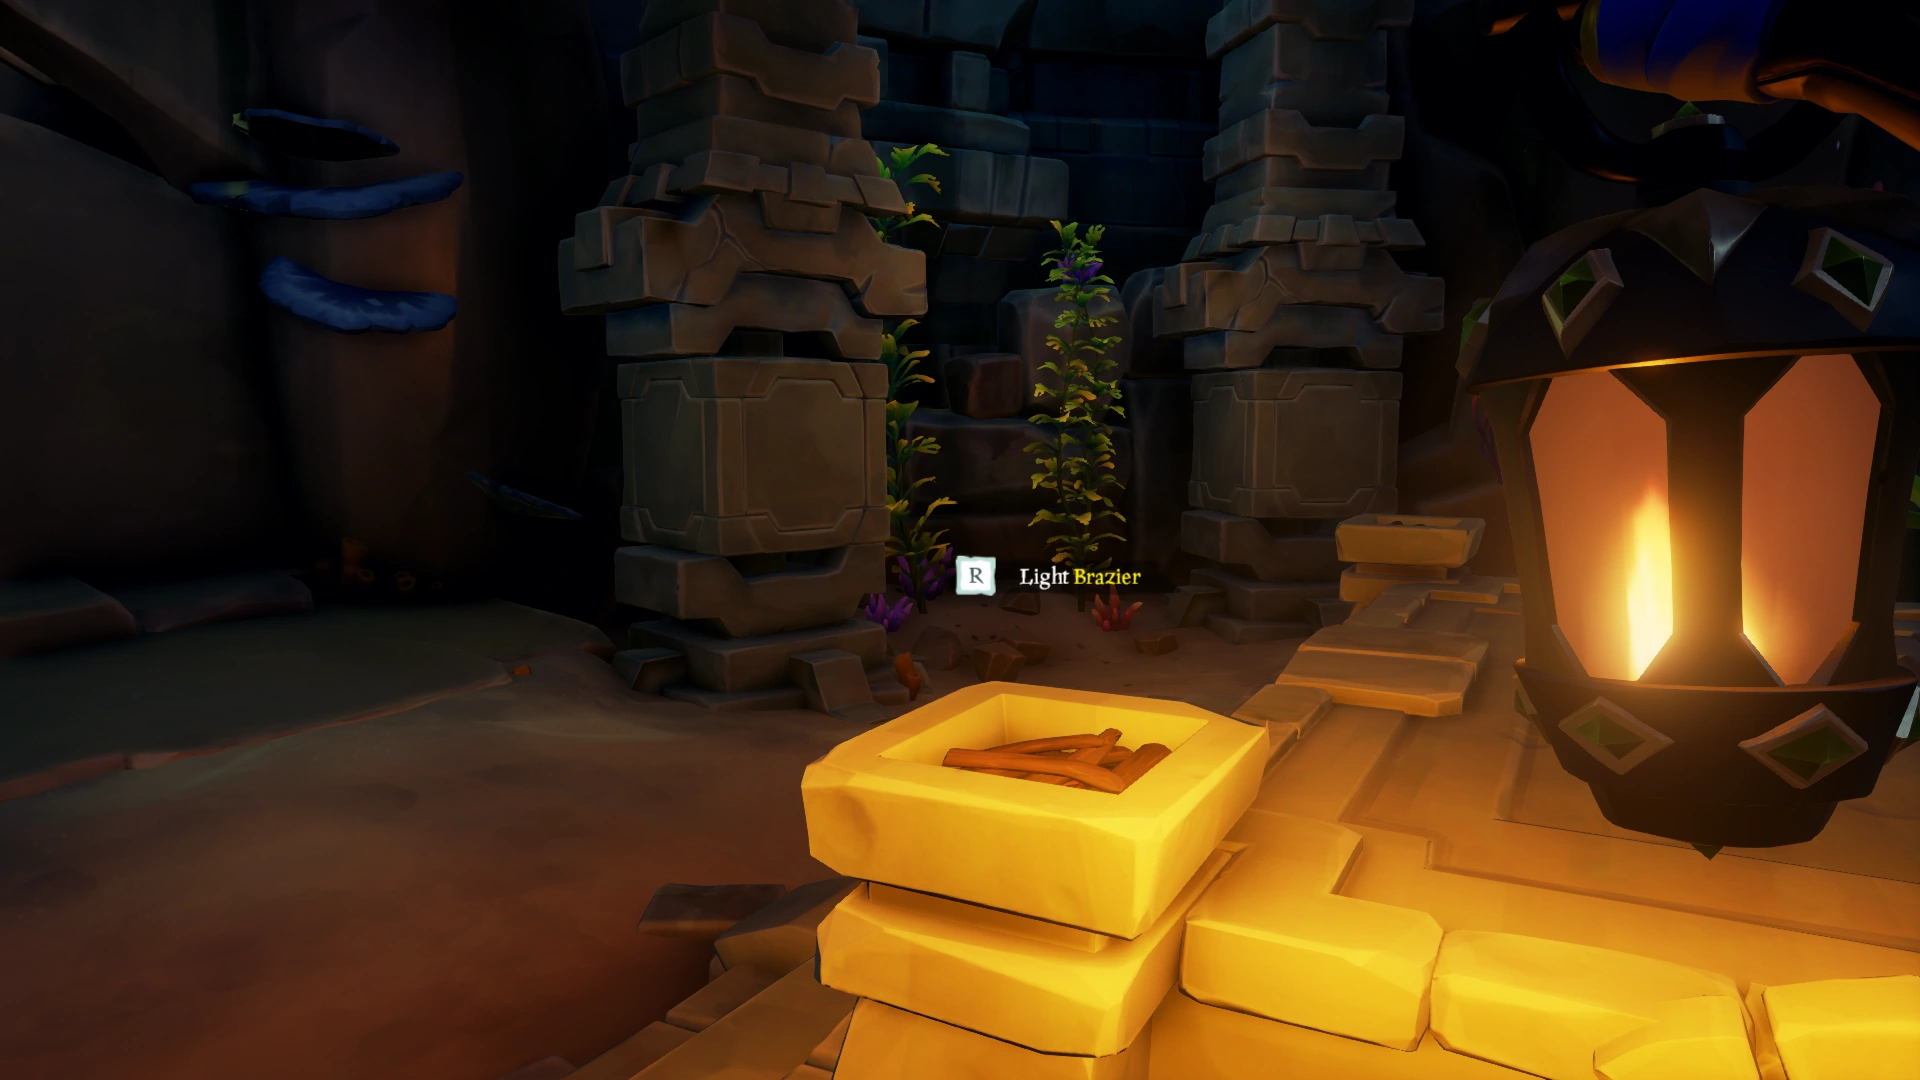
You need to raise your lantern with Secondary Use and light all 4 braziers on the Vault Table.
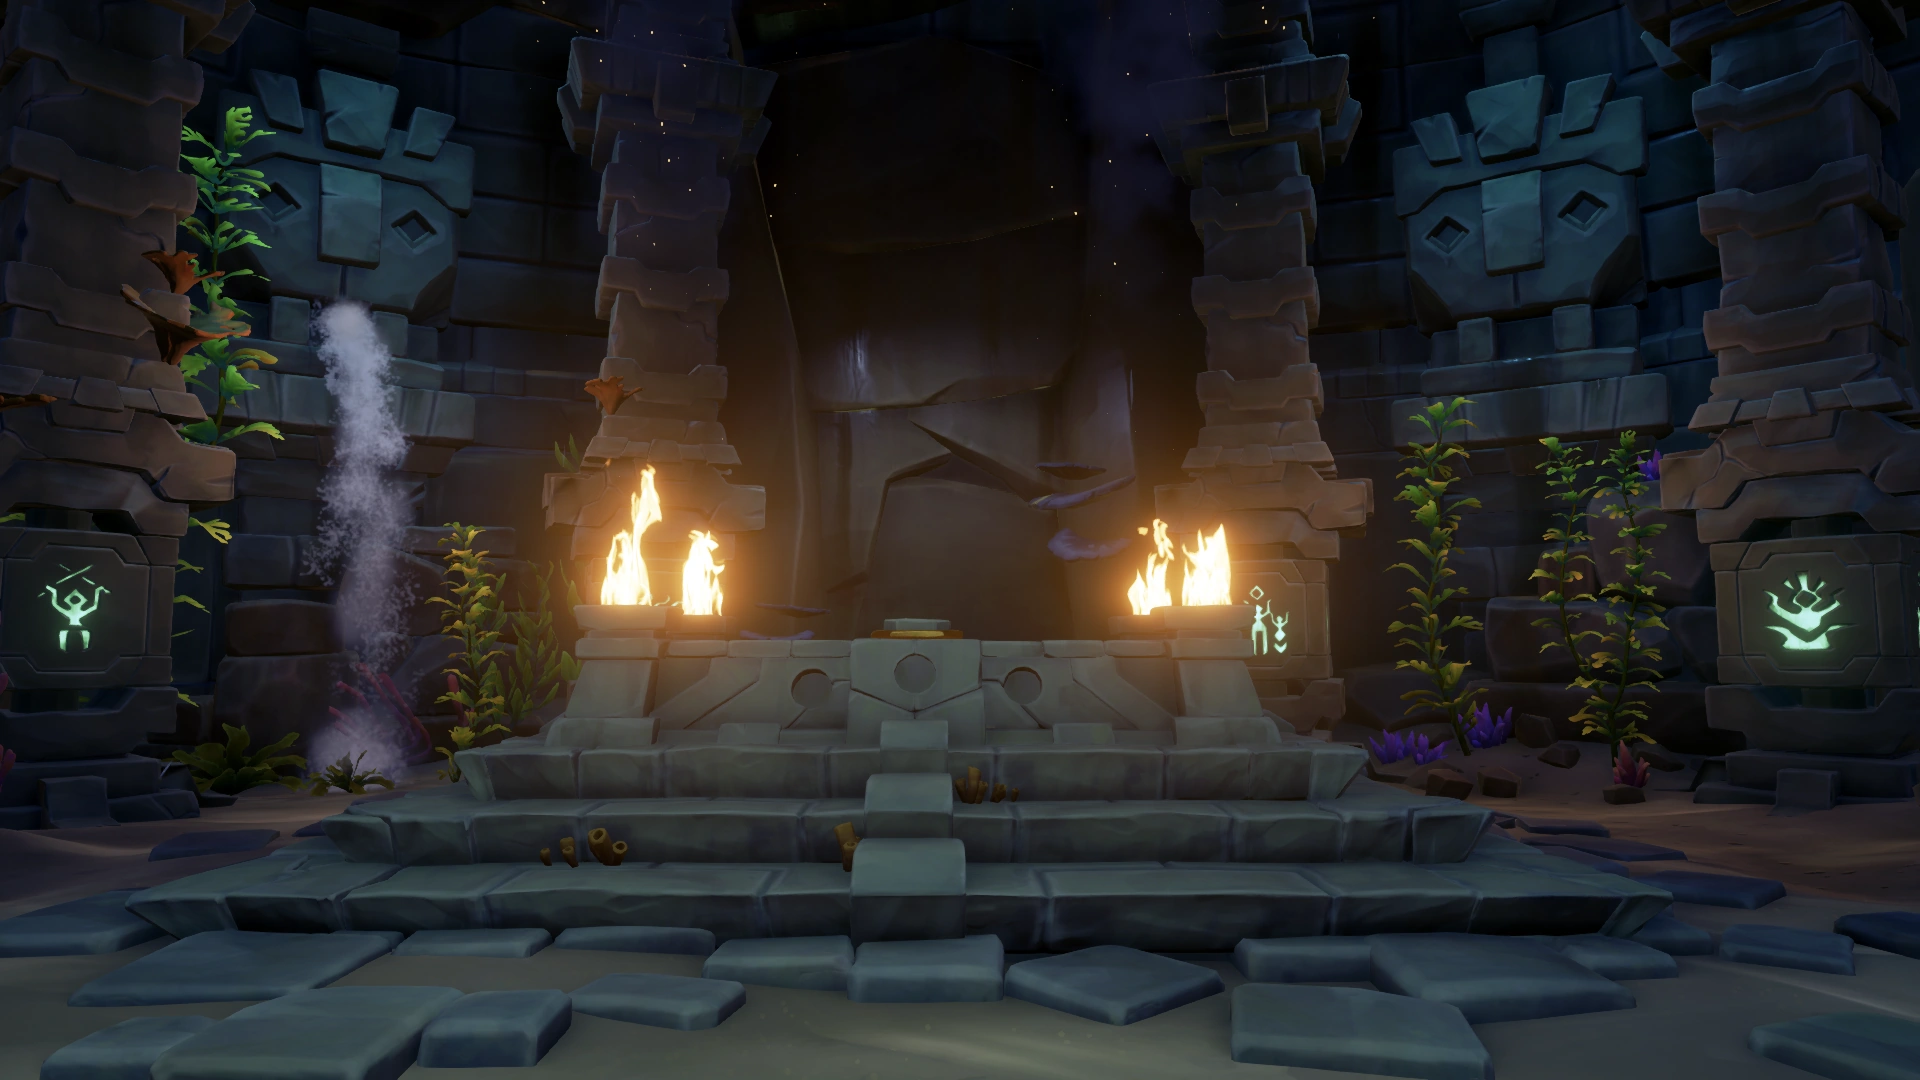
Once the braziers are lit, the Pillars will activate and begin to glow. At the same time, water will be filling in the room.
You can rotate each pillar between four images.
The second additional page on the Tale Book gives you a clue on what order these pillars need to be placed in. There are three rounds corresponding to each line on the page.
After you have lined up the pillars with correct images, enter the solution by pushing the button on the Table. Do this three times to progress!
The Medallion Puzzle[]
Take a breath, Pirate! The next part of the Totem Vault is to find three Totem Medallions hidden in specific locations of each Totem island. After you have successfully solved the Pillar Puzzle, you will see cloudy apparitions on the central table pointing you towards specific landmarks. Watch out, as these Medallions are protected by ancient guardians! Stock up on some health items and retrieve the Medallions to the Vault Room to progress.
Hints[]
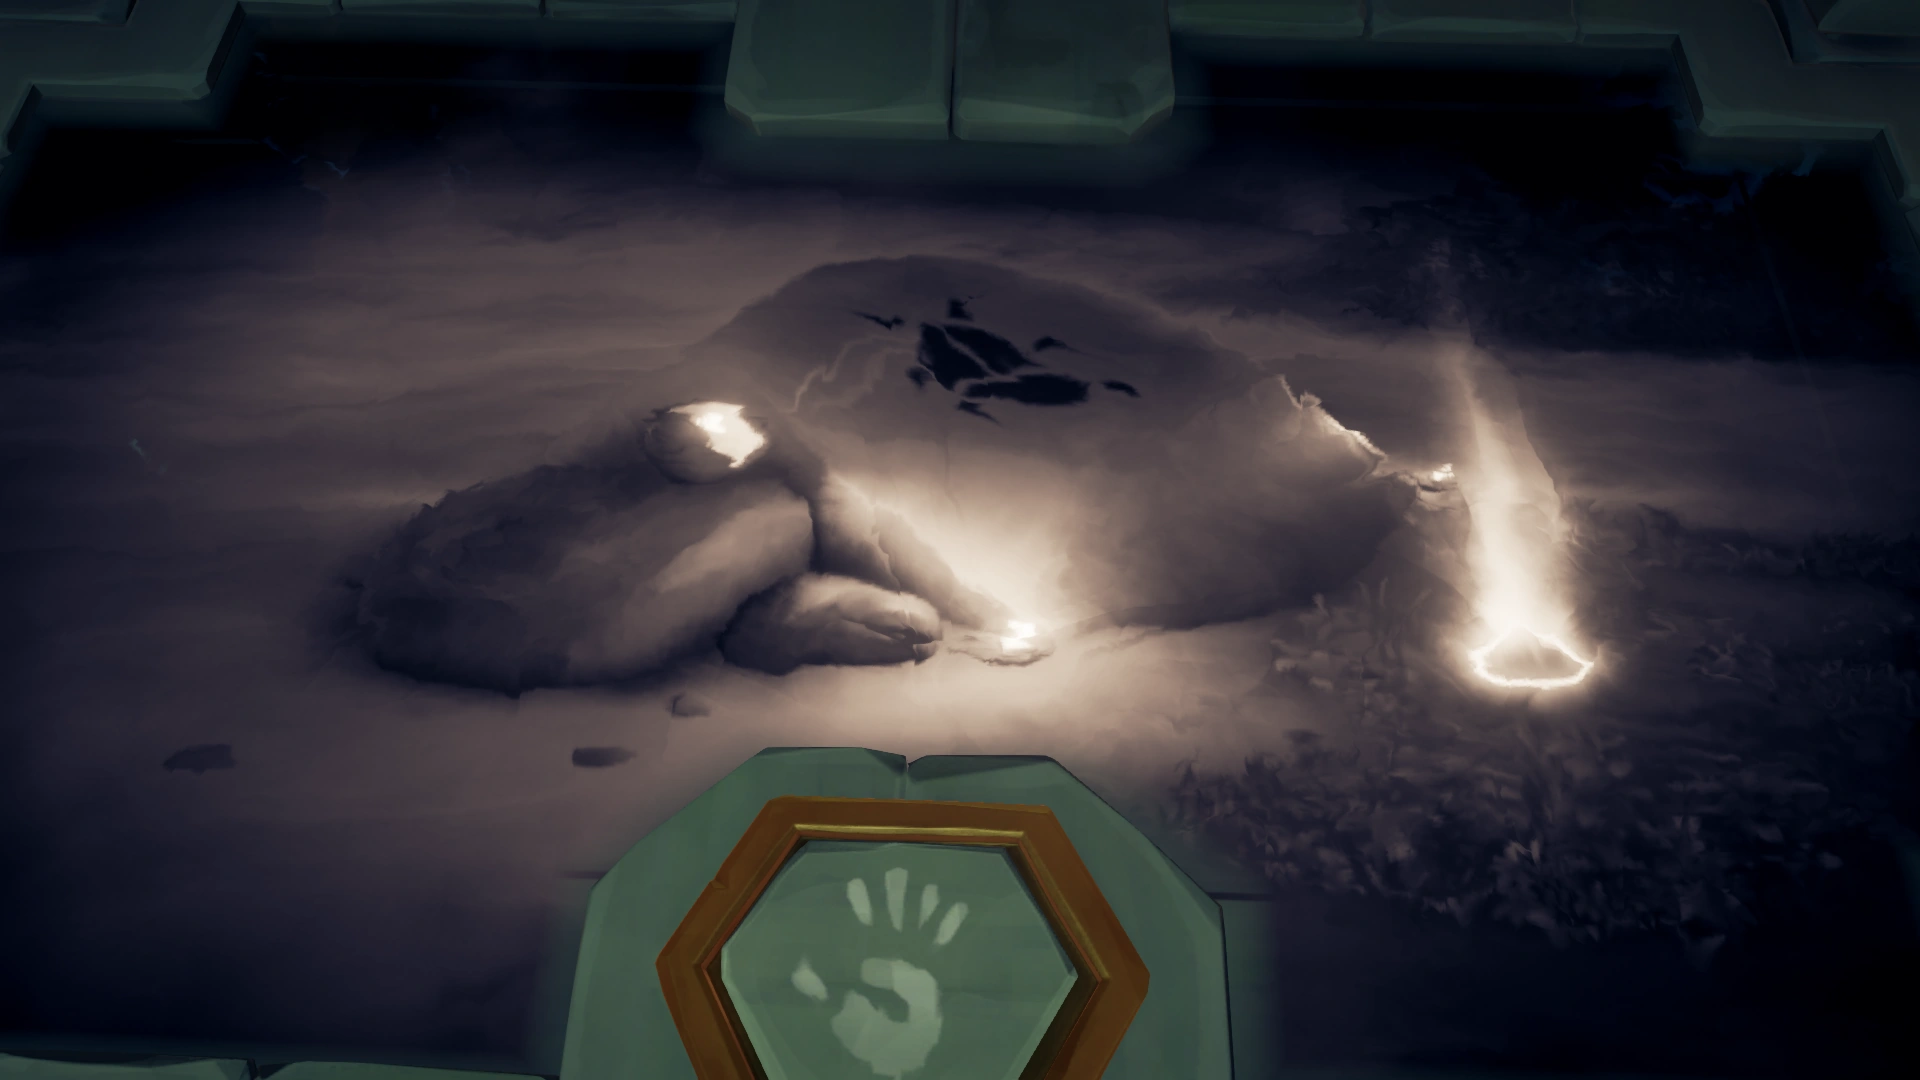
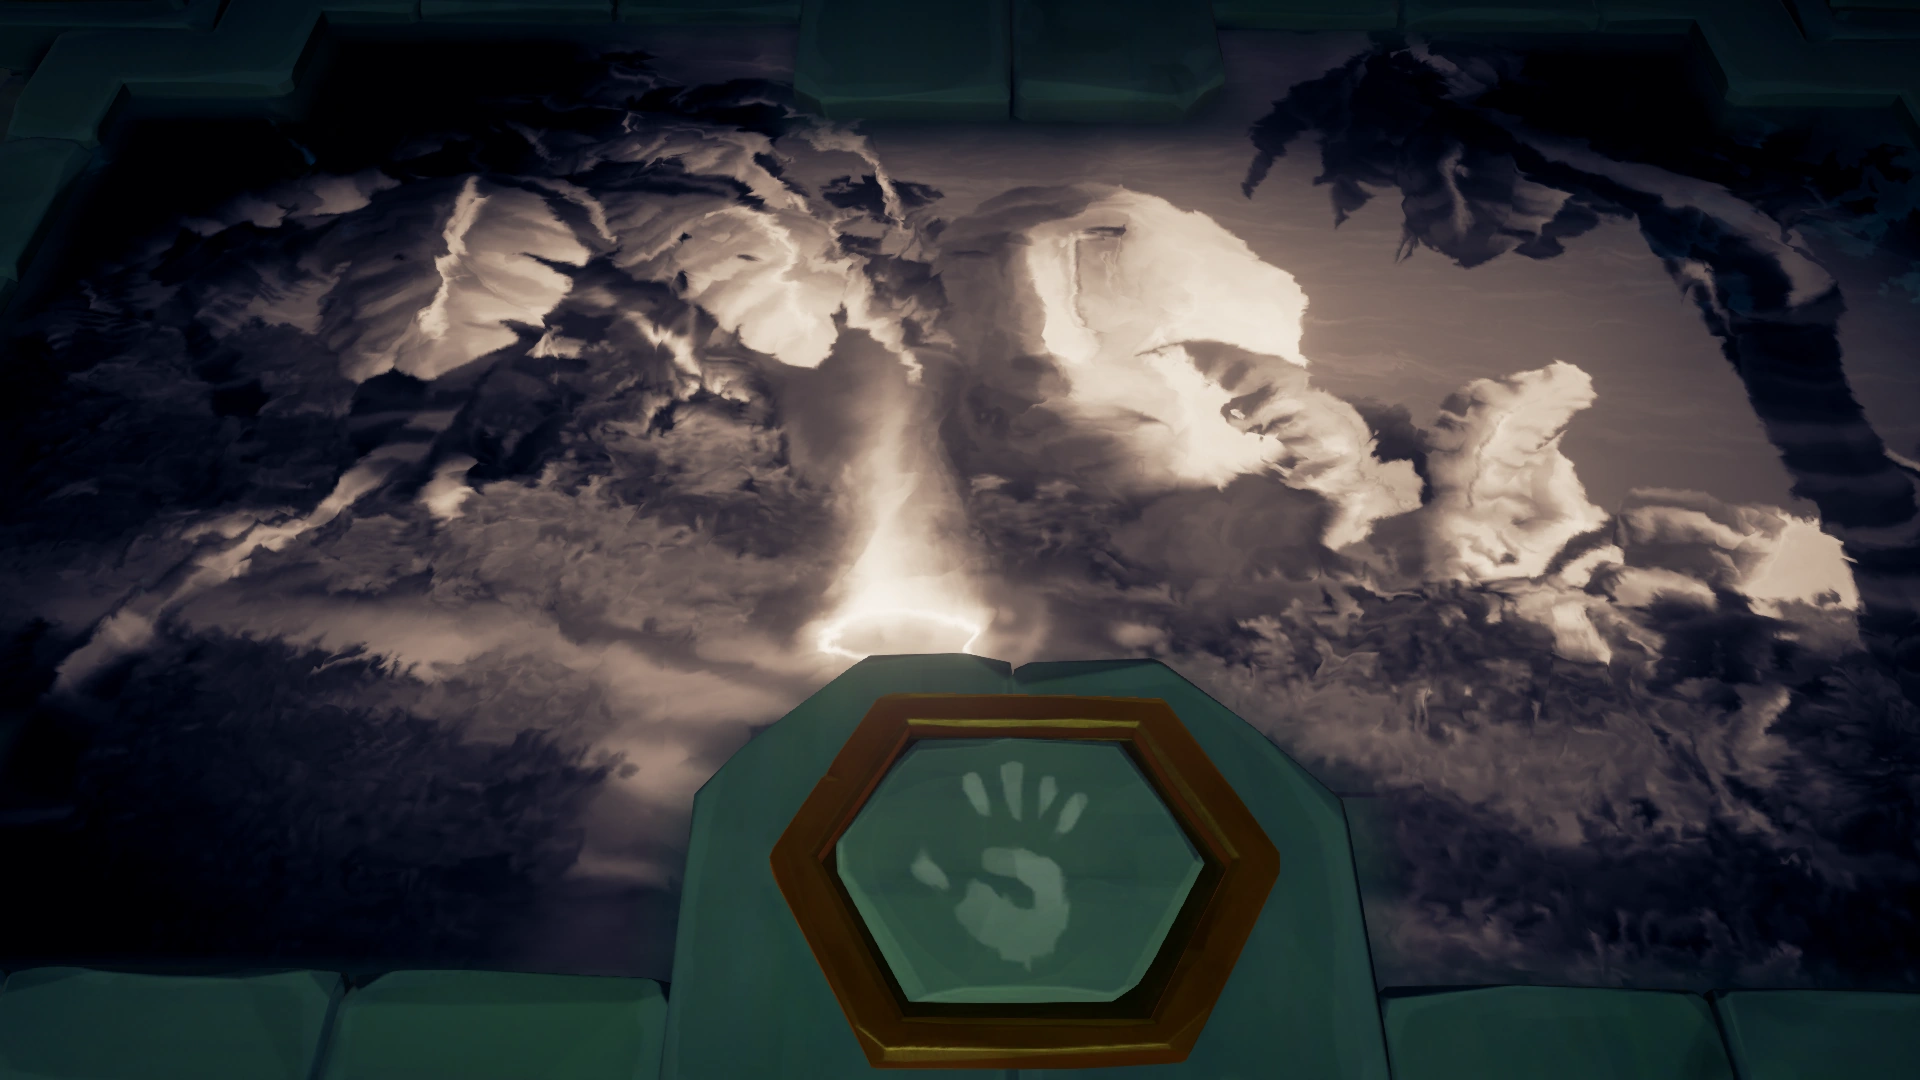
Look at the Table in the middle of the room for pictures of landmarks on that same island. The location of the Medallion is marked with a golden circle.
Of course not, because the Medallion is not visible unless you make use of your Tools!
You will see three slots on the sides of the Table back at the Totem Vault. Place the Medallions inside one by one.
CLICK FOR WALKTHROUGH AND GALLERY
|
|---|
Walkthrough[]
After the Pillar Puzzles, the central Table in the Vault will now show you an image of three landmarks on the Island with golden circles marking the exact spots where the Medallions are buried. The three Medallions of a single Island are always buried at the same locations. You will have to go to these landmarks and dig with your Shovel at the place indicated by the golden circle. It is recommended to take a picture of the table images to see exactly where the Medallions are buried.
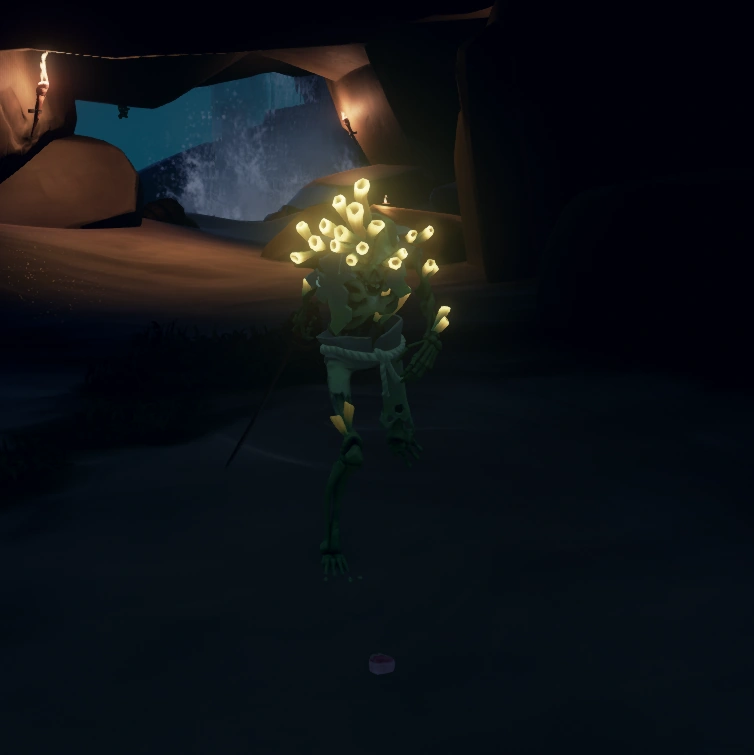
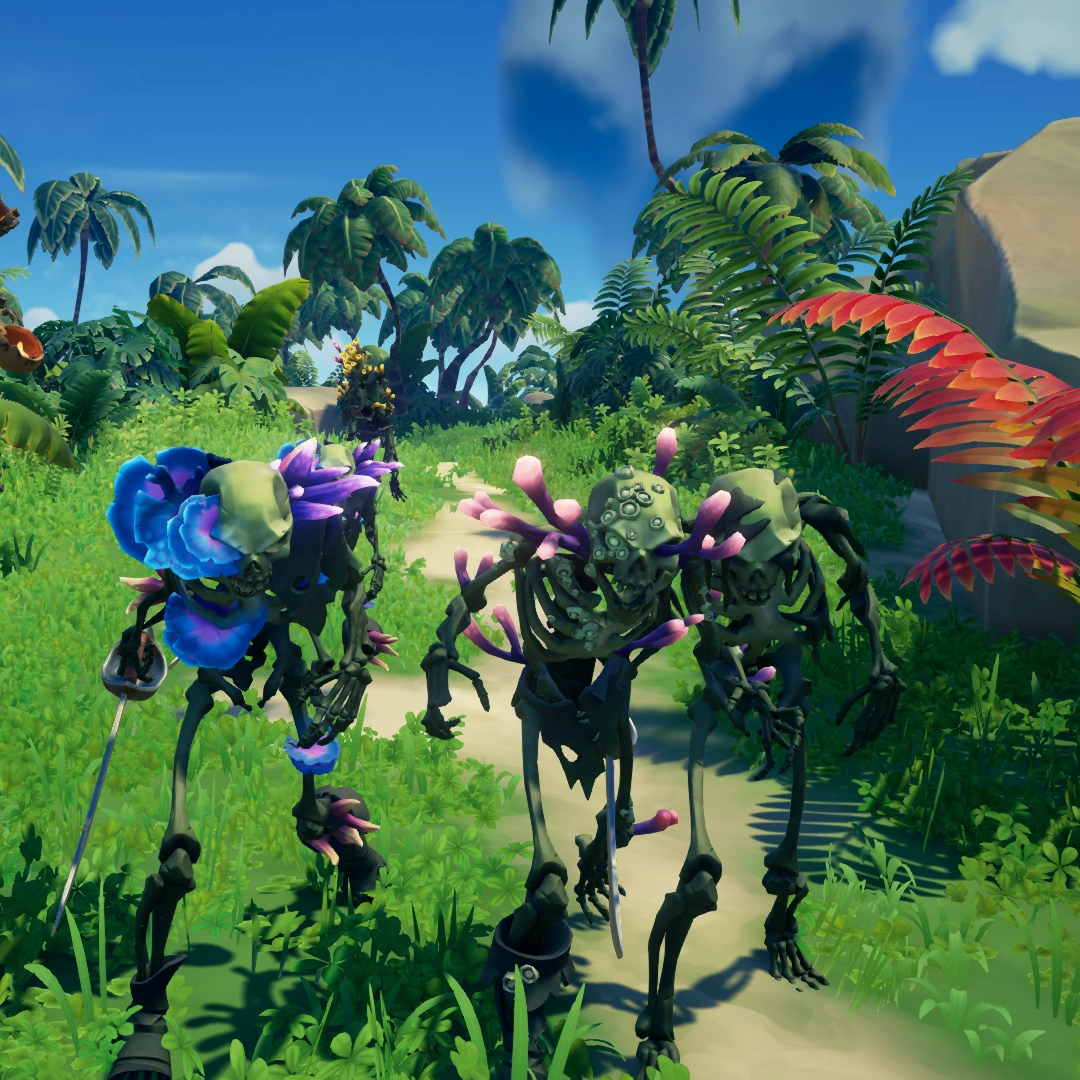
With every Medallion you dig up, a few Coral Skeletons will appear, dispatch them take the Medallion back to the table and move to the next one.
Medallion Locations:
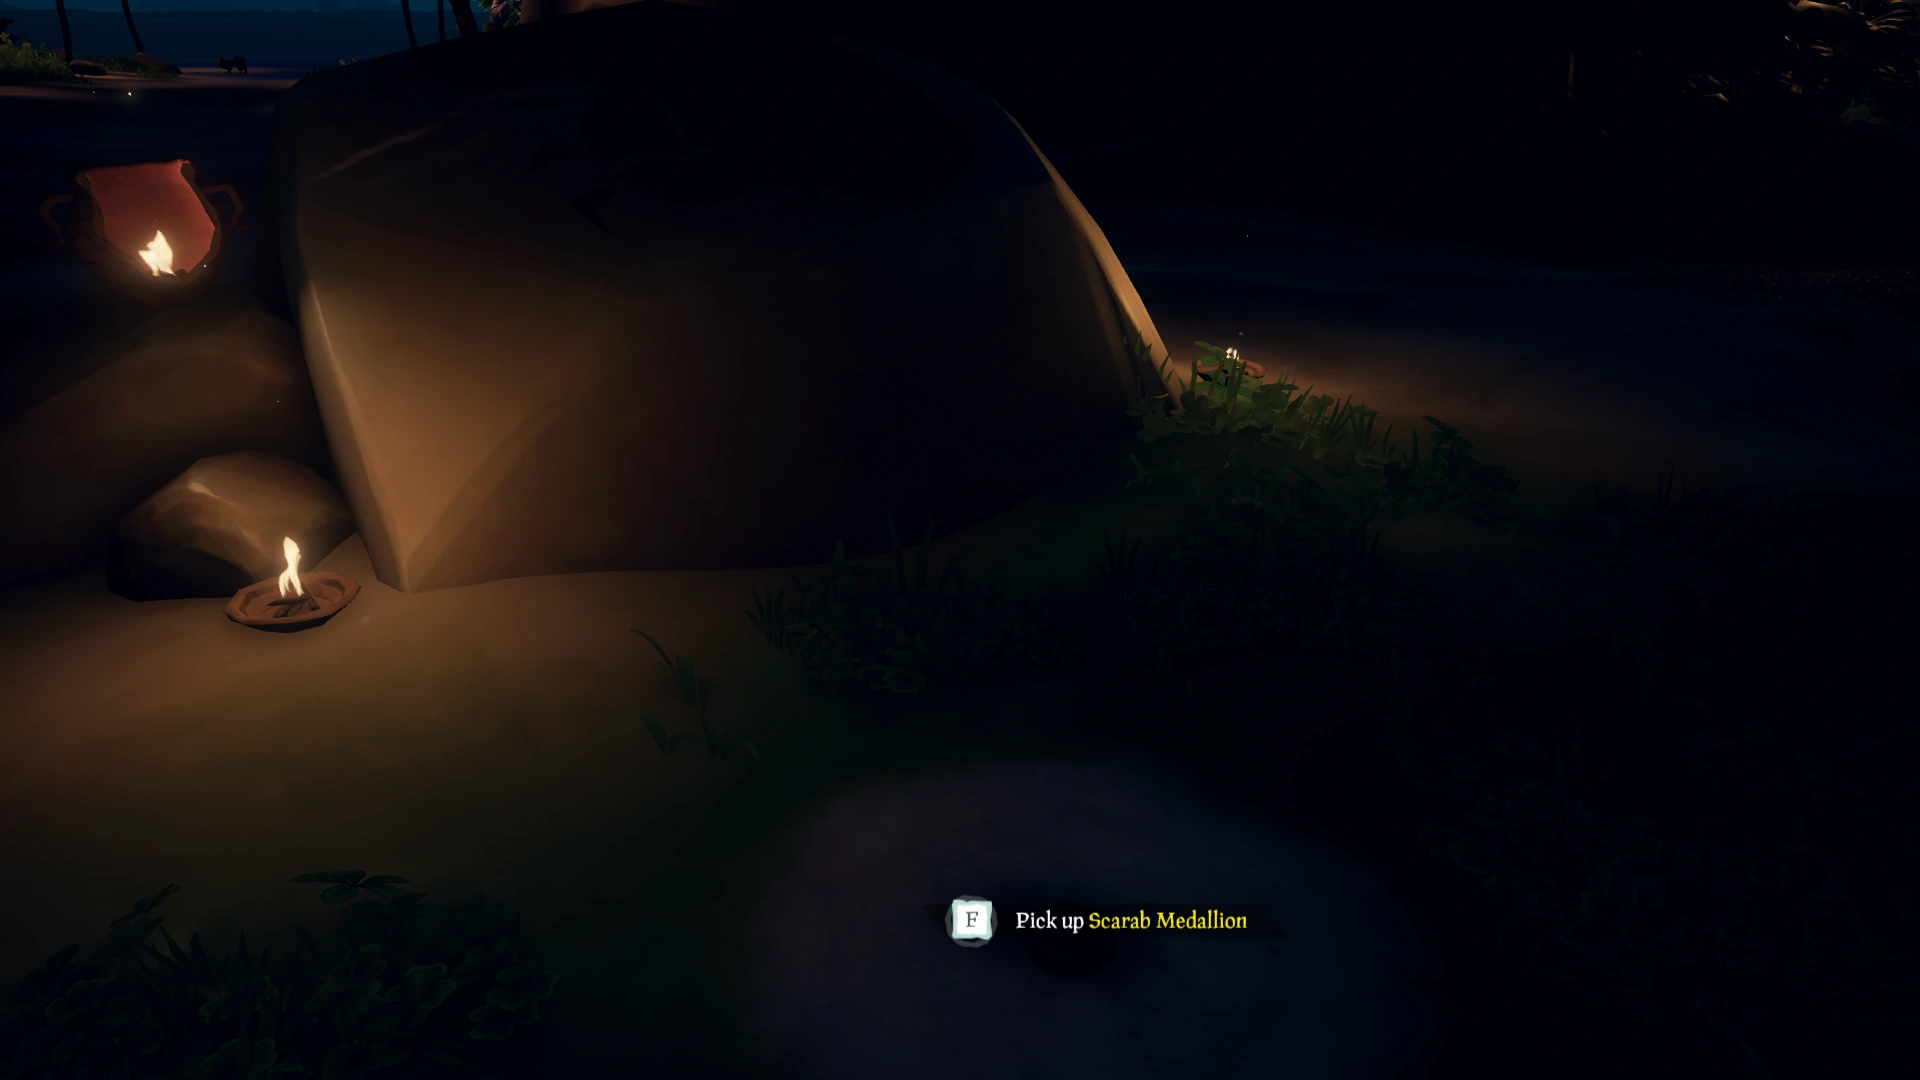
The three Scarab Medallions needed for the Scarab Vault on Crook's Hollow are placed in the following locations:
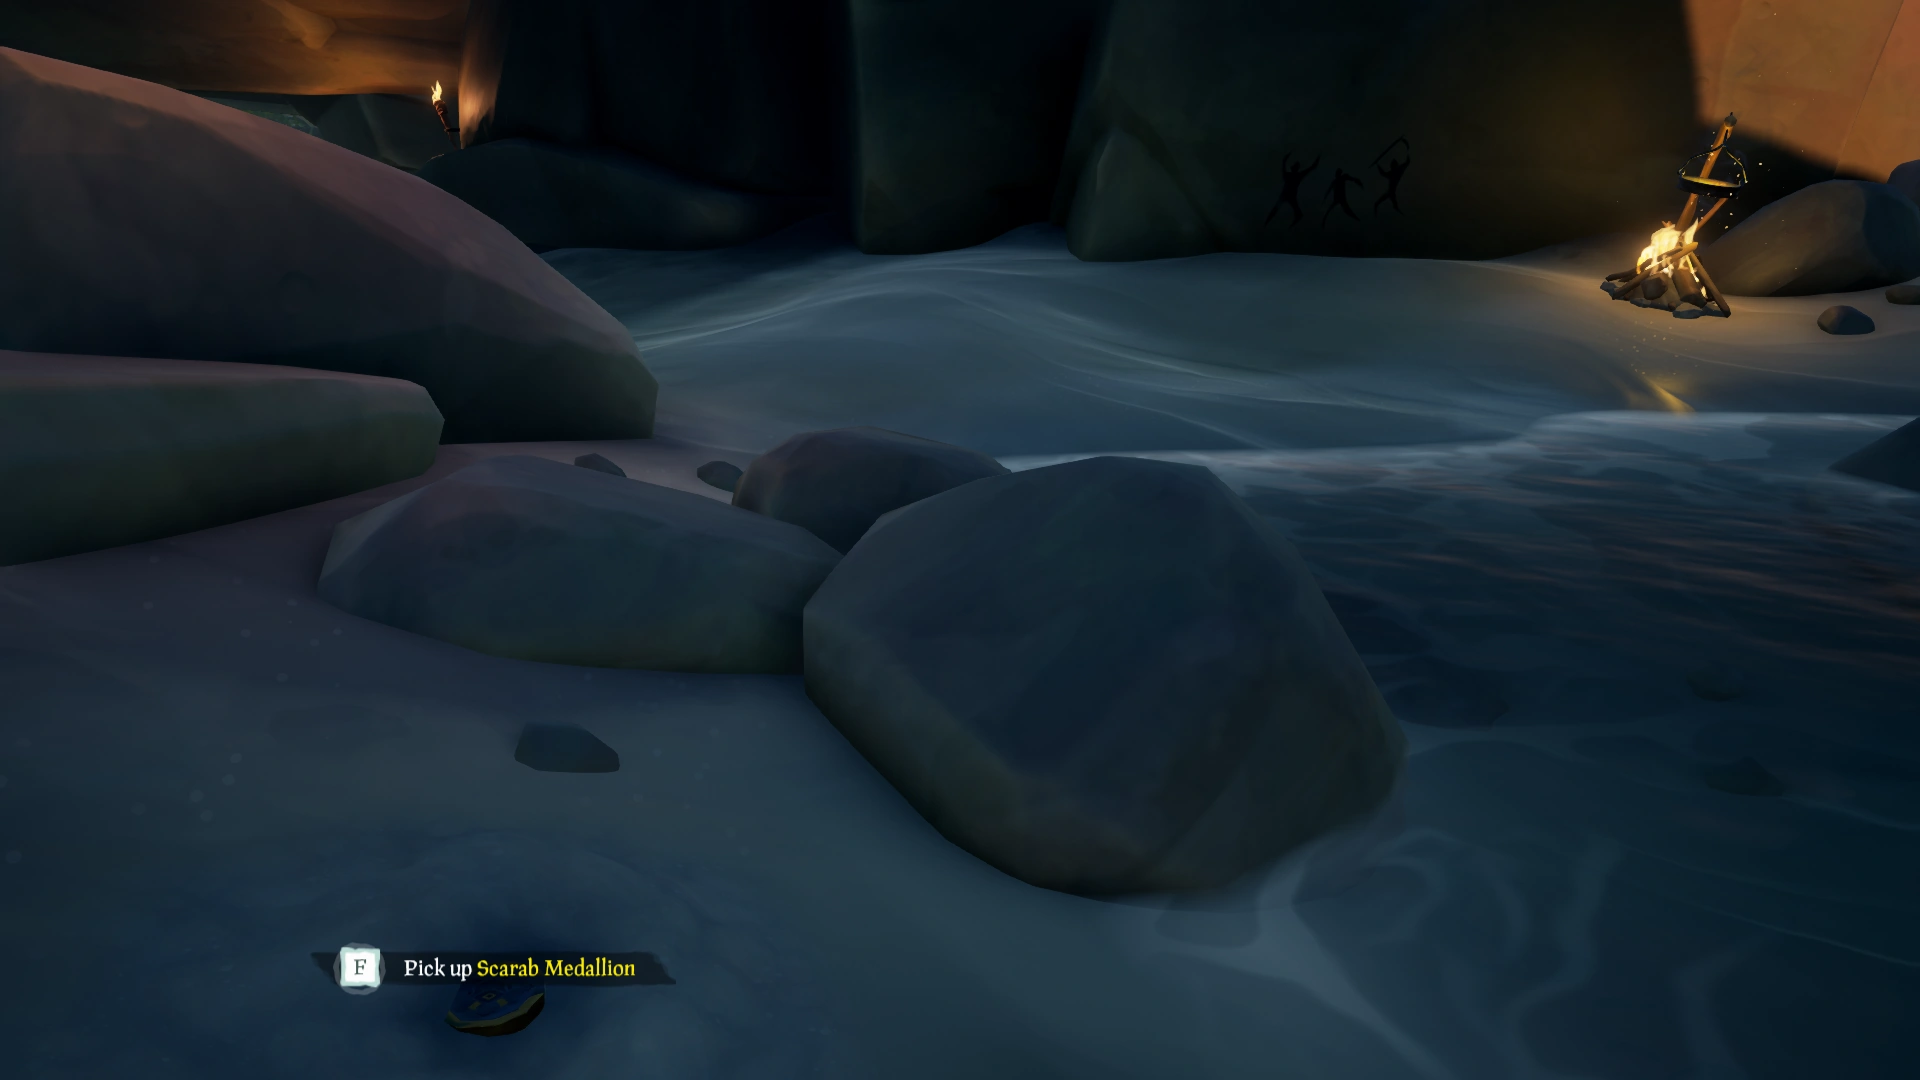
- A rock with a Scarab painted on it right outside the Vault.
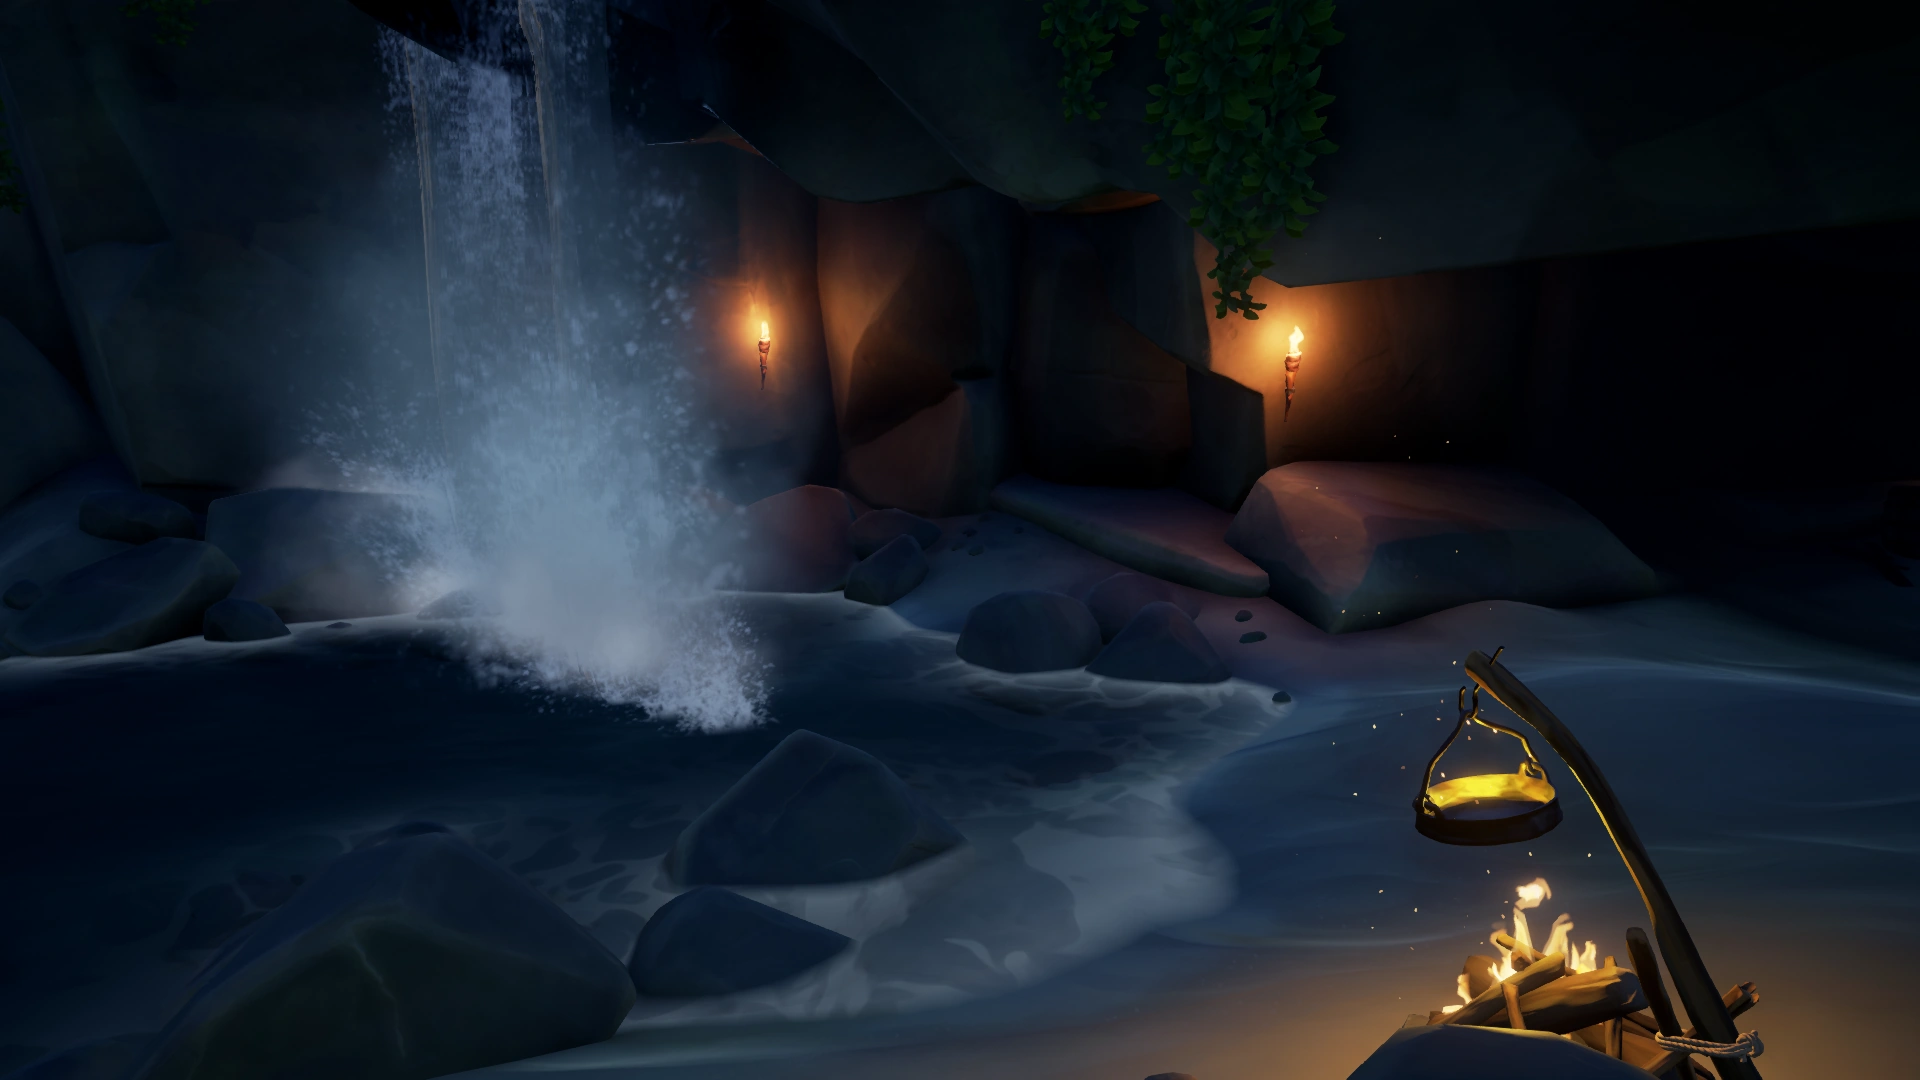
- Behind the Waterfall right outside the Cave.
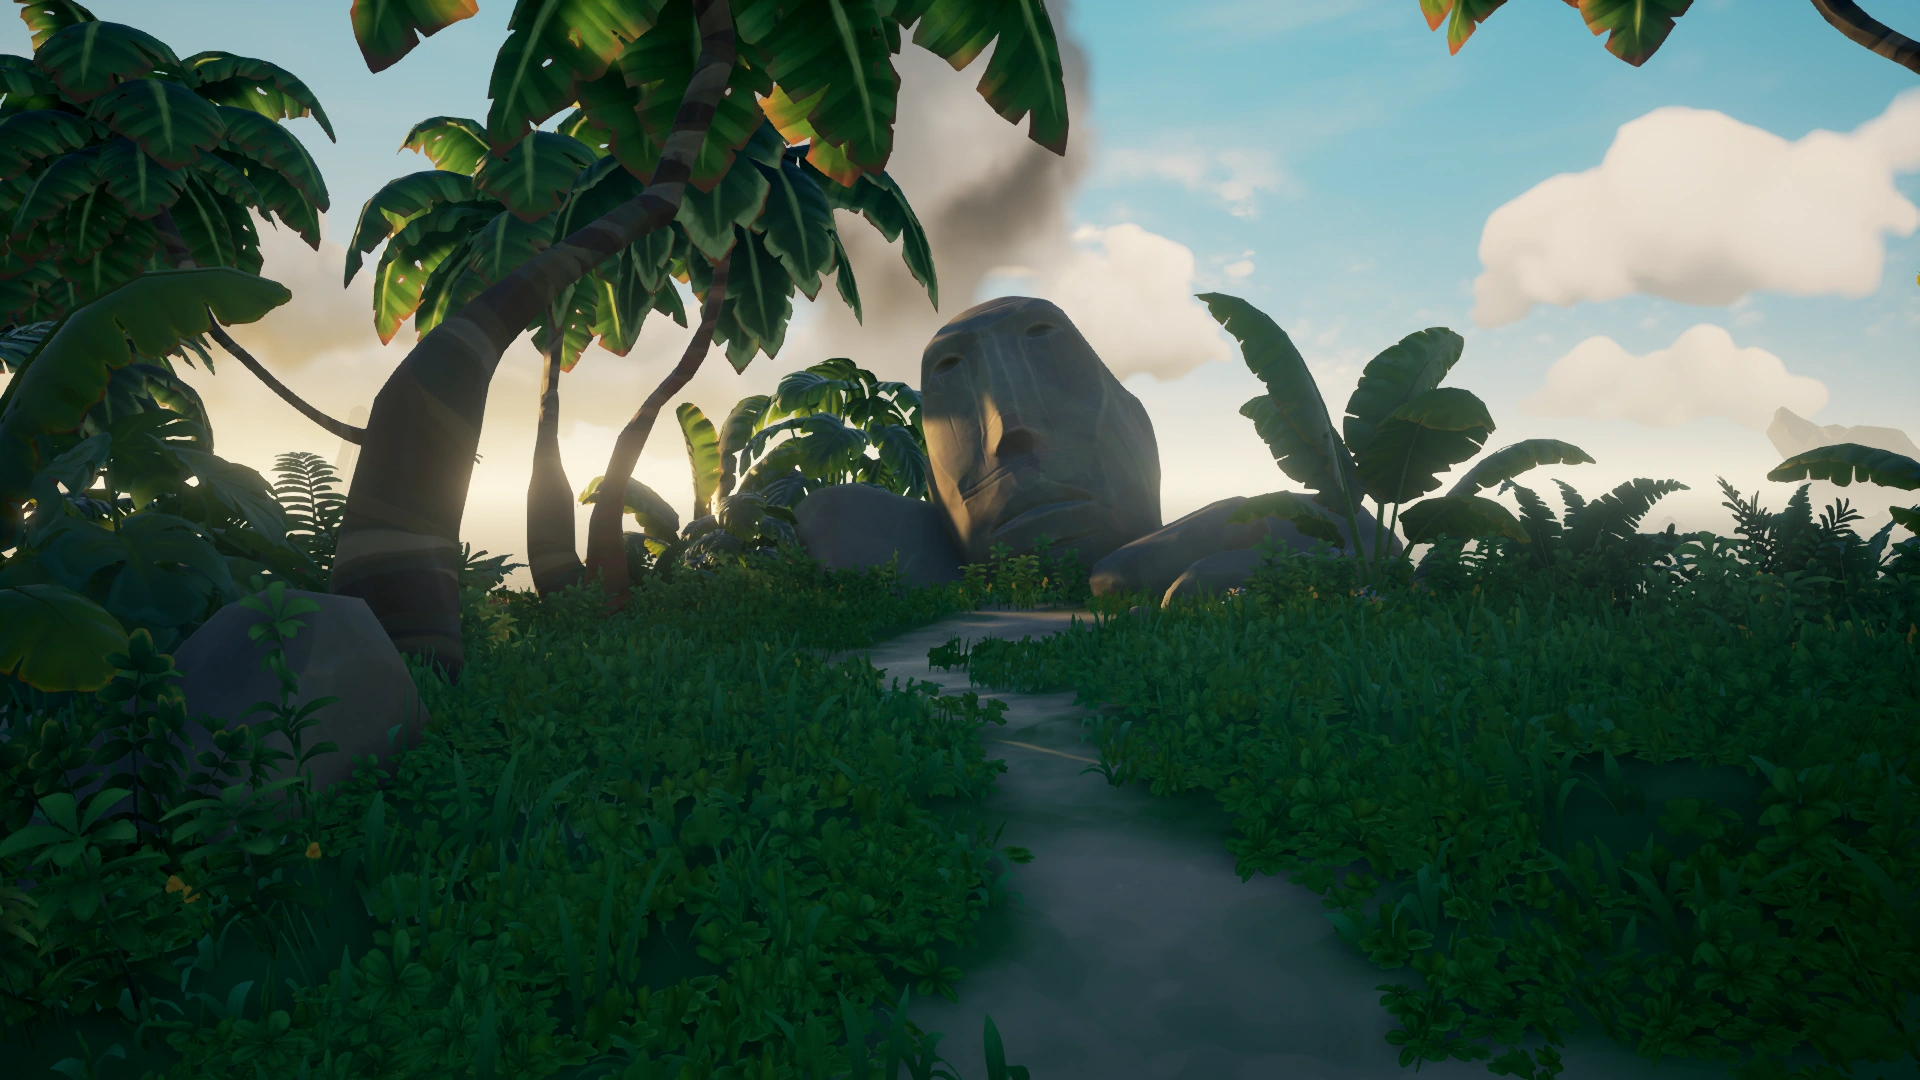
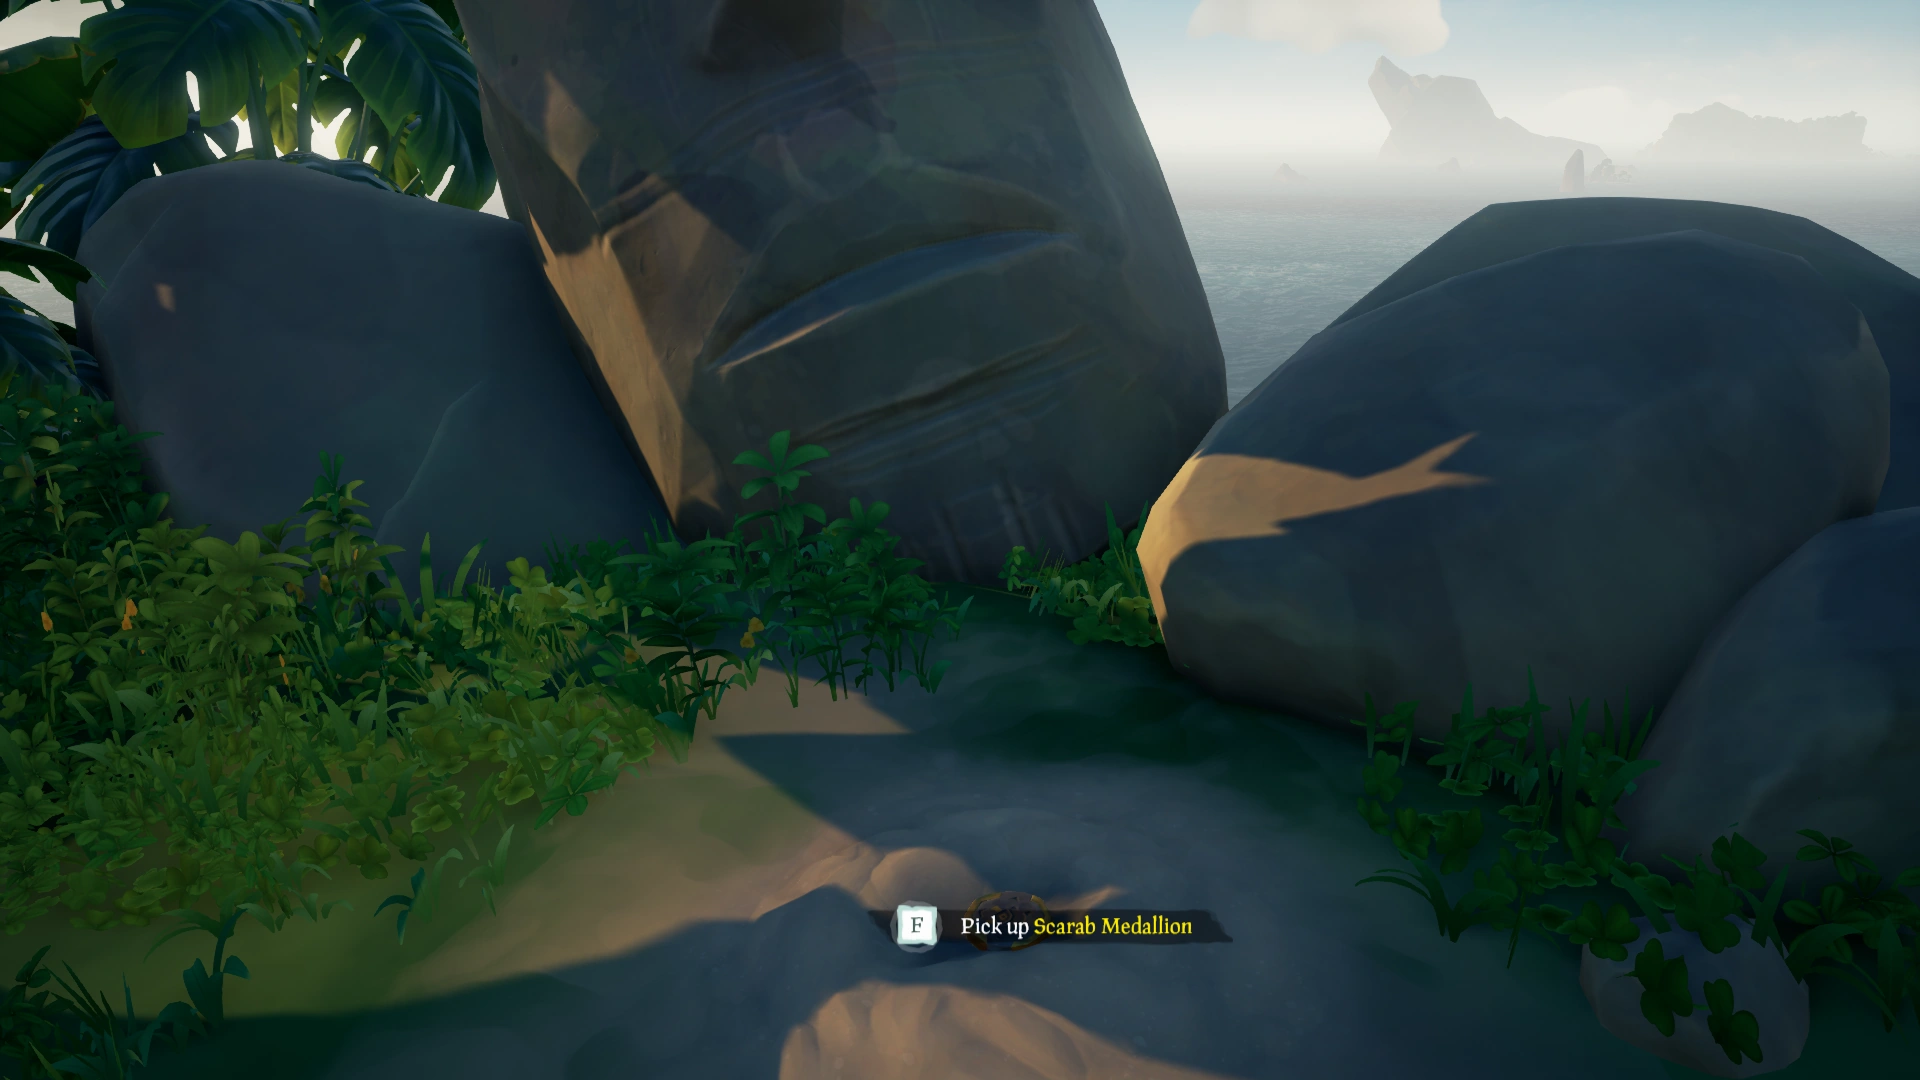
- In front of the Head statue made of stone on the very top of the Island.
The First image for the Crook's Hollow Scarab Vault. It highlights a specific spot by a rock with a Scarab painting.
You will find this landmark right outside the Vault room in the Cave.
You will need to use your Shovel to dig up the Medallion.
The second Crook's Hollow image.
This one is behind the Waterfall outside the cave.
The exact location of the second Medallion.
The final Crook's Hollow image
The image depicts a statue of a head on the very top of the Island.
The exact location of the final Medallion.
The three Boar Medallions needed for the Boar Vault on Devil's Ridge are placed in the following locations:
- In front of some rocks by the waterfall pond.
- Under a drooping rock formation right above the Vault.
- On top of the Boar shrine inside the Island's cave systems. The entrance to the cave can be found near the cannon on the north side of the island.
In front of some rocks by the waterfall pond.
Under a drooping rock formation right above the Vault.
The entrance to the cave can be found near the cannon on the north side of the island.
On top of the Boar shrine inside the Island's cave systems.
The three Snake Medallions needed for the Snake Vault on Mermaid's Hideaway are placed in the following locations:
- Right above the Vault on the North side of the Island.
- Atop a western pillar south of the bridge.
- Close to a lonely lantern below the bridge.
The three Crab Medallions needed for the Crab Vault on Uncharted Island (N-13) are placed in the following locations:
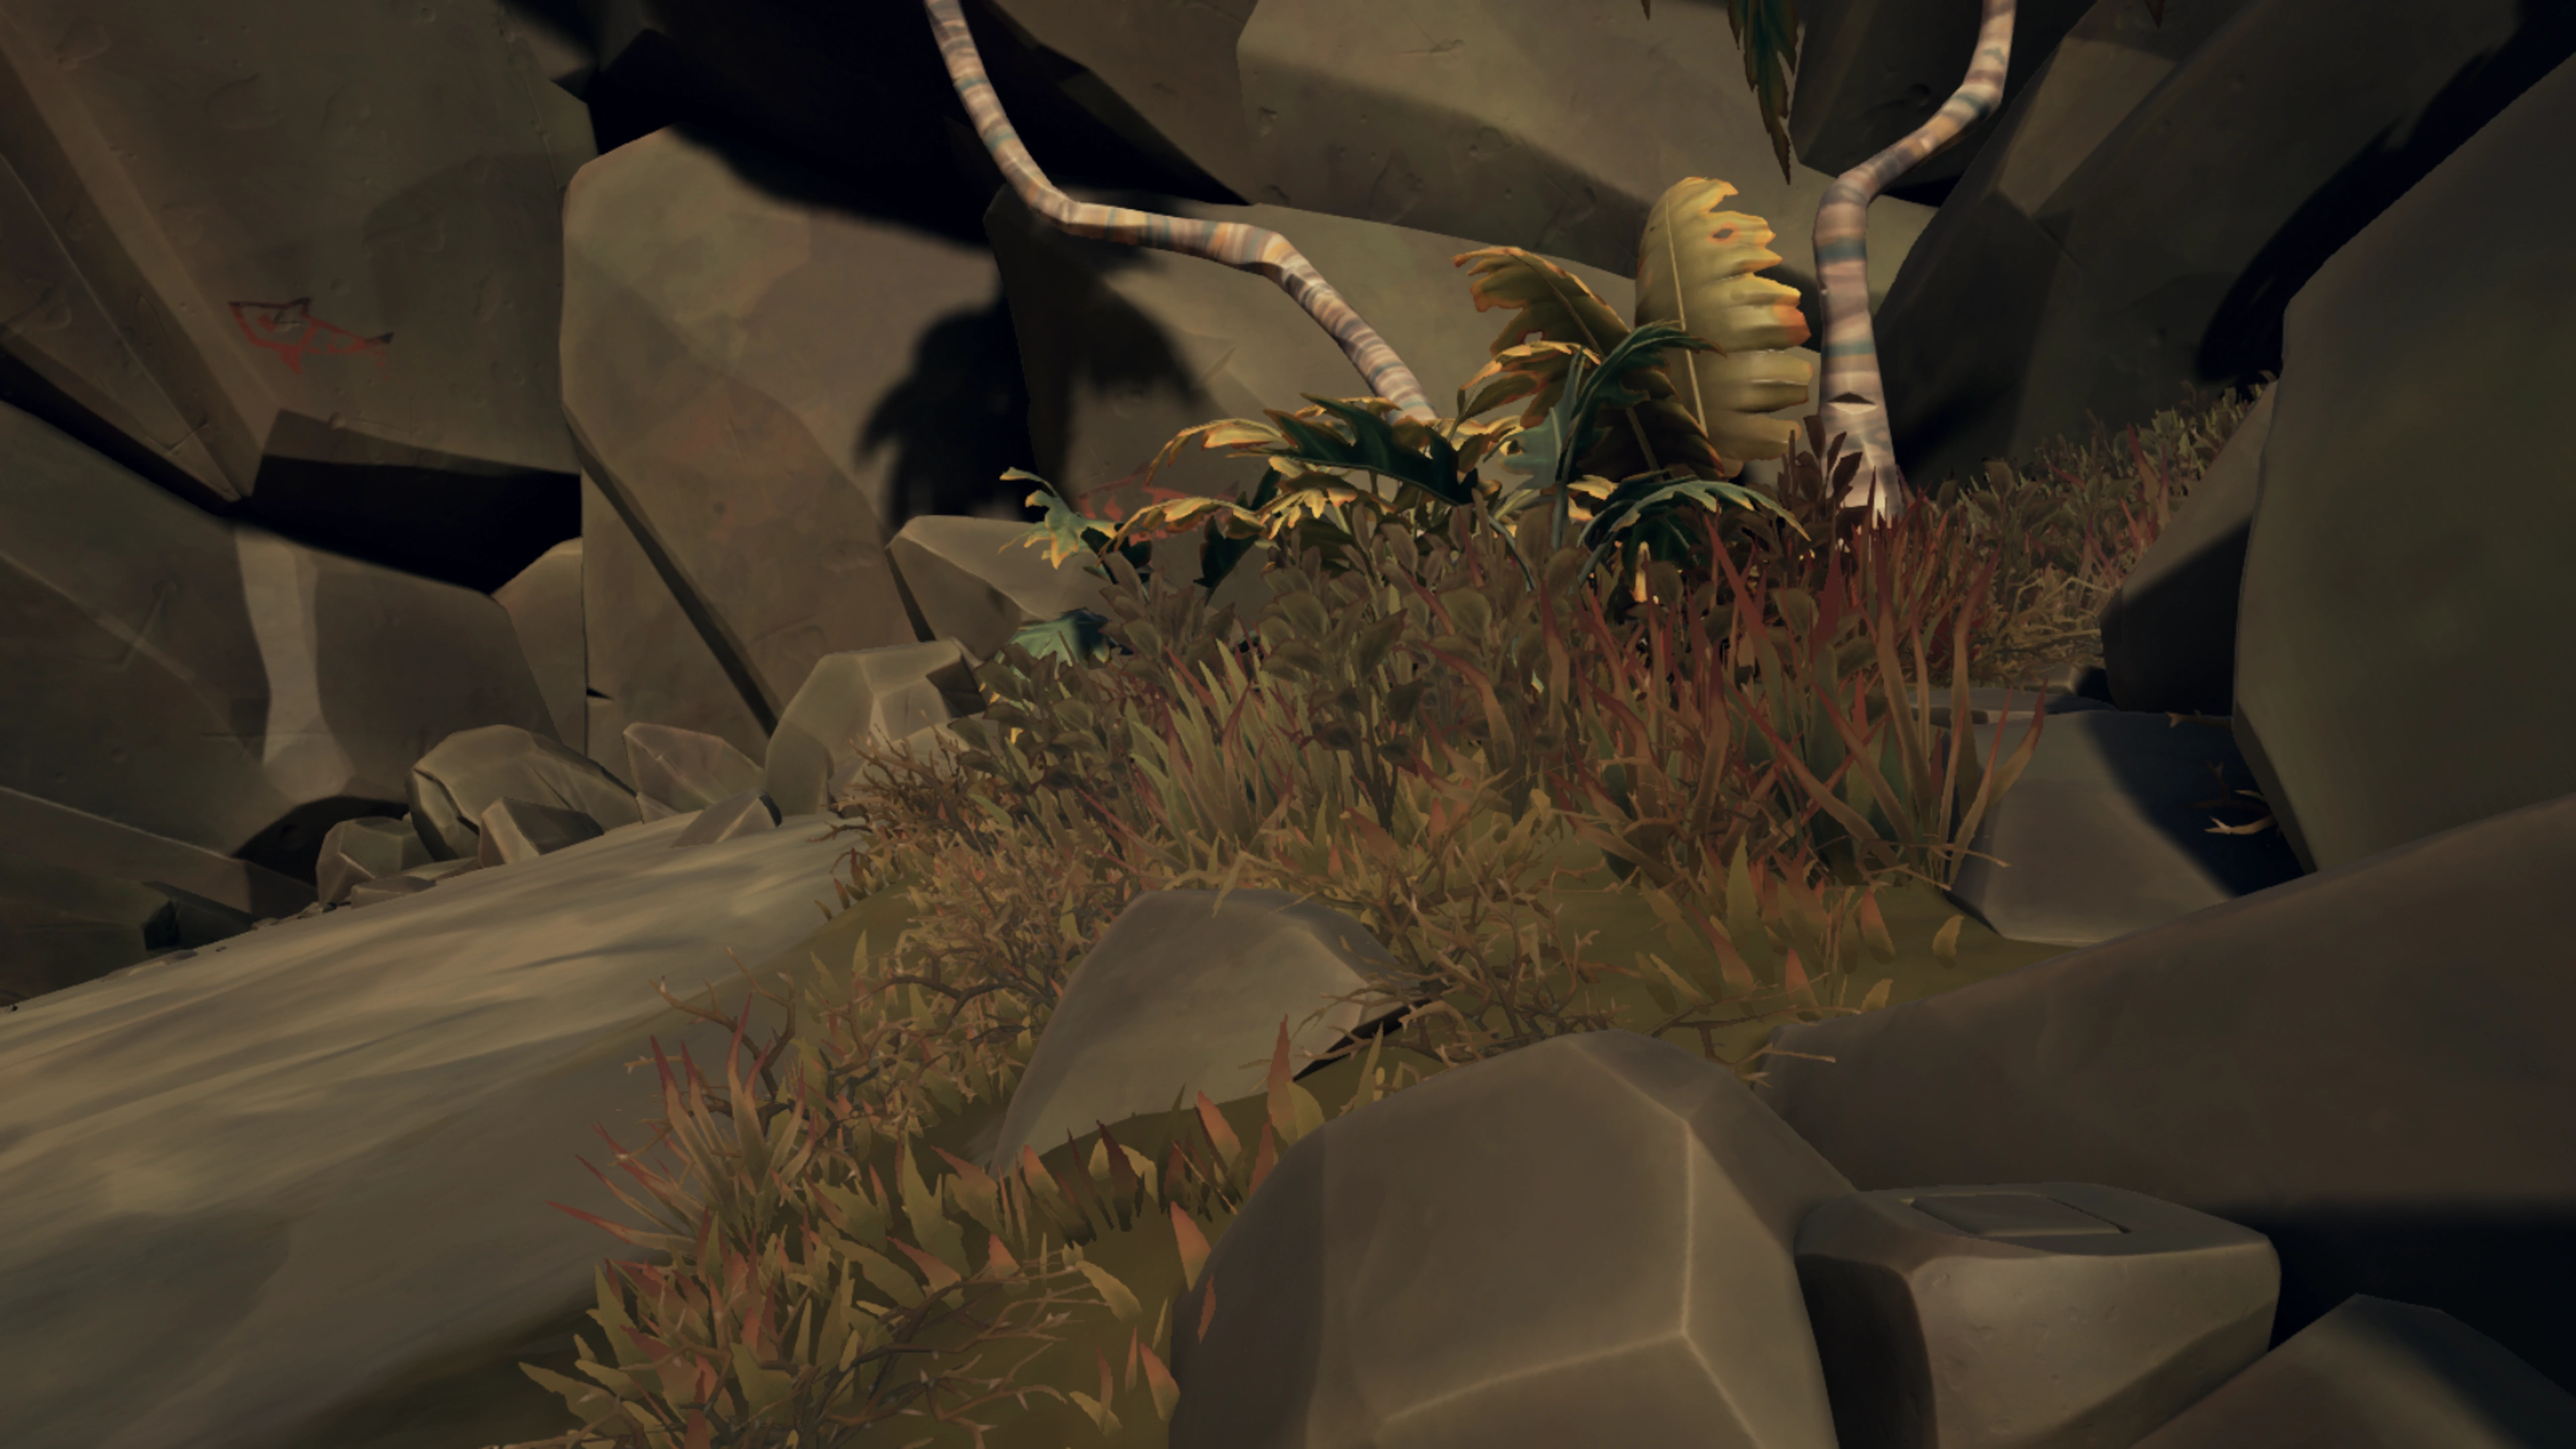
- Atop a pillar right by the cave entrance (This one is just there, no digging needed).
- Outside on the beach, on the south-eastern islet, right below some palm trees.
- Underwater below two stone arches, south-west of the Magpie’s Wing Shipwreck (this one is also laying there).
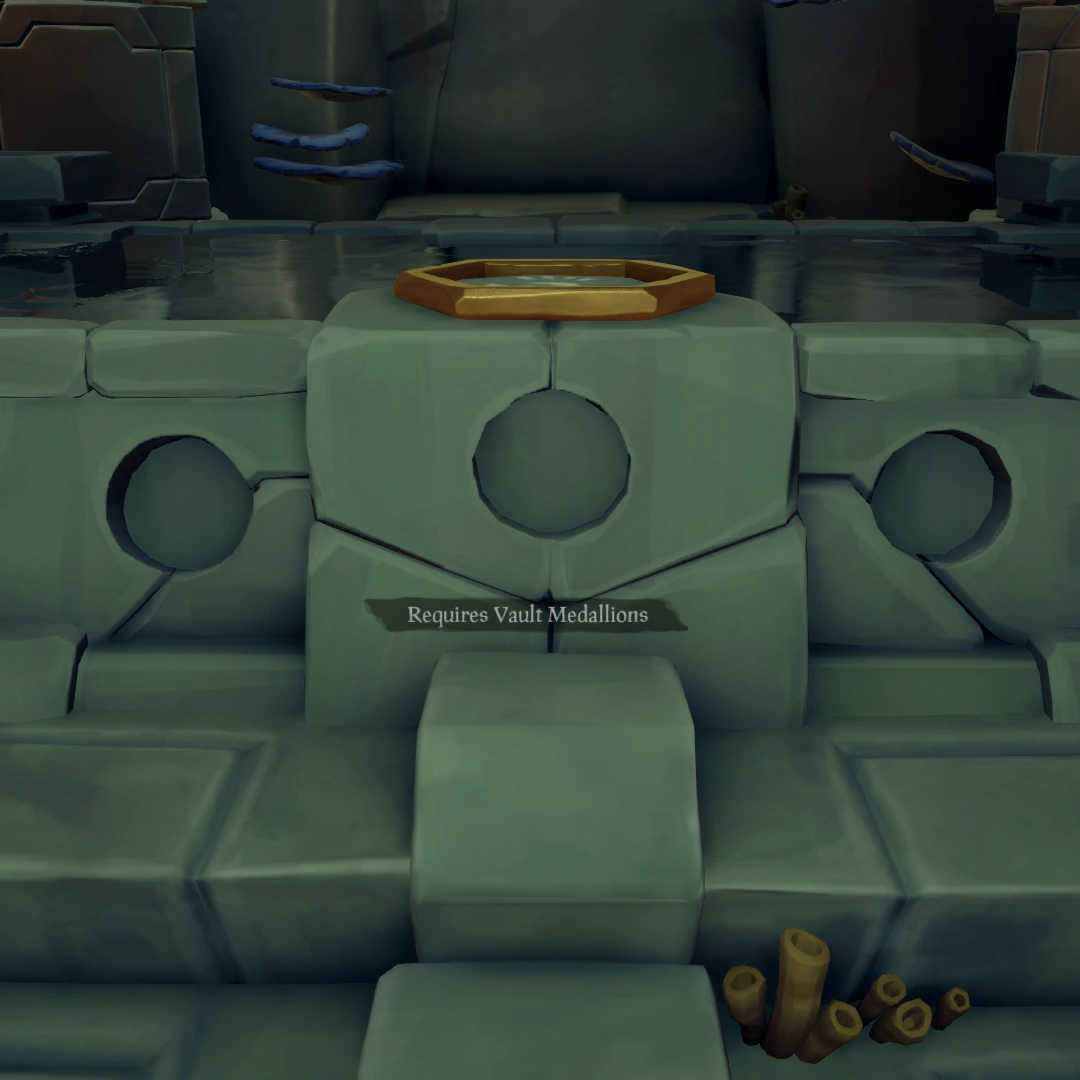
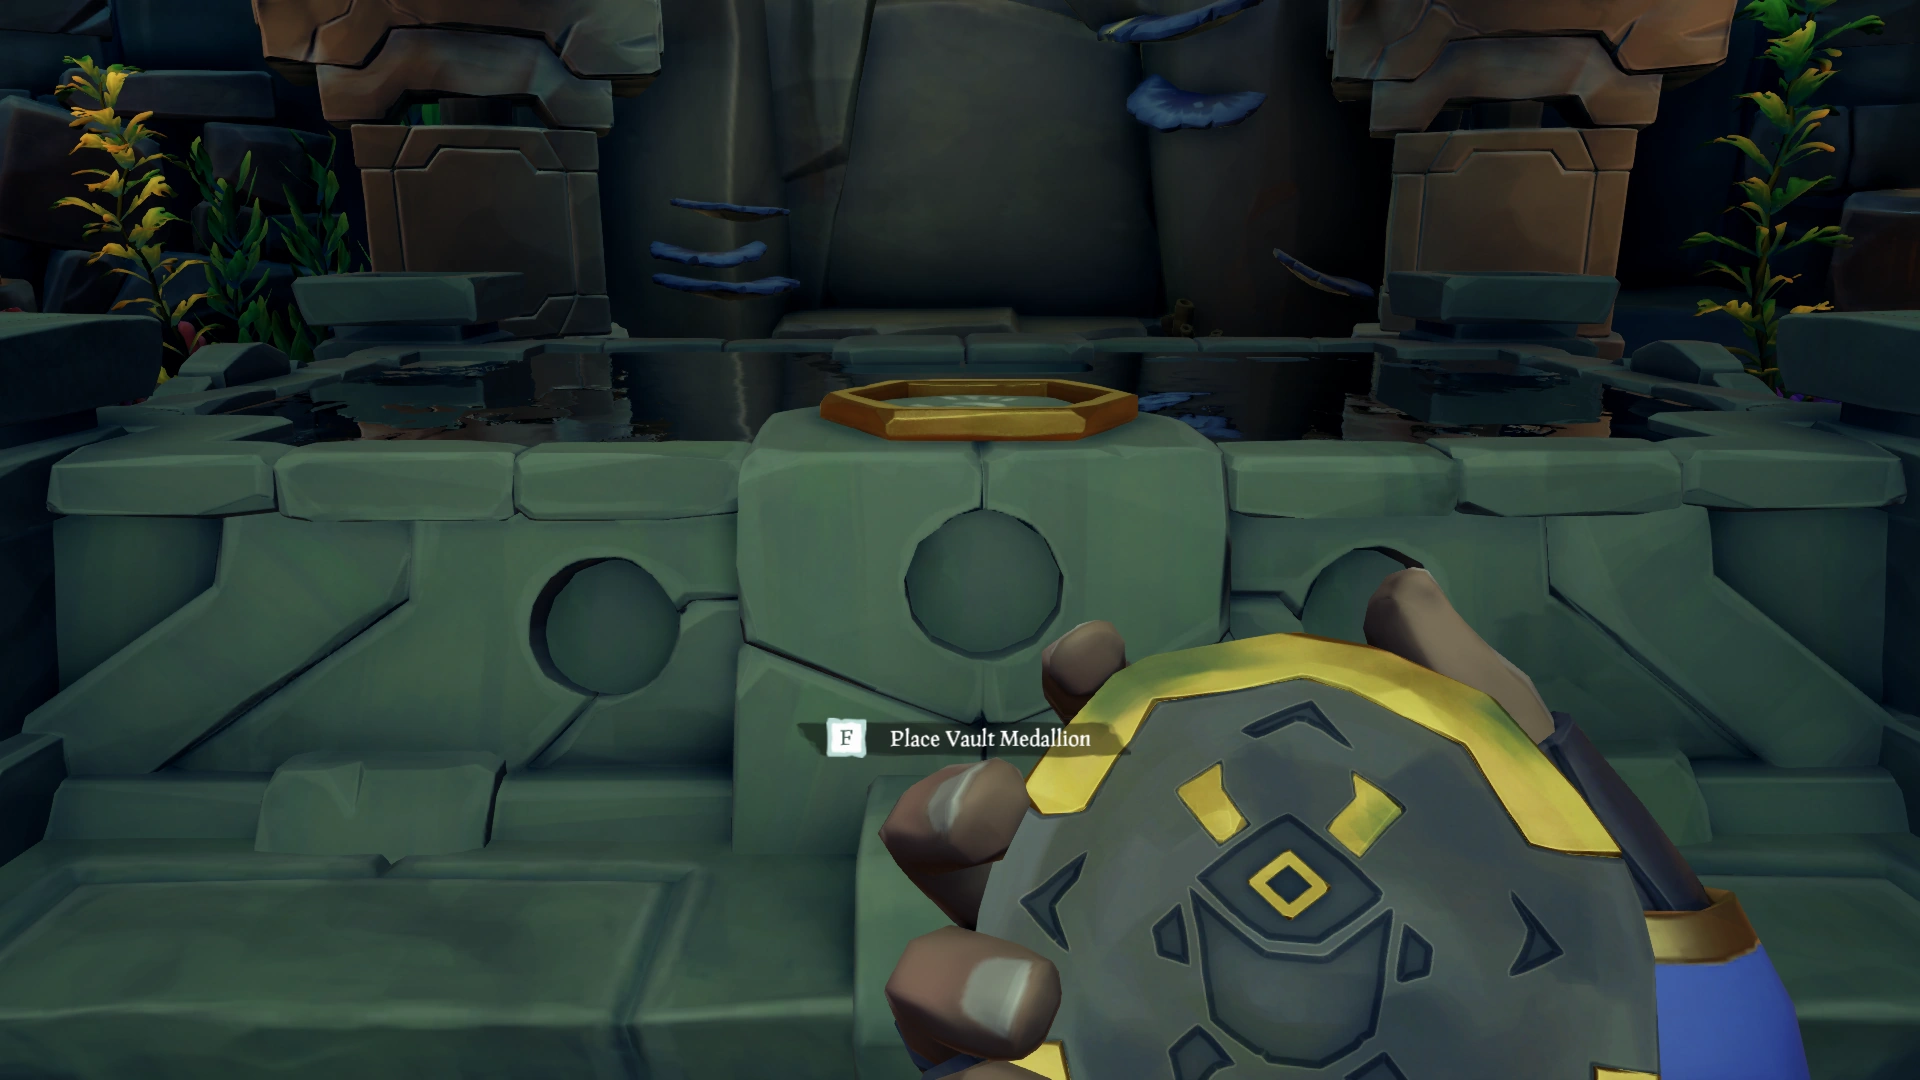
Take each of the Medallions back to the Vault and place them in the Slots at the side of the Table. After you have found and placed all three Medallions, the stone door between the pillars should lower and reveal the Shroudbreaker to you!
Image Guide[]
You will notice three slots on the side of the Table that "Requires Vault Medallions"
Digging up these Medallions will spawn fairly weak Coral Skeletons.
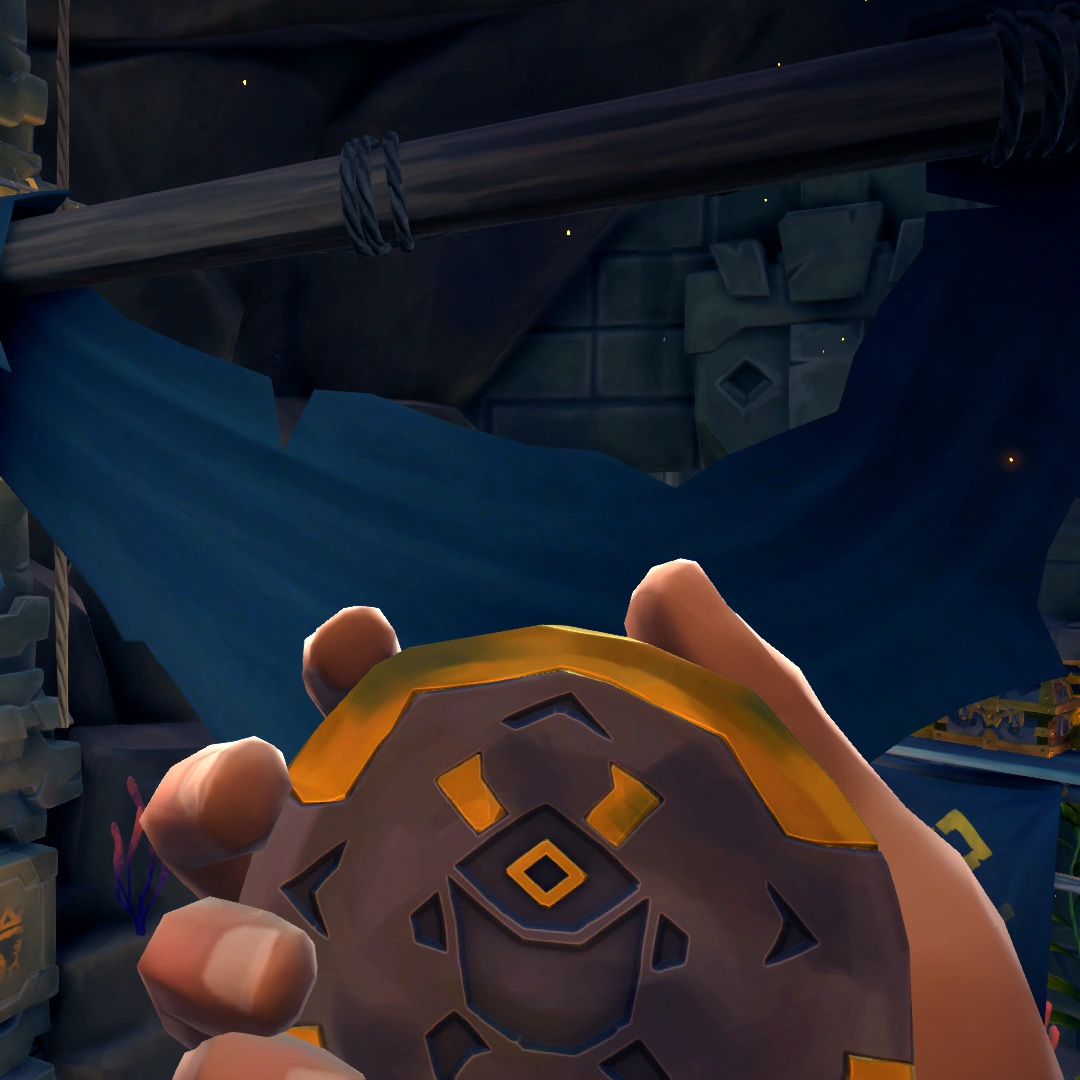
Each Totem Vault has their Totem Animal etched on these Medallions.
You will need to place the Medallion inside the slots in the Vault Table.
After placing all three Medallions in their slots, you will get a golden glow as confirmation of solving the puzzle.
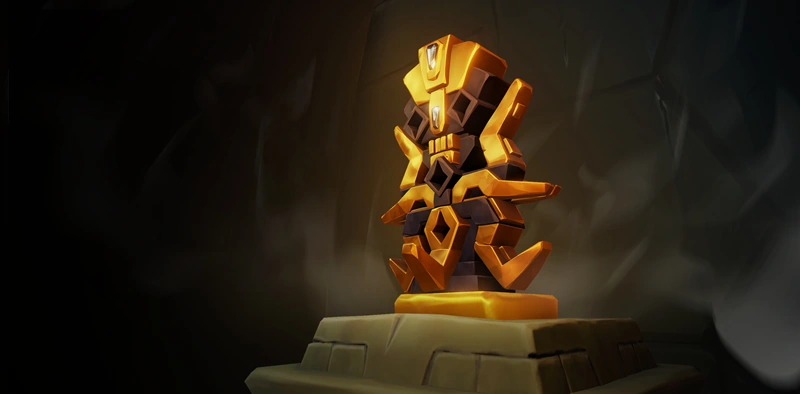
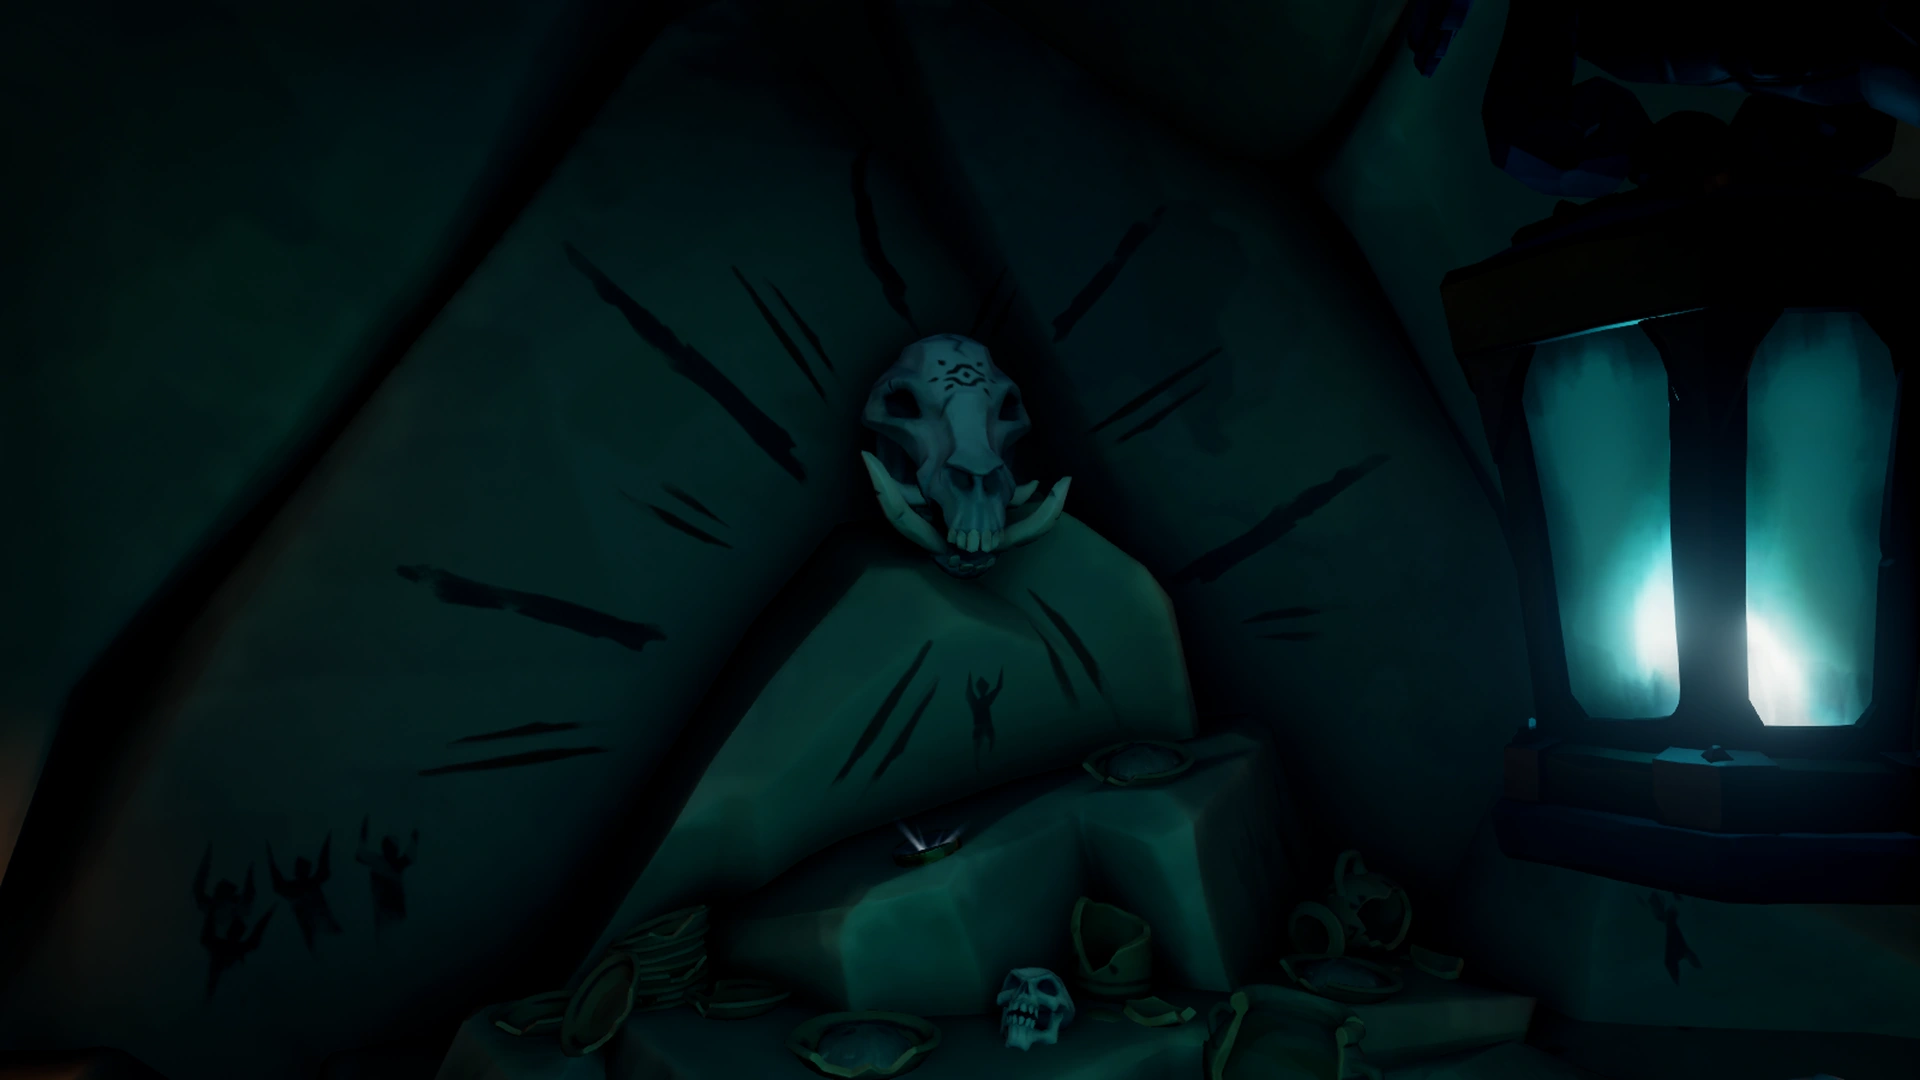
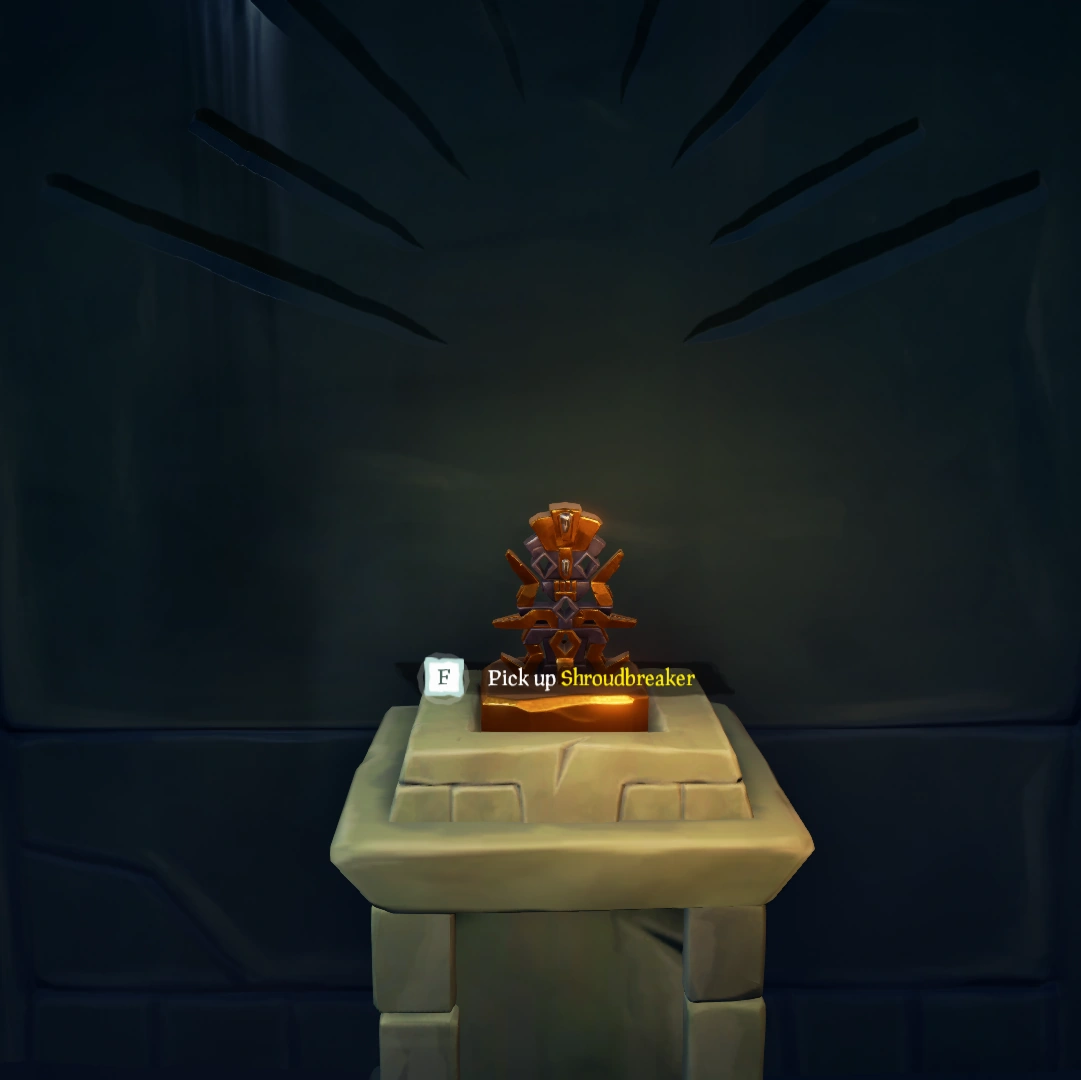
The Vault will finally reveal its prize.
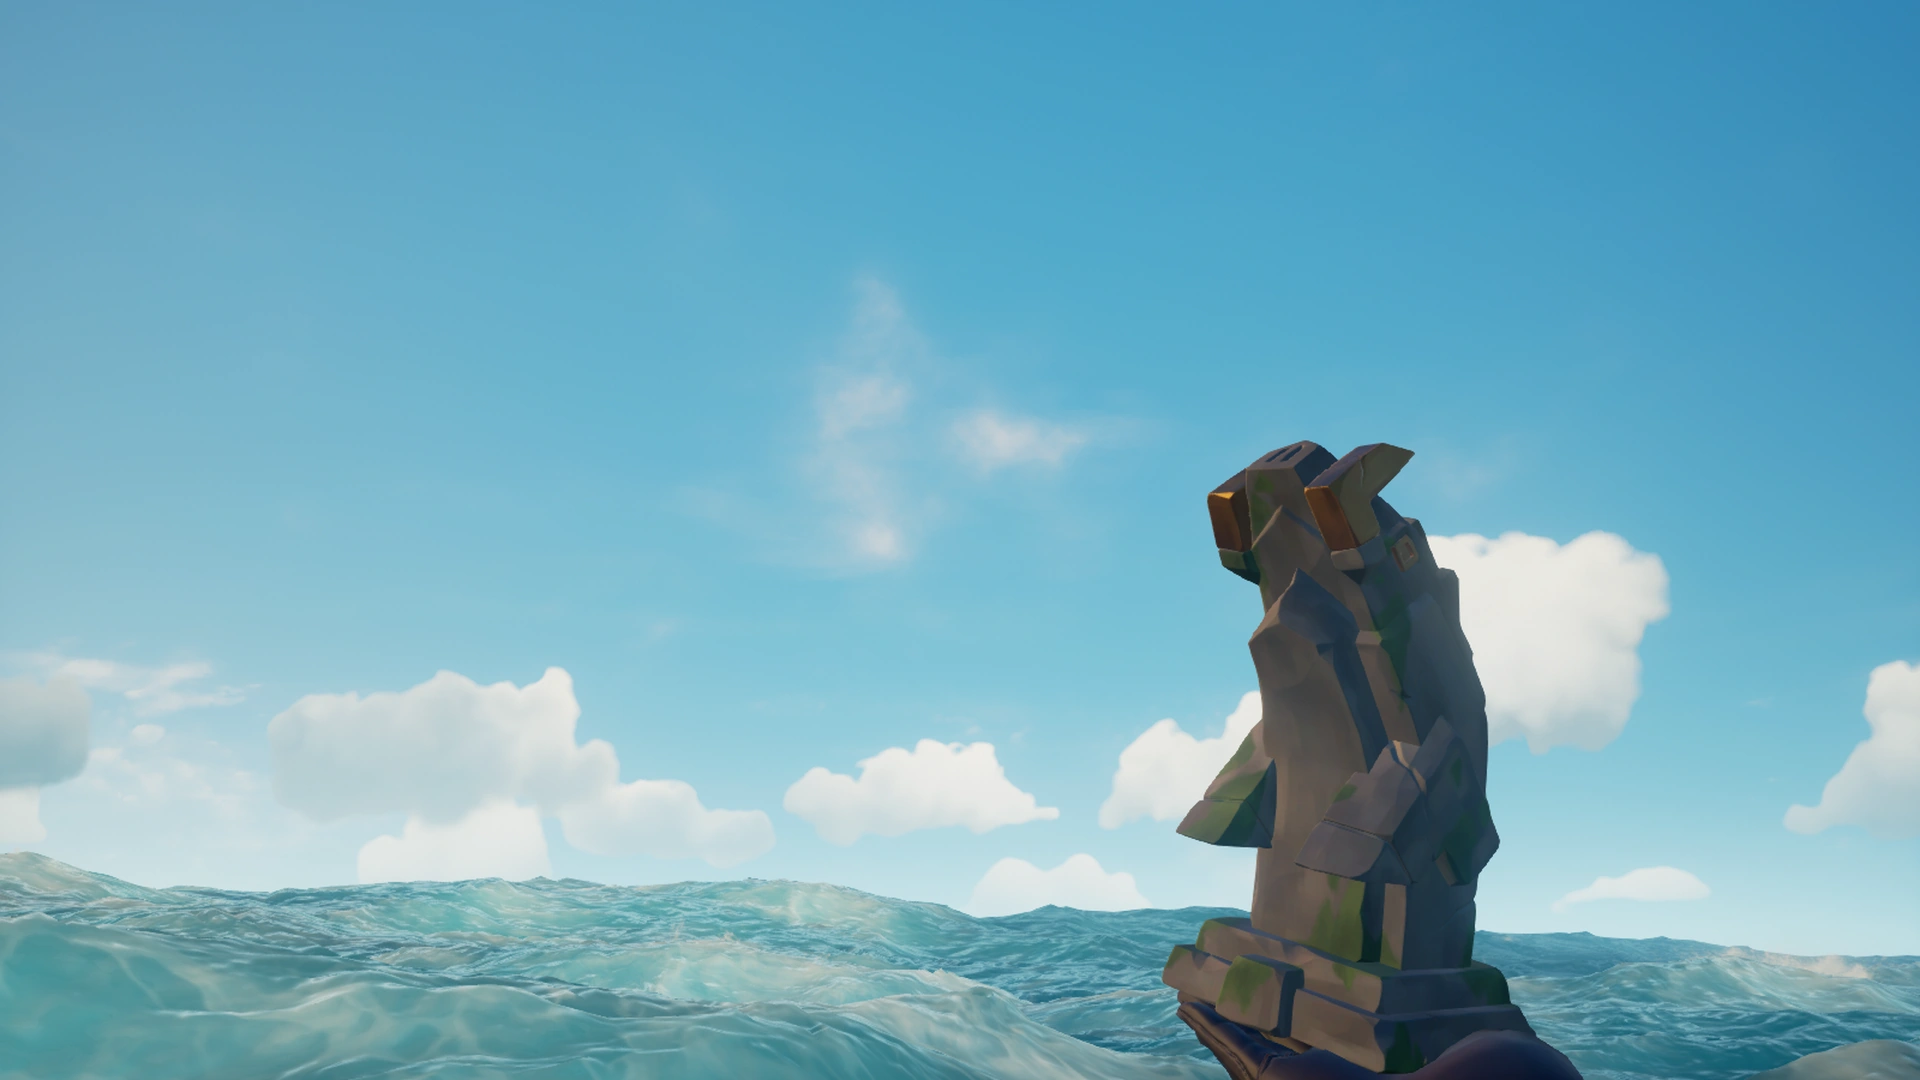
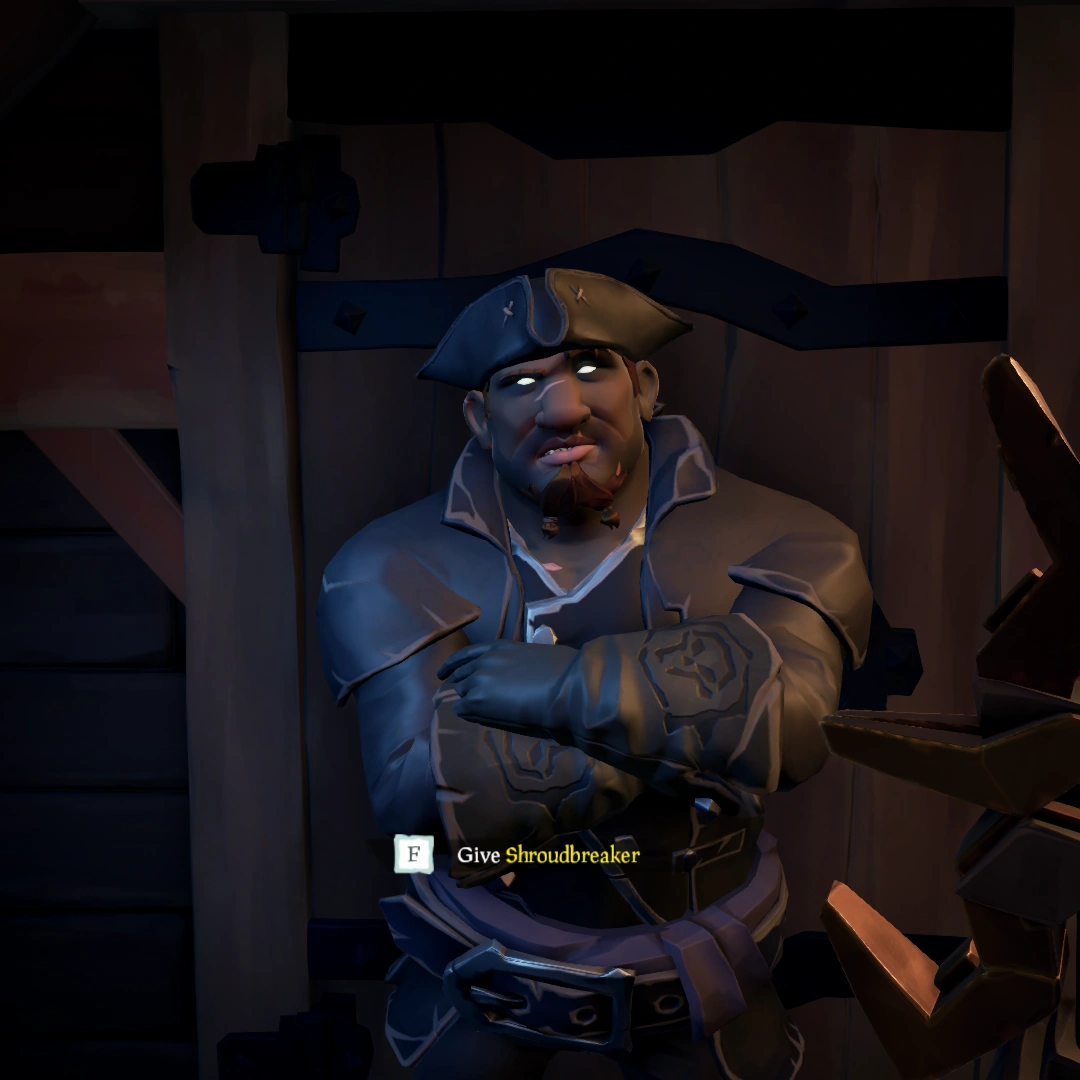
A Shroudbreaker!
The Shroudbreaker in-hand.

The Grand Adventure Begins[]
Once you have the prized Artifact from the Totem Vault, you will need to escape the endless waves of Coral Skeletons who come to swarm you and return the prized possession to the Mysterious Stranger waiting at any tavern. These Skeletons spawn infinitely, making them useful for farming certain Commendations that require players to kill Skeletons in specific ways. After handing over the Shroudbreaker to the Stranger, you will hear a few words from the fellow and the Tall Tale will be finished! For those who want to quickly complete their 5 Completions of the Tall Tale for the Footsteps of the Pirate Lord Commendations, they can have a friend acquire the last Checkpoint of the Tall Tale, place it up for vote and leave themselves. The last Checkpoint will place the Shroudbreaker on your Voyage Table. To keep their Checkpoint, the player who placed it on the table has to leave the session before the tale is completed.
"Note: Although this can be finished at any Outpost, you can grab Mercia's Journal #5 if you head over to Plunder Outpost.
CLICK FOR FINAL DIALOGUE
|
|---|
MYSTERIOUS STRANGER
Great Ramsey's Ghost! I heard all the stories, but to actually hold the Shroudbreaker in my hands… I never thought I would see the day.
Something's wrong...
There should be four jewels set in the base that grant the Shroudbreaker its power, but they've been removed.
Without them, you won't last five minutes in that fog.
Now let me think...I did hear tell that Captain Briggsy made it to the Shores of Gold.
If that's true, she might know the whereabouts of these missing stones. Not that she'd ever say.
Sometimes, even the best pirates fall victim to their greed or hatred, and it changes them.
Strips the flesh from their bones. Gives 'em power, but twisted 'em up inside. Briggsy is one such abomination.
People call them Skeleton Lords and most pirates flee at their approach.
Not even the Order of Souls dares challenge them, and rightfully so, but you… you are going to have to hunt one down.
I have eyes and ears across the Sea of Thieves, if you gather any of the missing pieces, I'll see they're restored to the Shroudbreaker on your behalf.
For now, head to Plunder Outpost and speak with Madame Olivia about Briggsy's whereabouts.
Remember, Skeleton Lords are NOT to be taken lightly.-
-
-
-
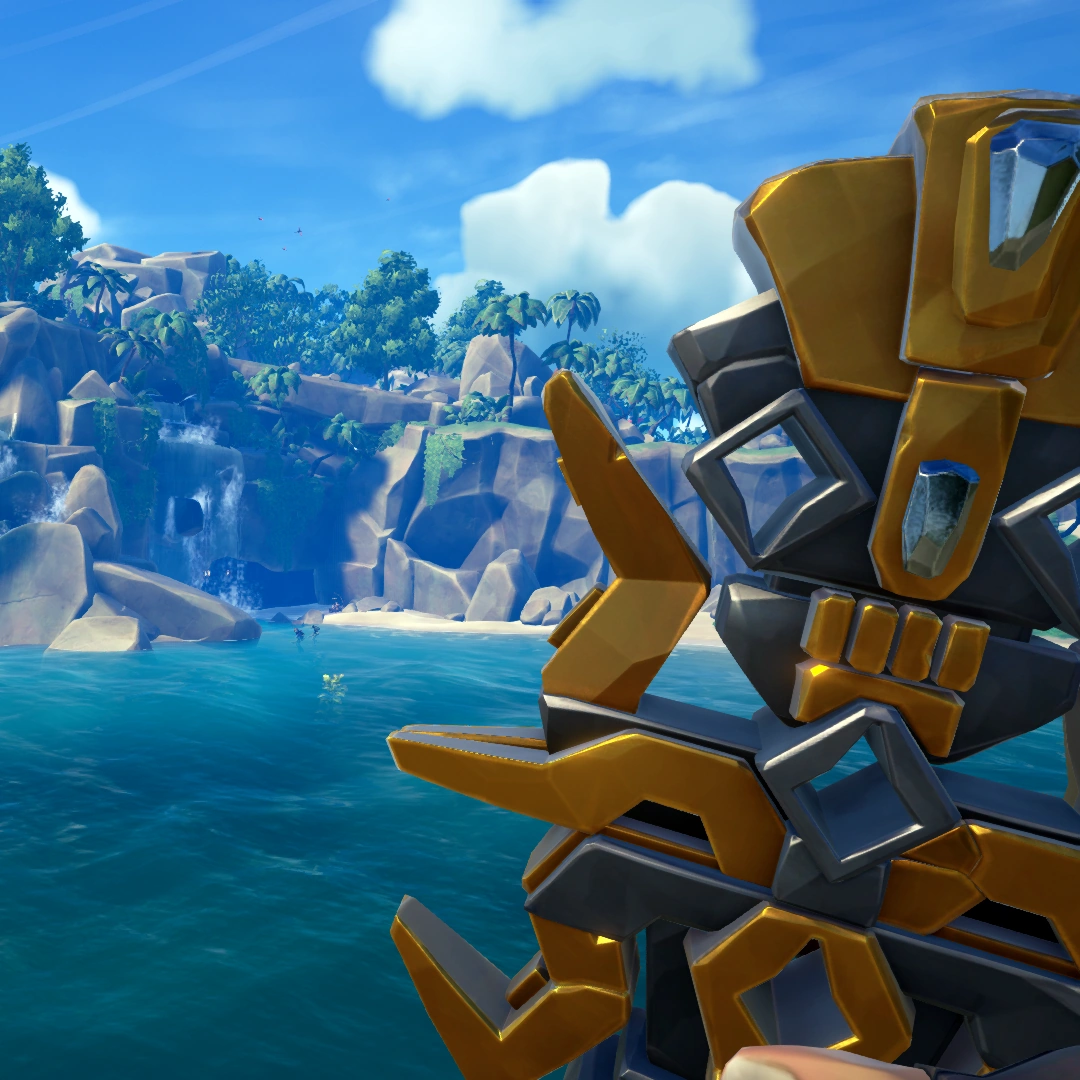
With the artefact in hand, endless waves of Coral Skeletons will start to pursue you.
You need to get back to any Tavern and give the Shroudbreaker to the Mysterious Stranger to finish the Tall Tale.
Mercia's Journals[]
Looking at the Commendations of the Tall Tale, you may have noticed one of them requiring the Crew to find all of Mercia's Journals. These five Journals can only be found and read when the Tall Tale is active and they are only present for the Crew who is doing the Tall Tale. These Journals are hidden around The Ancient Isles Region retelling the accounts of Mercia and her own search for the Shroudbreaker Artefact. Each of the Journals hints towards the location of the next journal.
The locations and the contents of the five Journals are presented below. Click Expand under any Journal to see an image of its exact location.
CLICK FOR JOURNALS
|
|---|
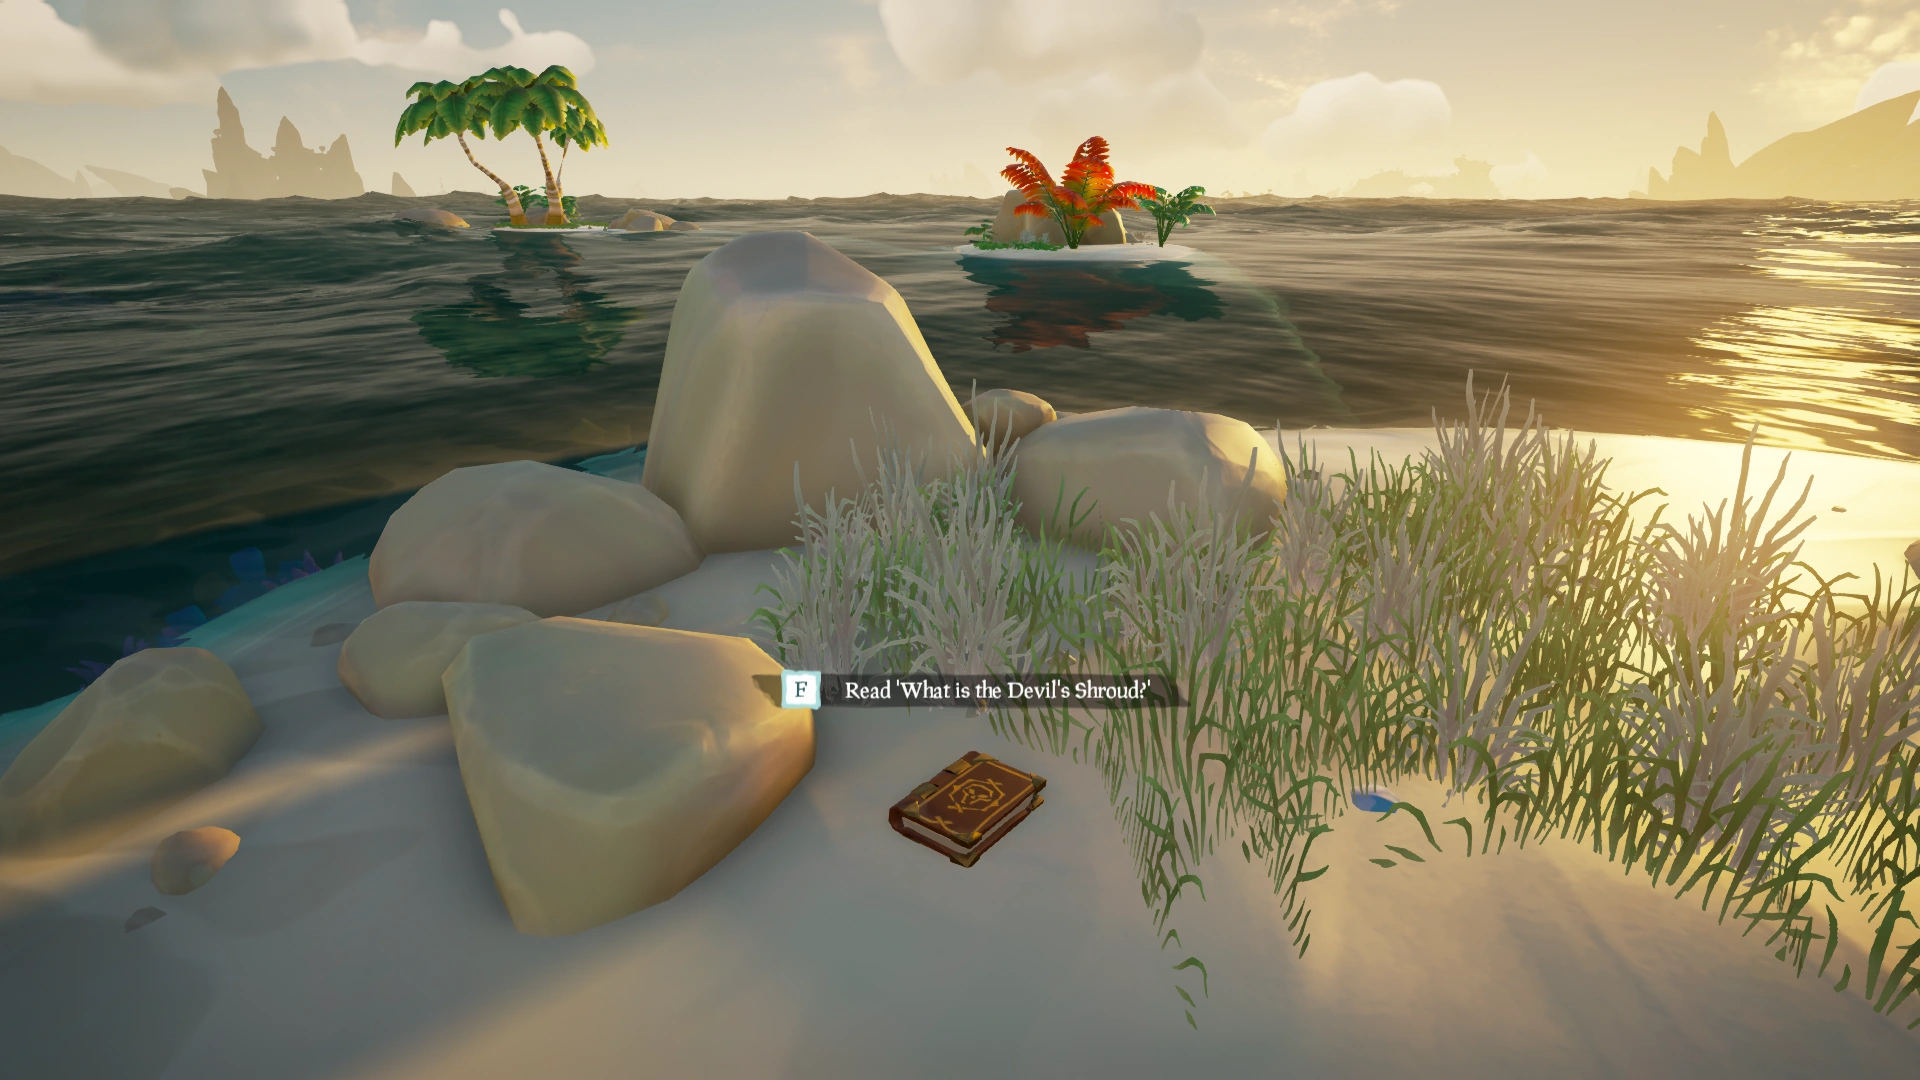
What is the Devil's Shroud?[]
Found on Uncharted Island (N-13) stashed between three rocks on the beach. It mentions Ancient Spire Outpost.
Finally, a balmy day, and a chance to document my research before it all spills out of my head and overboard.
Ramsey has been thinking again, and that usually means I'm the one due for a headache. He called for me late last night...
"Mercia. How might we stay safe in the Devil's Shroud?" I just stared at him. We all know how dangerous that fog is.
It surrounds the Sea of Thieves, but it ebbs and flows. Sometime sit swallows whole islands for months or even years at a time.
Sail into that mist, and you'll start to choke. The deck beneath your feet will splinter. The Shroud feasts on ships and sailors alike.
Being me of course, I told Ramsey I'd find a way. I've left my notes tucked away at Ancient Spire. I'll see what I can learn...
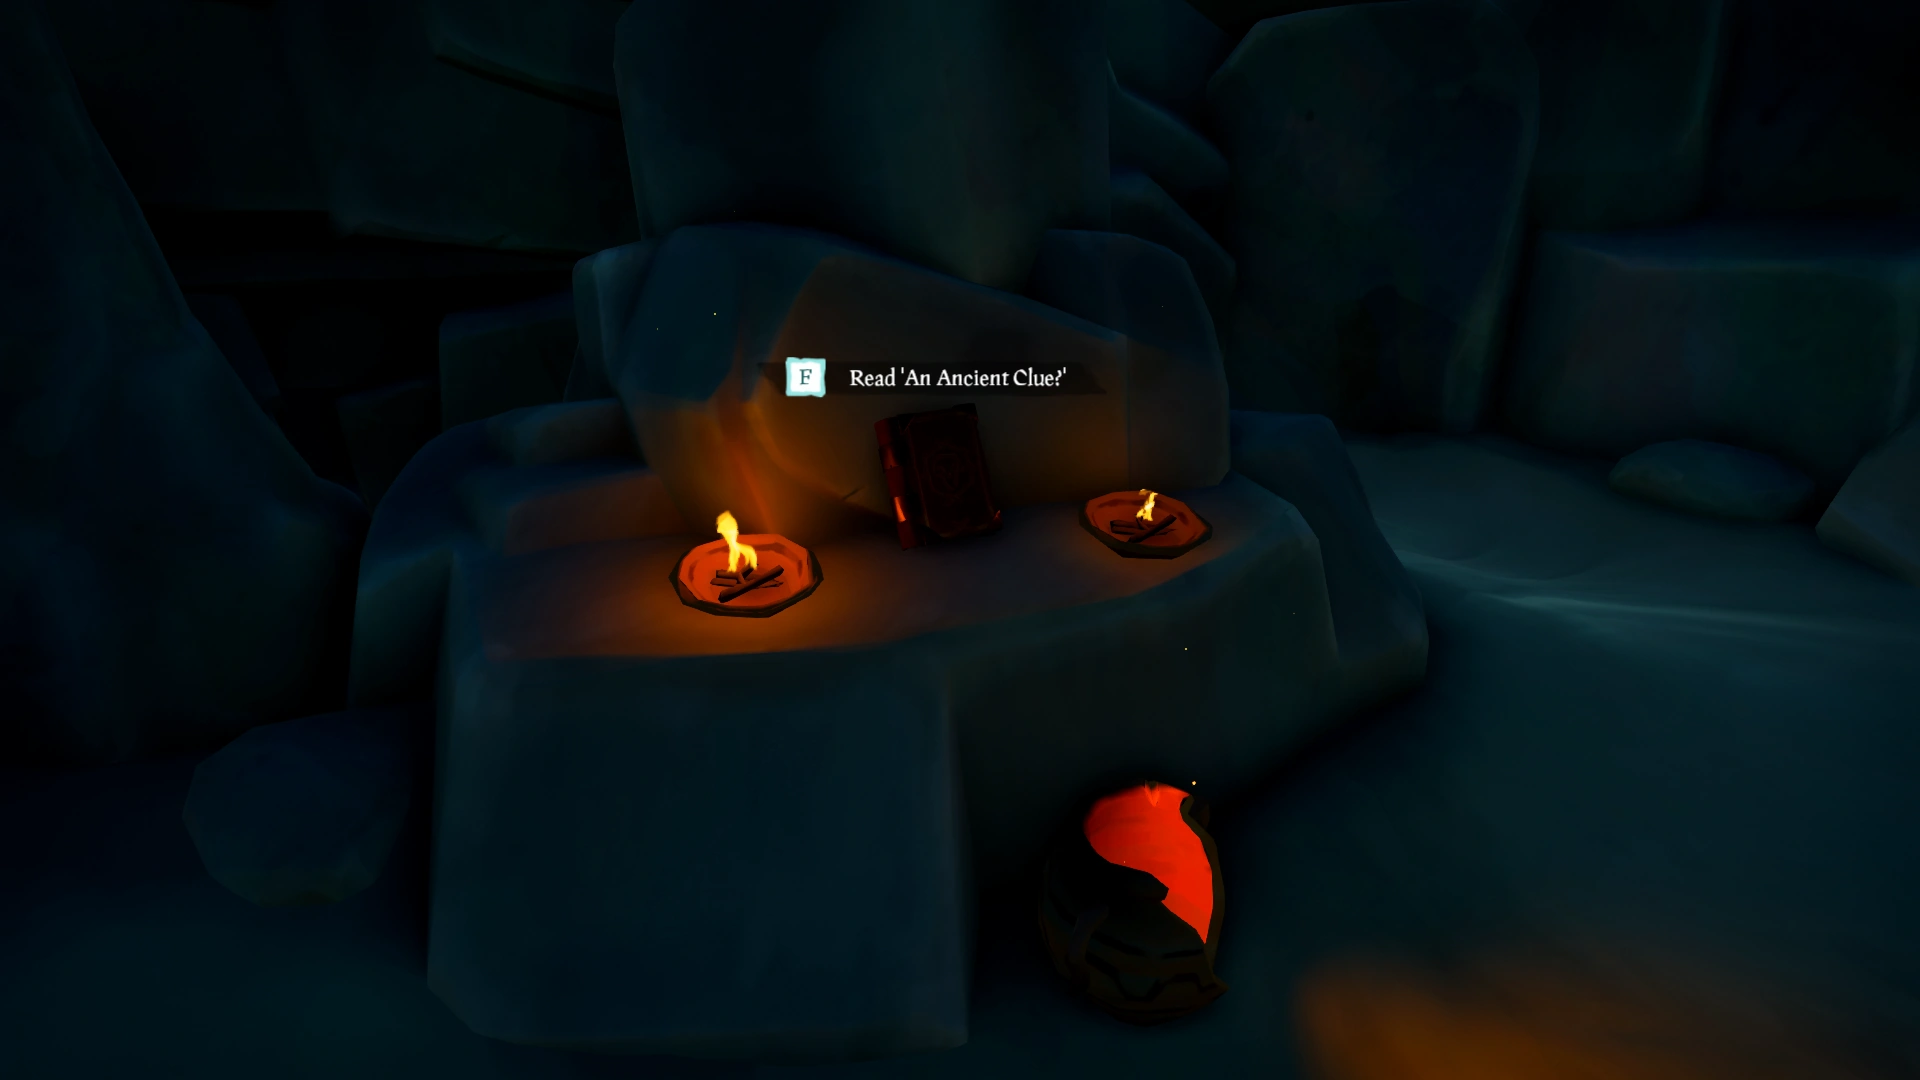
An Ancient Clue?[]
Found in a cave atop the Ancient Spire Outpost, this Journal mentions Devil's Ridge.
Did you ever walk into a room thinking about something so hard, you couldn't see it right in front of you? The truth is like that, sometimes.
While filling my tankard below deck, I happened to glance down at the map table. Ancient Spire. In the Ancient Isles. The truth...
I've asked to set course for Devil's Ridge, nearby. If I'm right, the key to breaching the Shroud has been in front of me all along.
We like to think of ourselves as being the first to find a way of reaching the Sea of Thieves, but that isn't the truth. Not one bit...
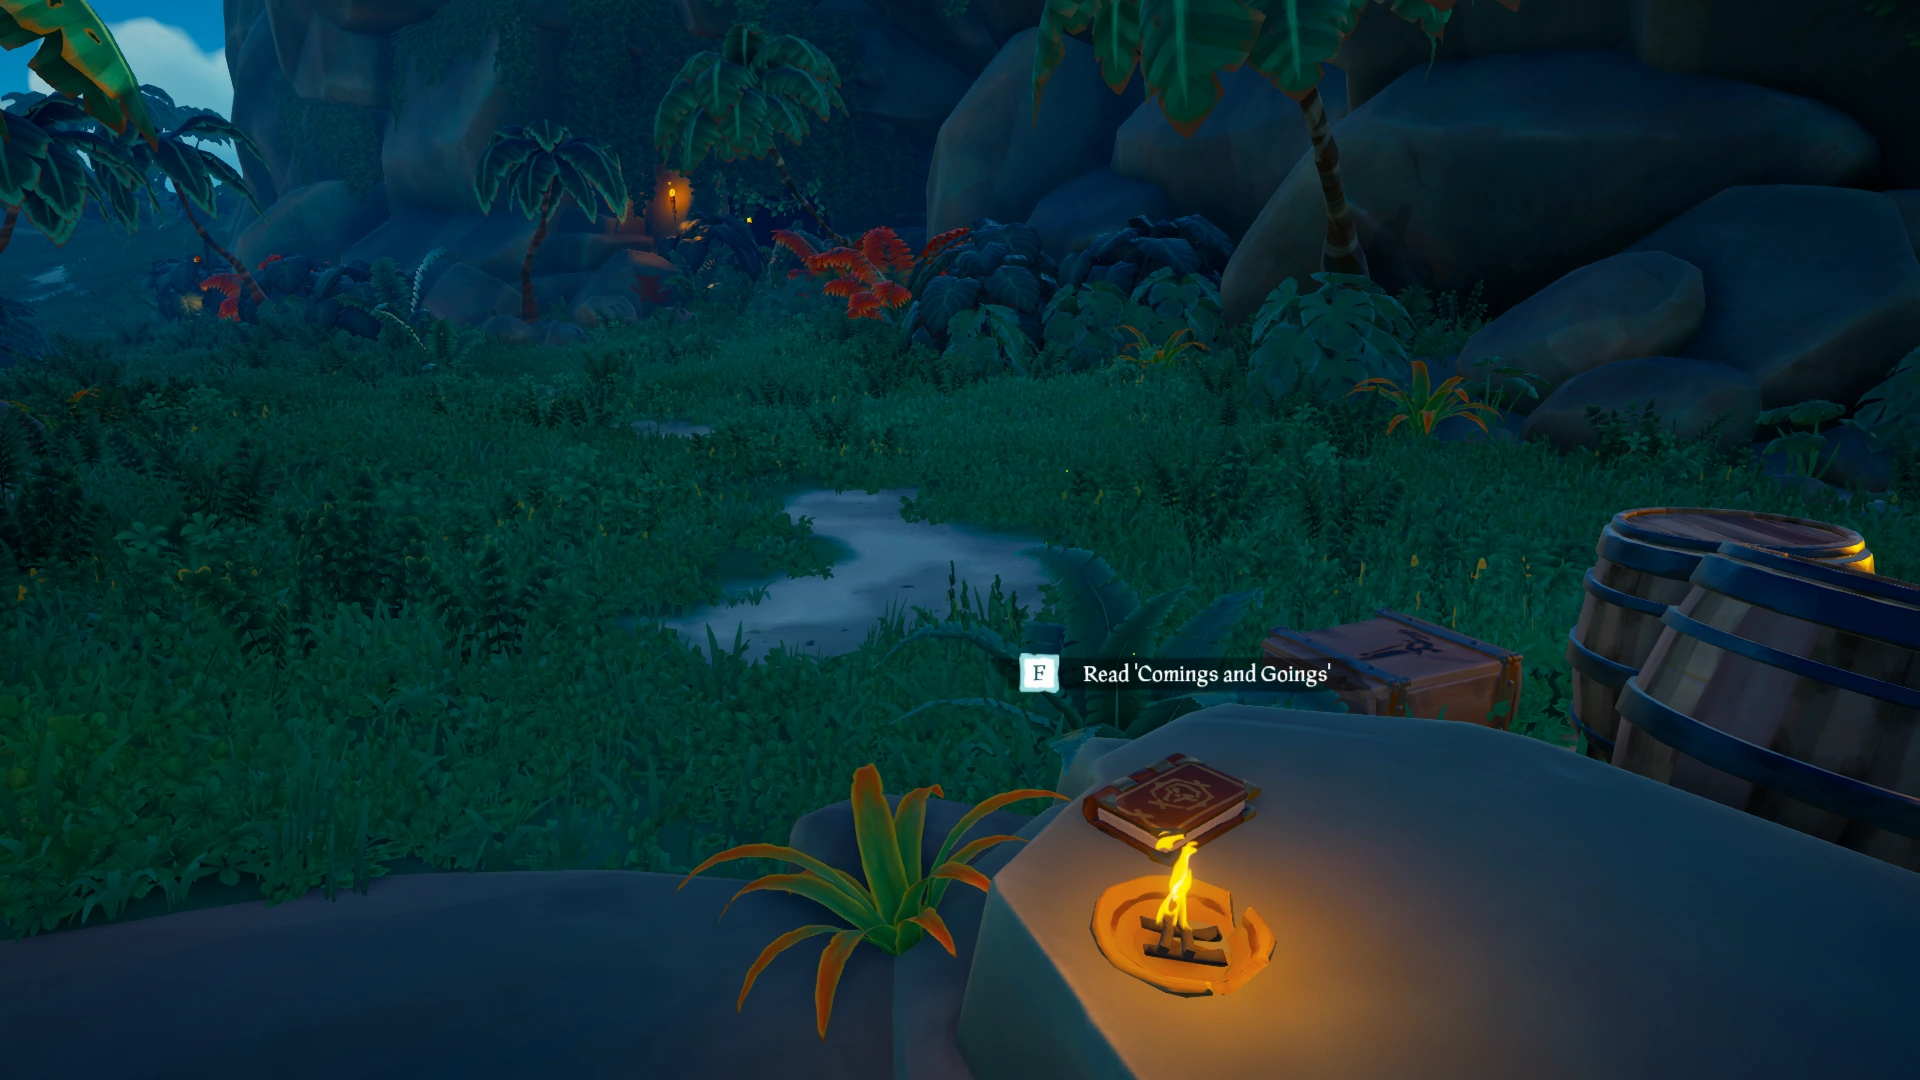
Comings and Goings[]
In a camp by the Northern Cannon on Devil's Ridge, this Journal mentions Thieves' Haven.
The First Ones. The Lost Tribes. The Ancients. Whatever you call them, they lived here, in what we now know as the Sea of Thieves.
Signs of their civilisation can be found all over the place, even on islands that were once claimed by the Devil's Shroud.
They built temples, altars -- places that were important to them. They couldn't simply pack up and leave when the fog drew in...
I'll need to cross-reference some of my oldest notes, stashed away back at Thieves' Haven. Our first hideout! How nostalgic.
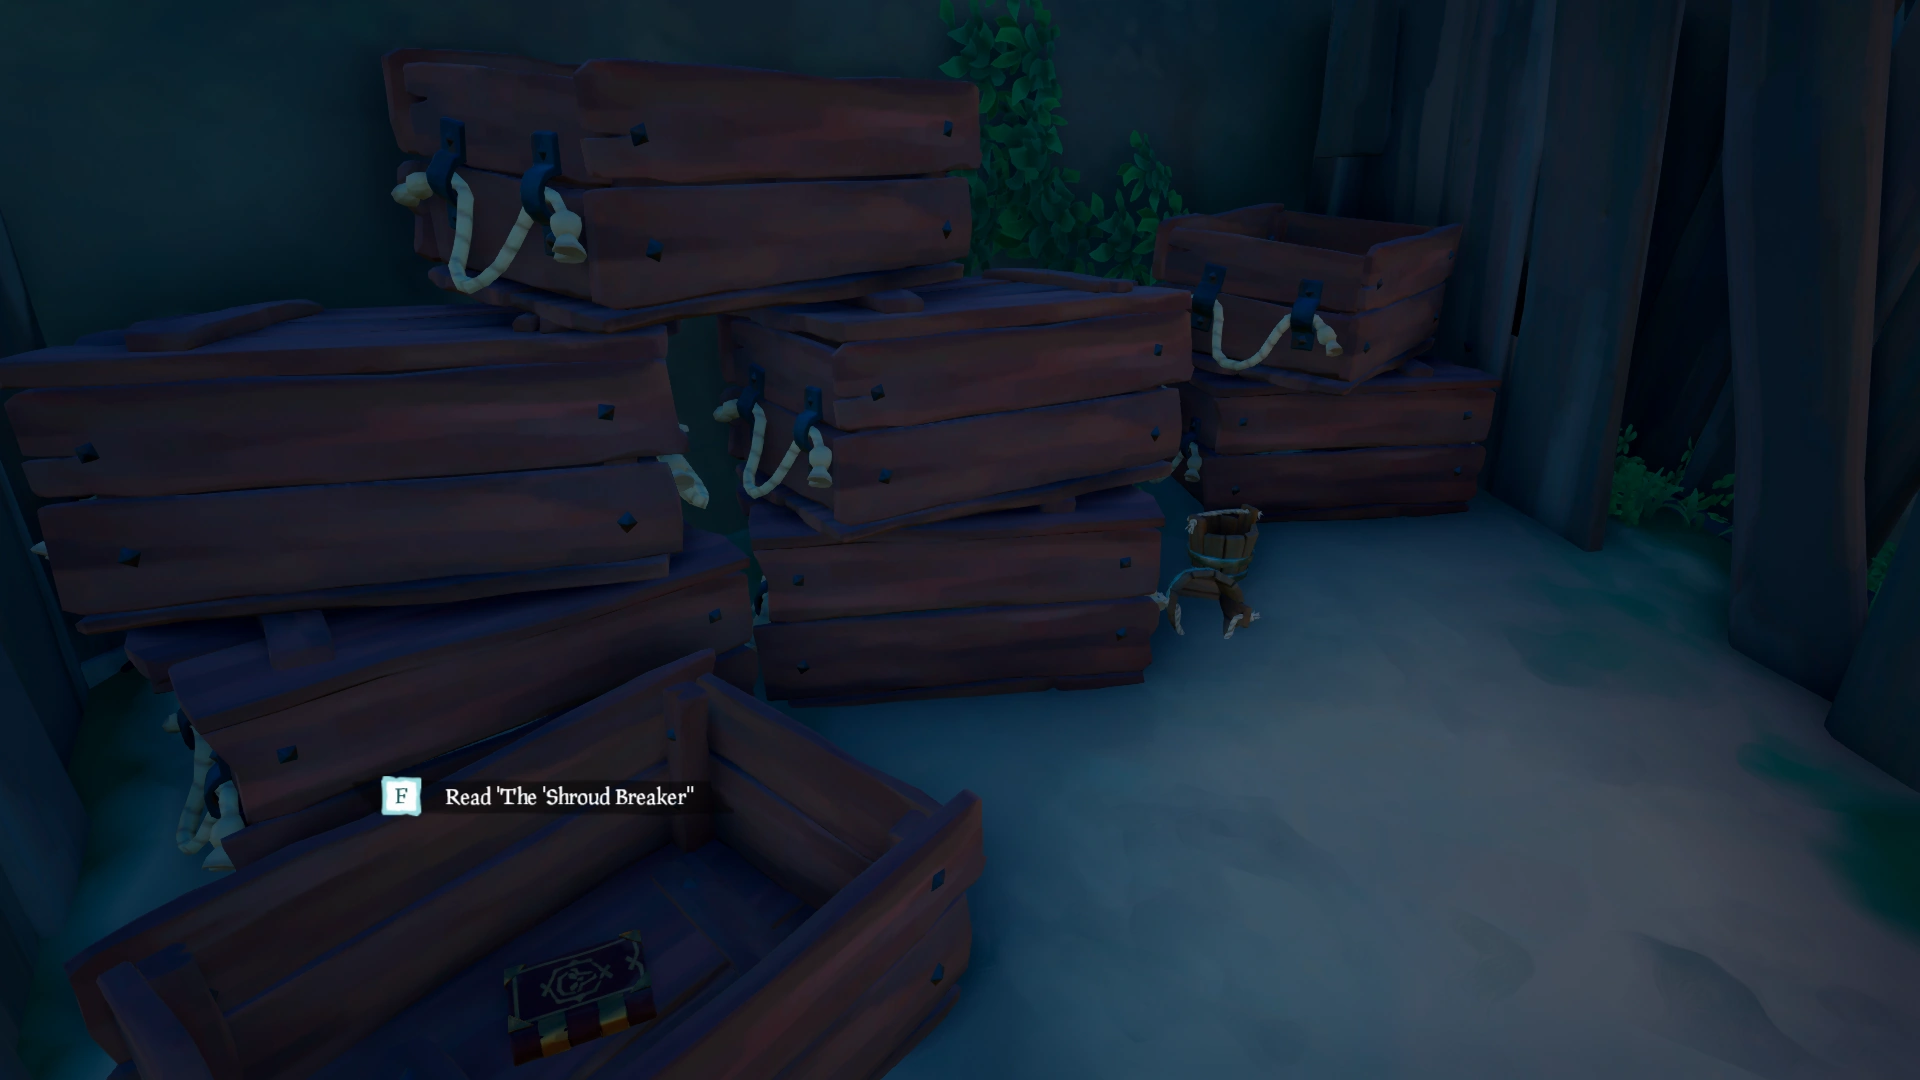
The Shroud Breaker[]
Inside an overgrown shack in the middle of Thieves' Haven, this Journal mentions Plunder Outpost.
It exists! Proof lies in some of the most obscure places (Ramsey won't let me write down where) but the relic's real enough.
As near as I can tell, they used the artefact like a beacon to protect their homes and places of worship from the Shroud's effects.
At other times, it was taken to a vault to recover its powers. When I told Ramsey, he replied "Ah, so it's a shroud breaker, then!"
All of this seems to have inspired him. We're making for Plunder Outpost on Ramsey's orders, to see a man about a map...
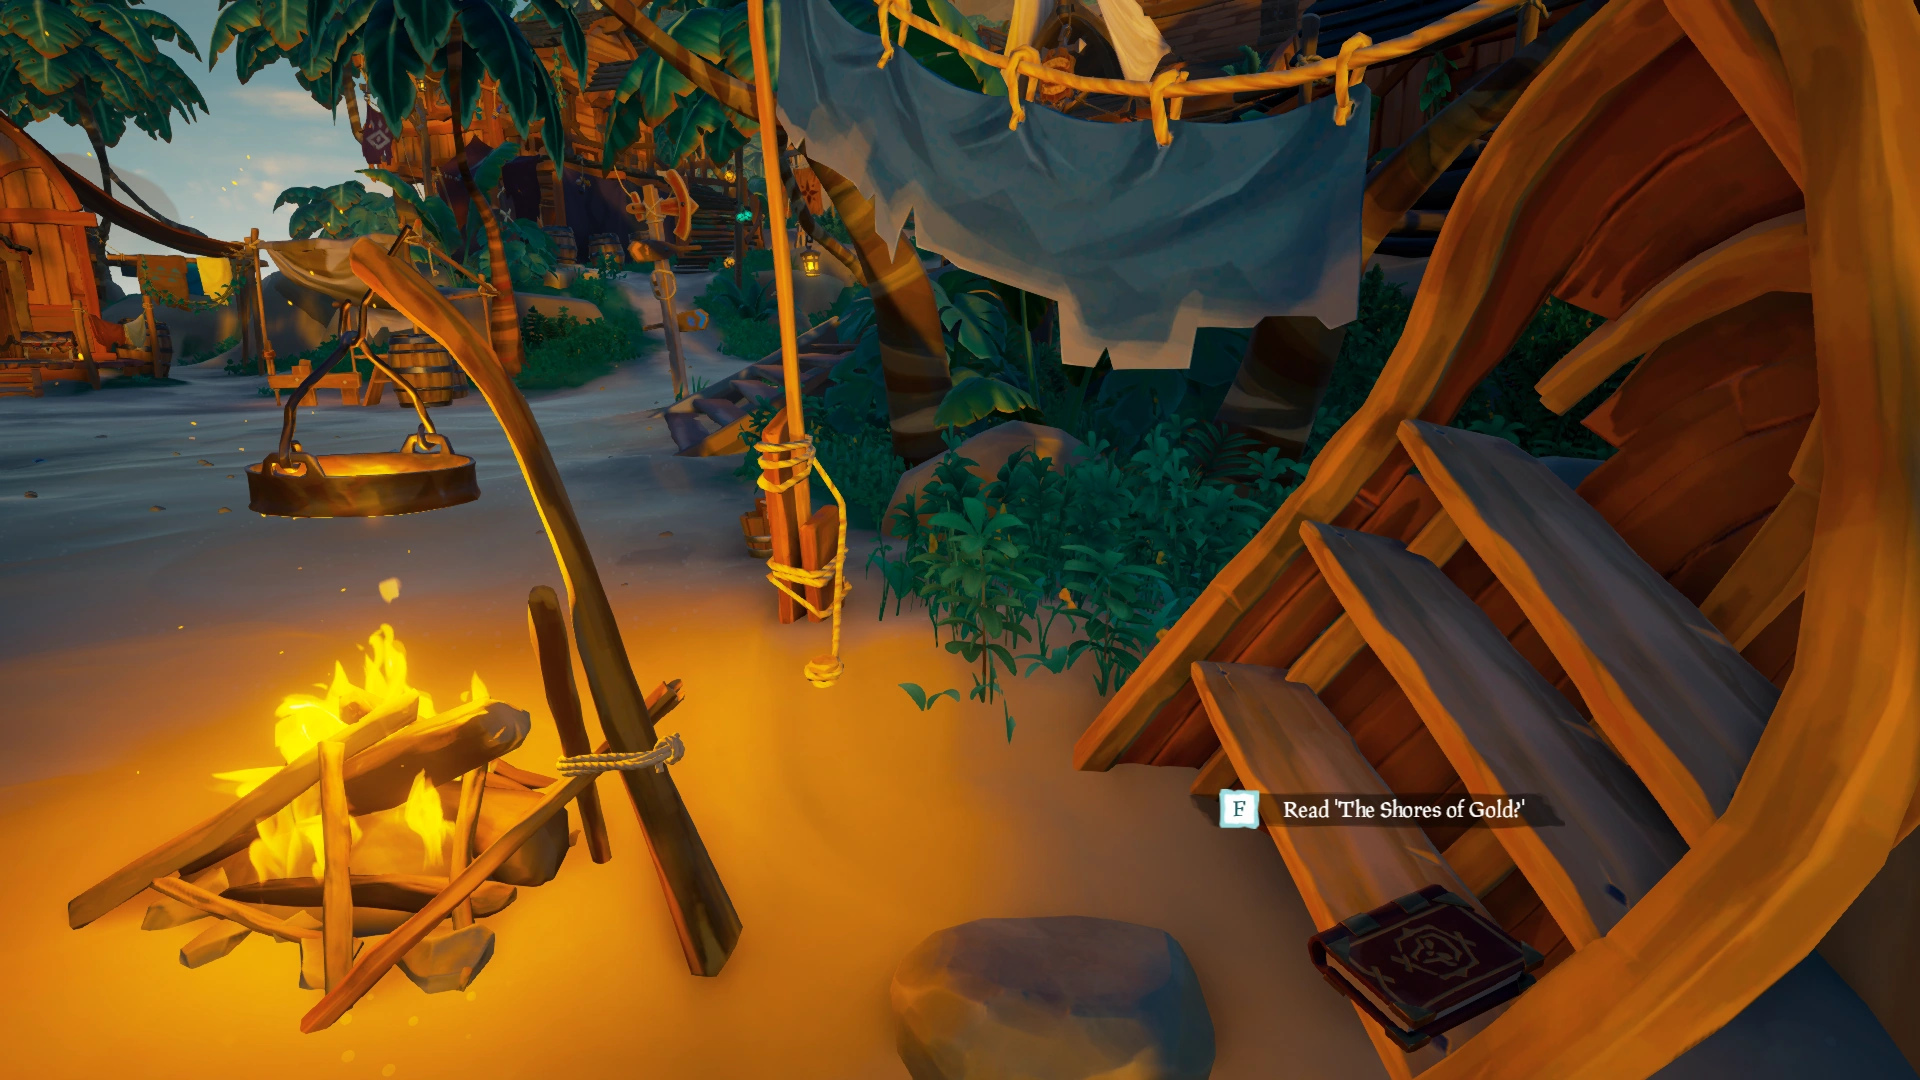
The Shores of Gold?[]
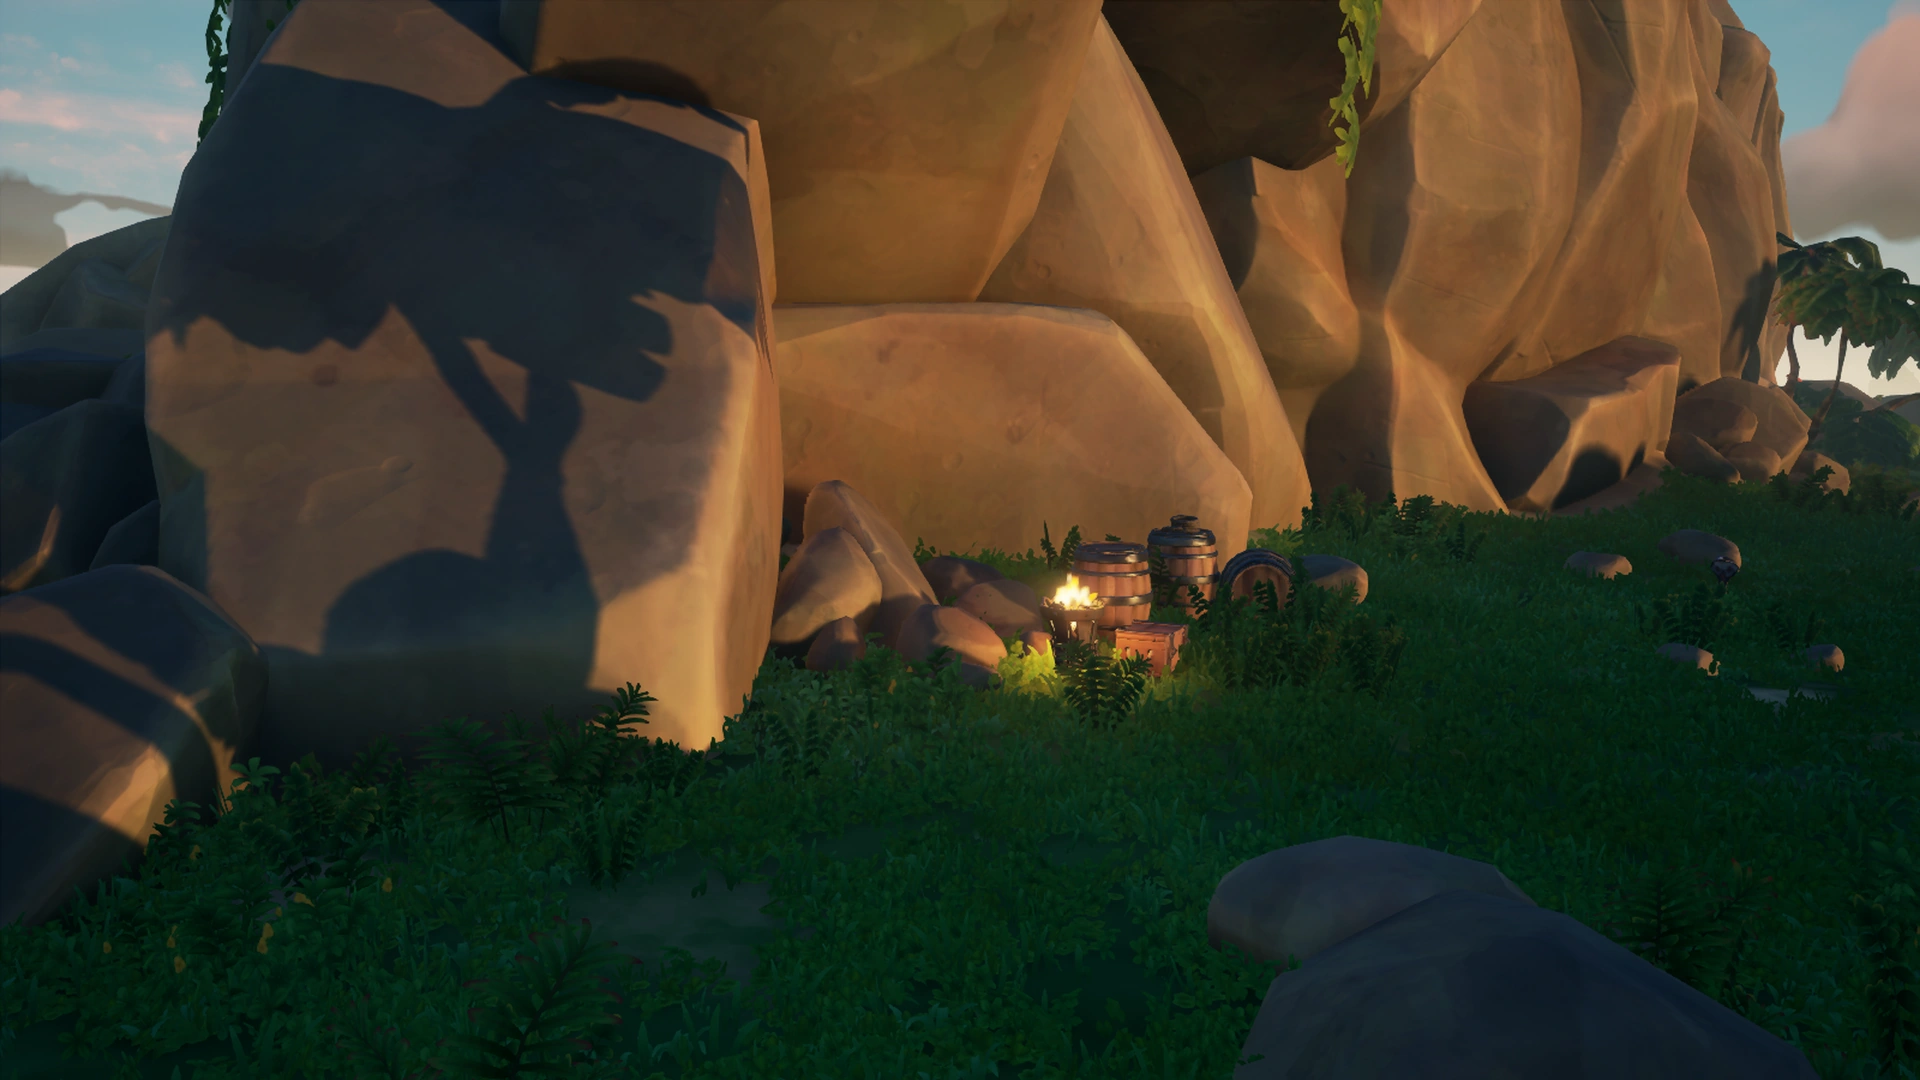
Placed by a Campfire next to the Rowboat behind the Gold Hoarders Tent on Plunder Outpost.
Well. This escalated quickly. Ramsey remembered the drunken ramblings of some old salt who'd sailed too close to the Devil's Shroud.
The old man claimed he'd glimpsed a glittering island... One where the very ground was made of gems and precious metals.
It sounds impossible, but as Ramsey likes to say, that's just another way of describing something we haven't seen yet.
At first light, we'll be setting out to find that Shroudbreaker. If these Shores of Gold are real, it's the only way we'll reach them.
I should get to my bunk and try for sleep. From now on, Ramsey's voyage journal can tell our story...